


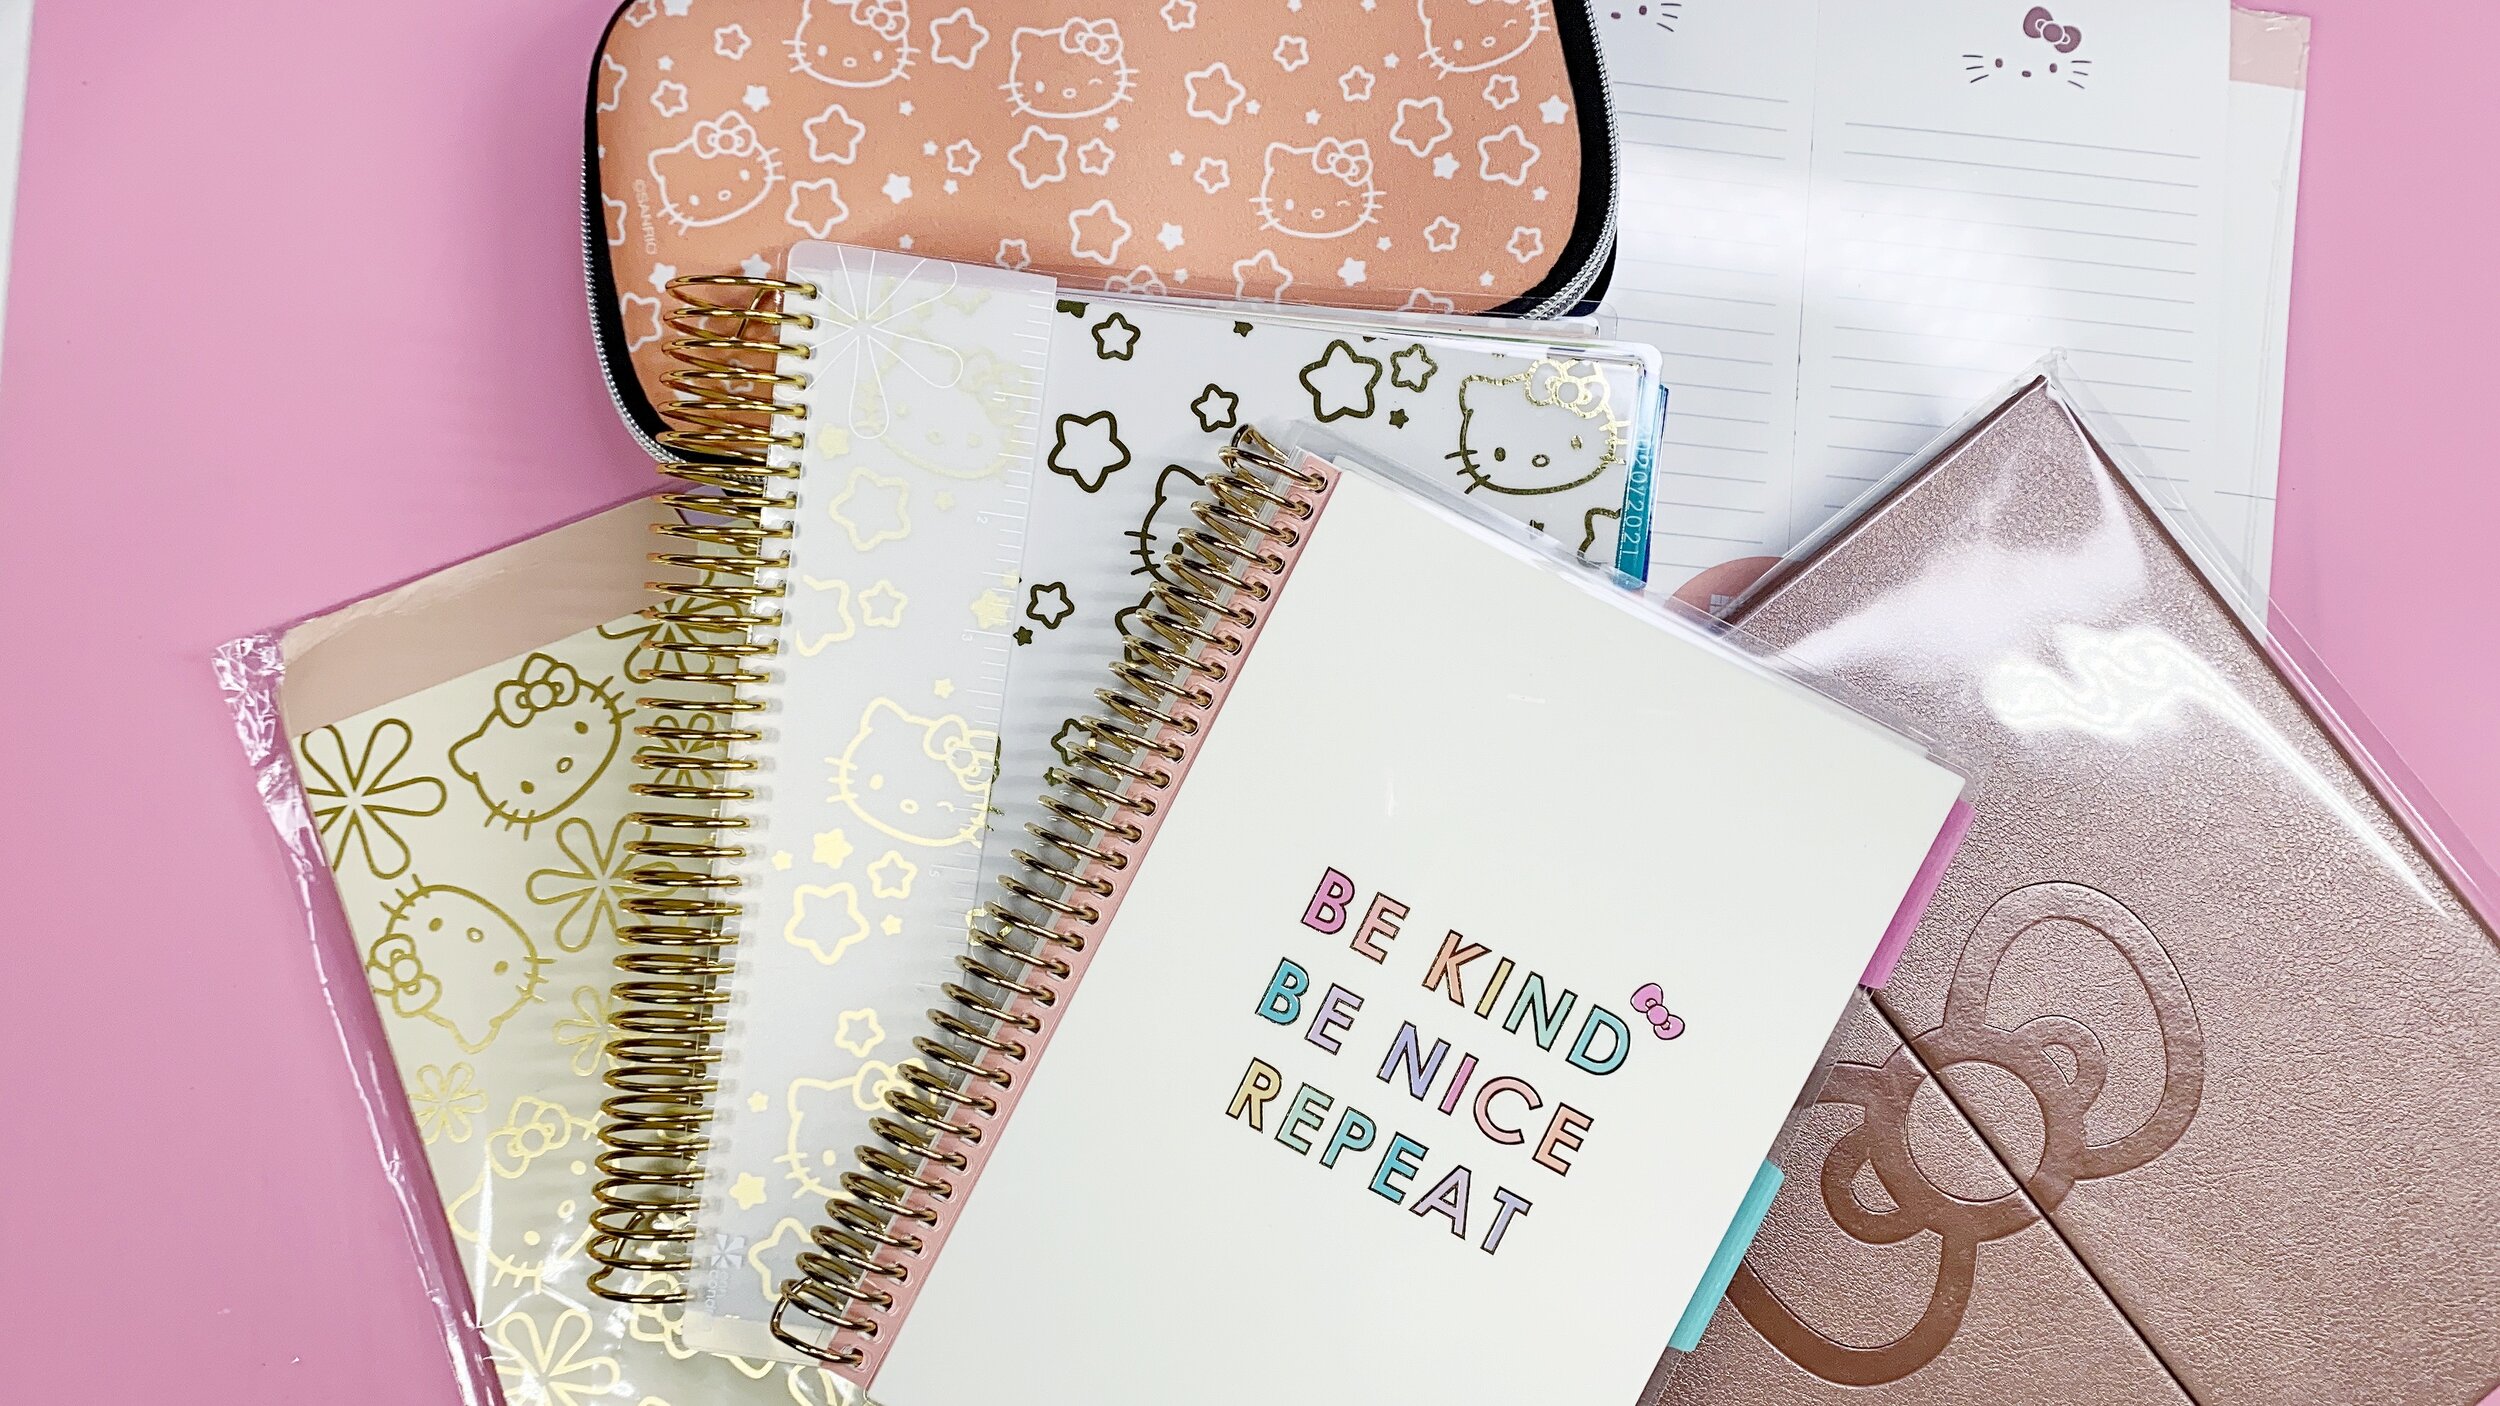
Hello Everyone! Happy February!

Let's Go Make Art
Hello Loves! I hope you are all safe, happy, & staying creative! About me, I have been well.
Trying my hardest to stay active and present in all aspects of my life. You & I know that
creativity helps me a lot to stay happy and centered. Speaking of staying creative, I have a fun
product and an amazing company that I want to share with all of you today.
“Let’s Make Art" makes creating art fun and easy. They offer kits with video instructions on
how to learn different techniques and paint new projects every month. You can choose
from different type of medium and subjects. On the website, they also offer some extra tools
and supplies that you may need for your creative projects. I mean, it’s amazing! They have
everything!
Check them out:
Let’s Make Art Website: https://www.letsmakeart.com/collections/art-boxes
Twitter: https://twitter.com/letsgomakeart
Facebook: https://www.facebook.com/letsgomakeart/
YouTube: https://www.youtube.com/channel/UCzzCo7lZGJ-sTCgpI7BJKEg
Instagram: https://www.instagram.com/letsgomakeart/
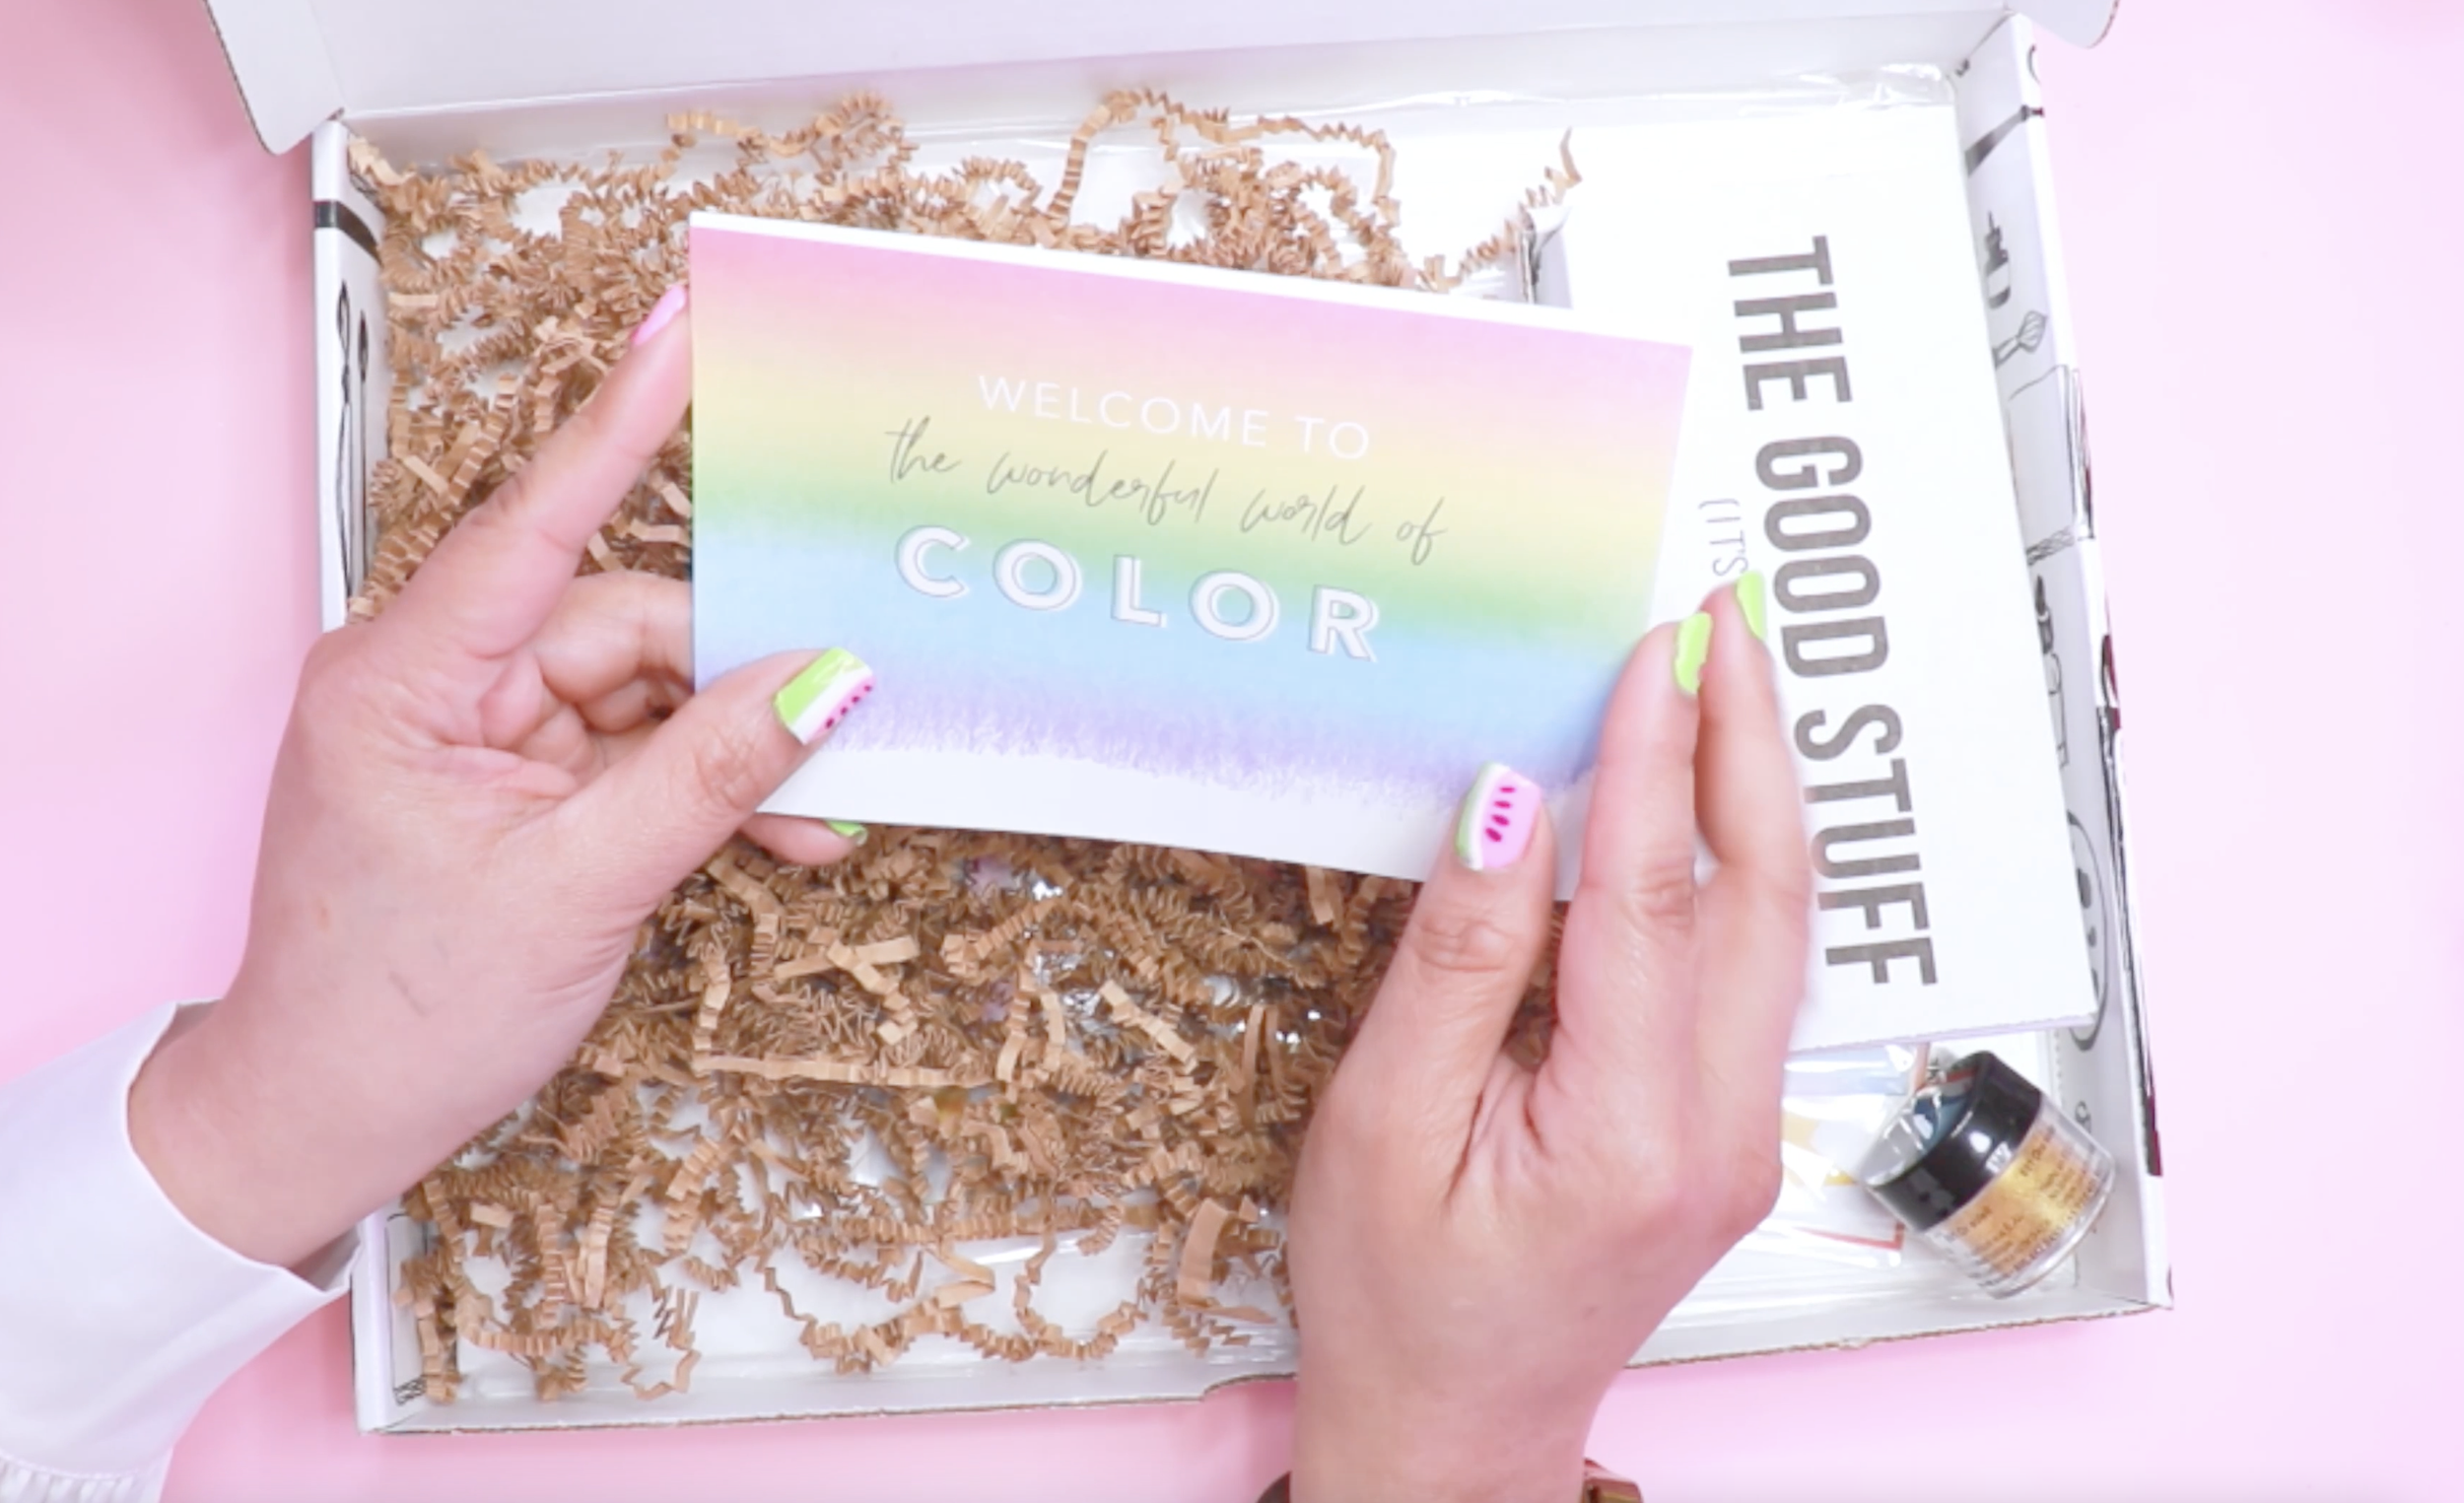
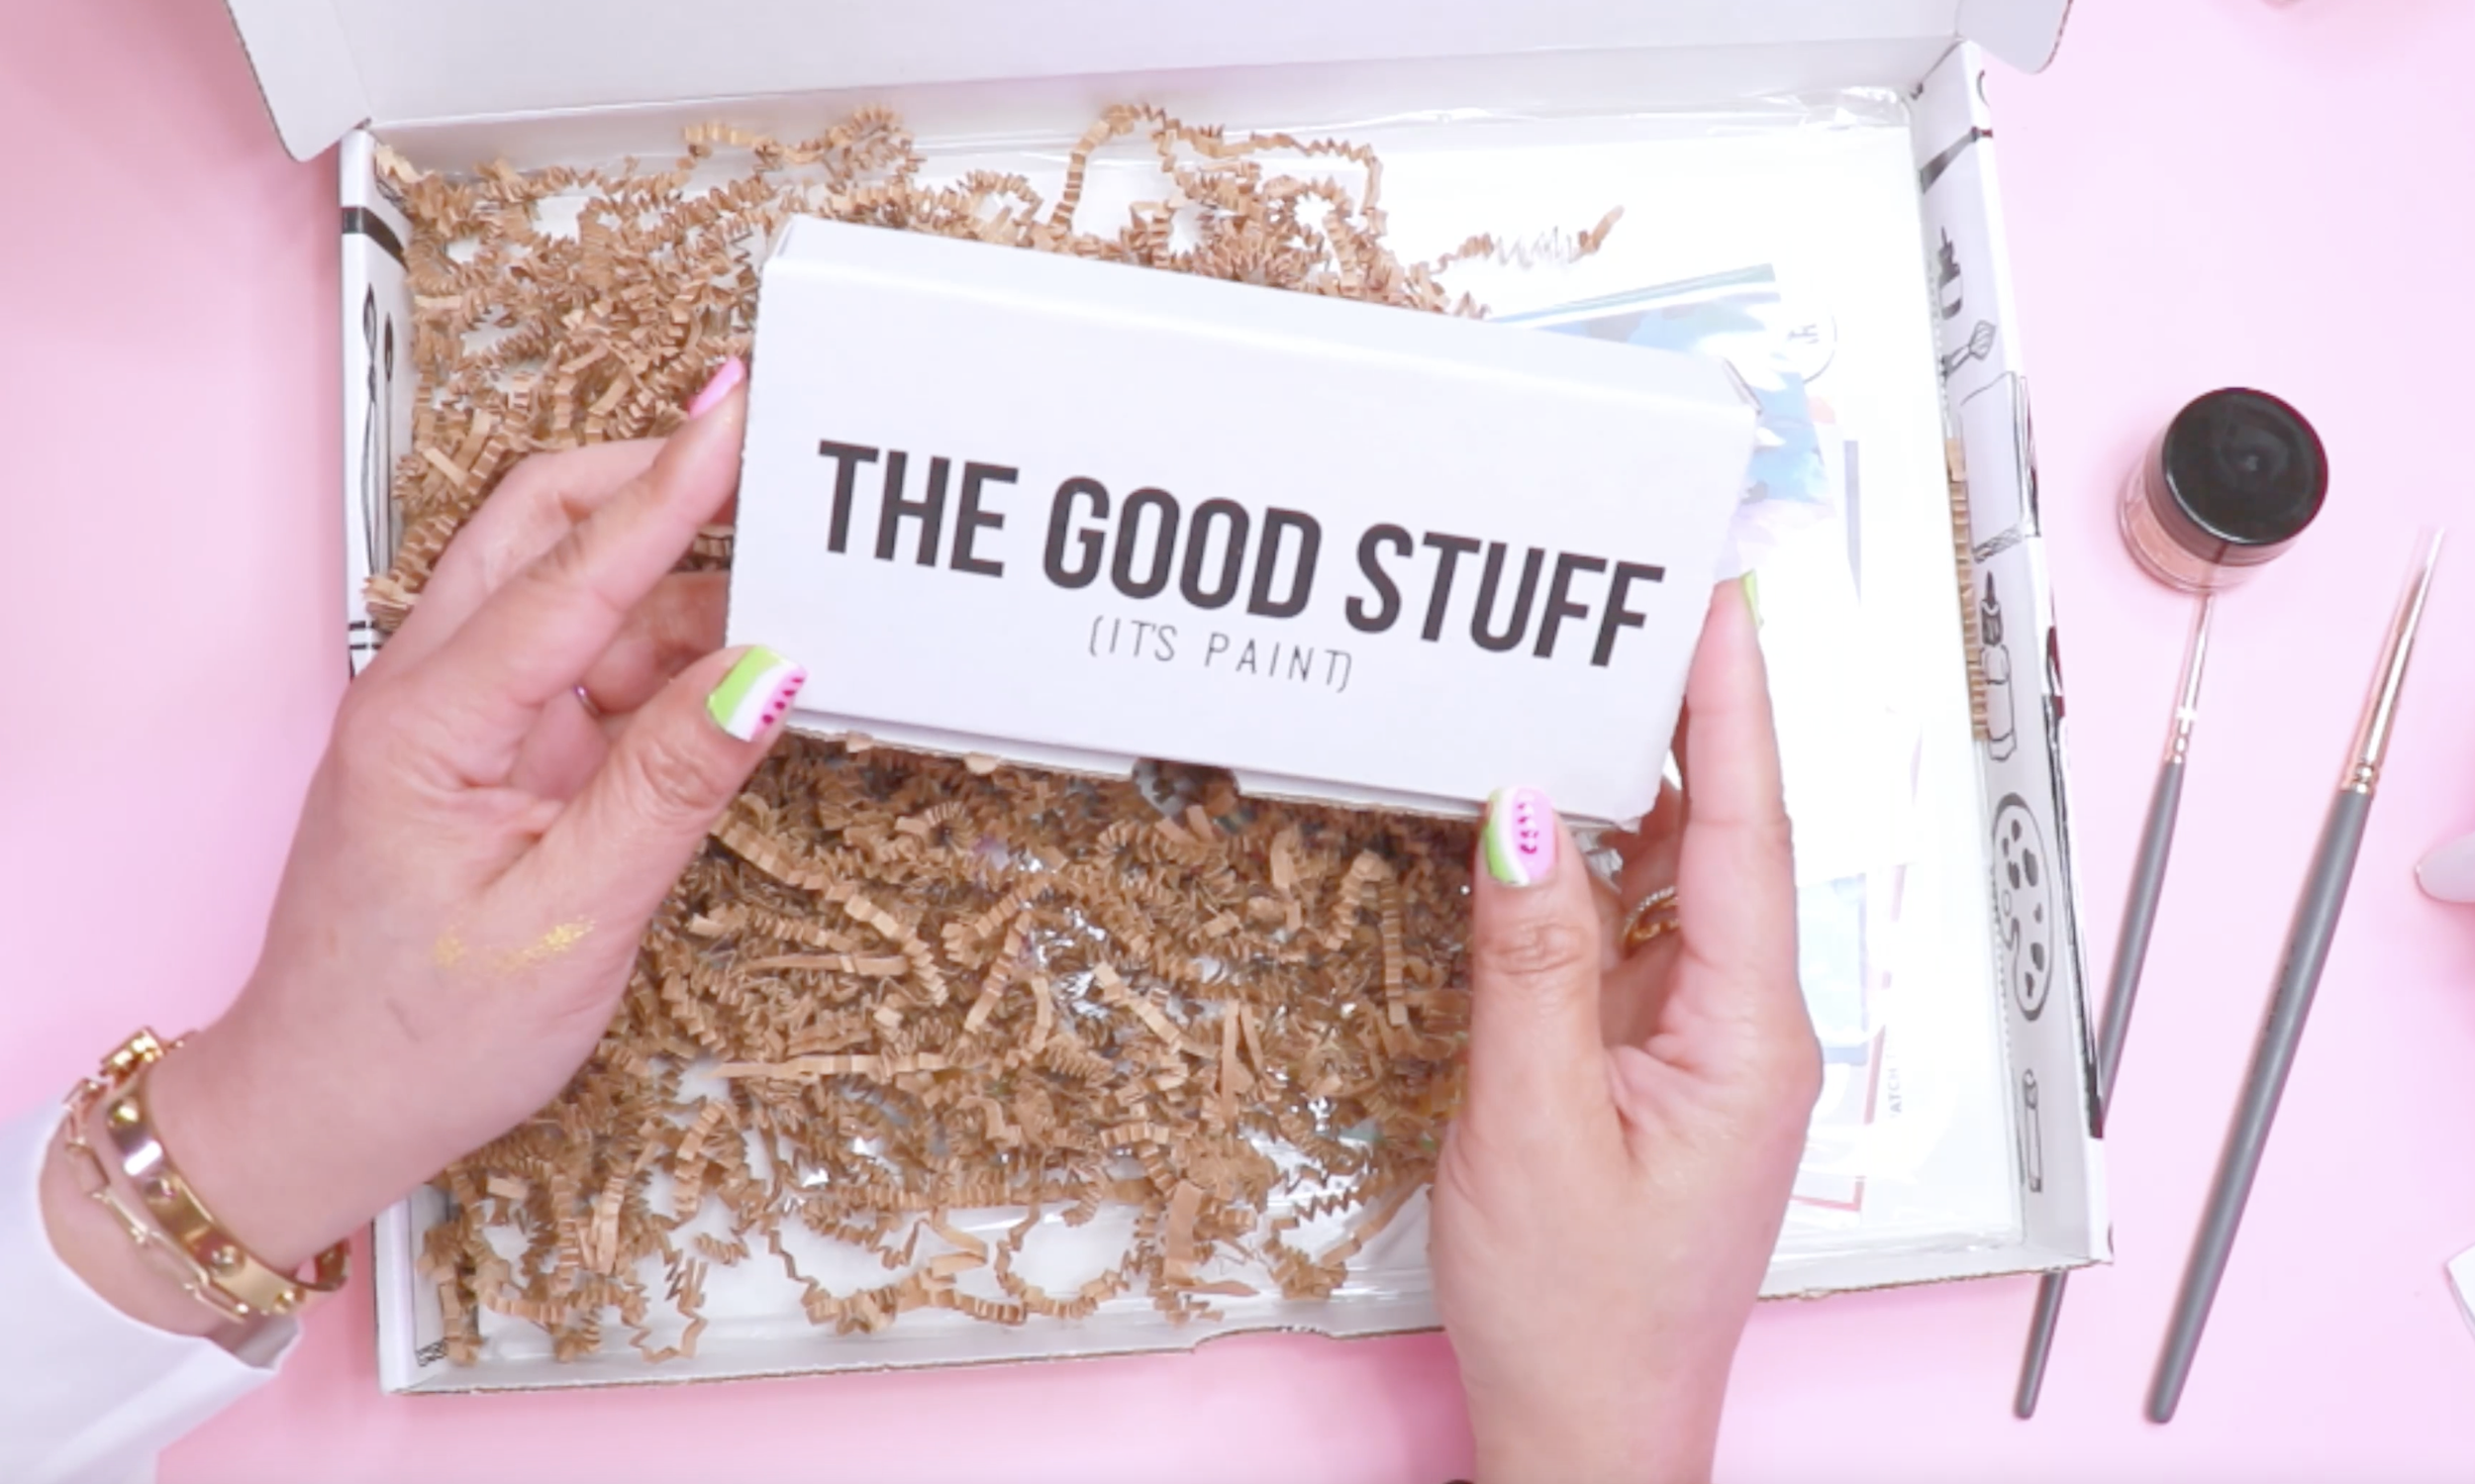
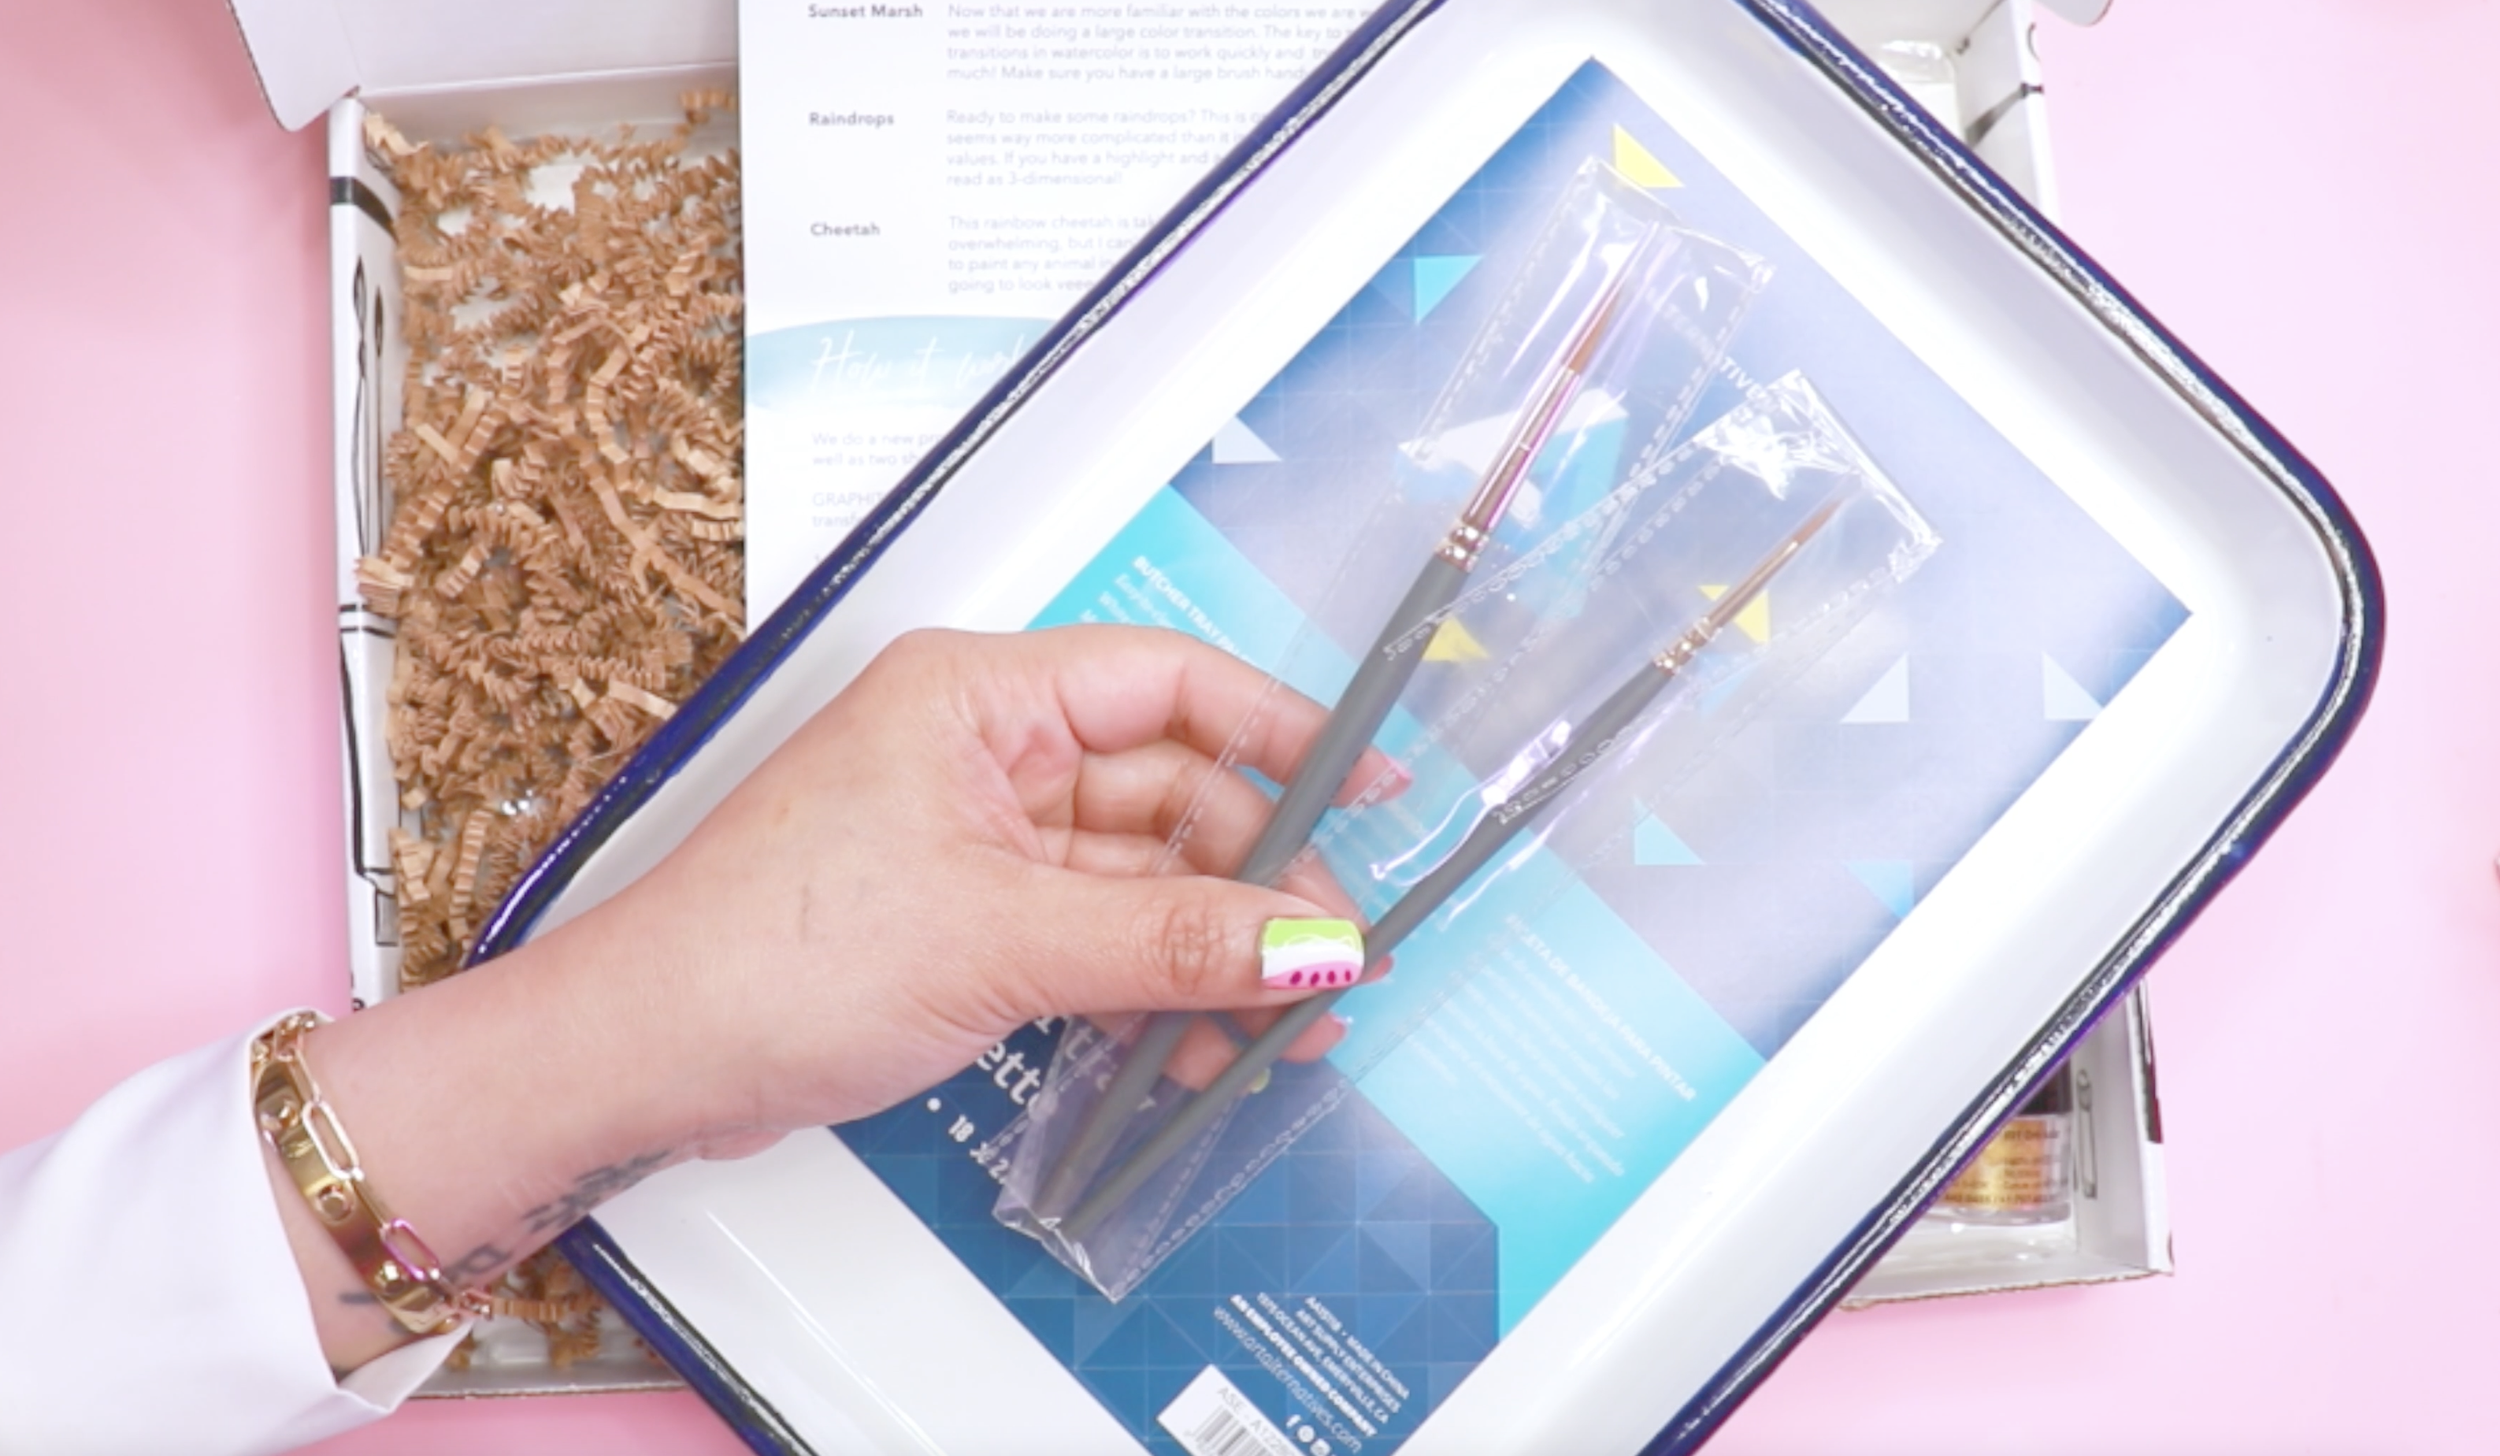
They sent me their Watercolor “Wonderful World Of Color” Box, and also a butcher tray for the
liquid watercolors and some extra brushes too!


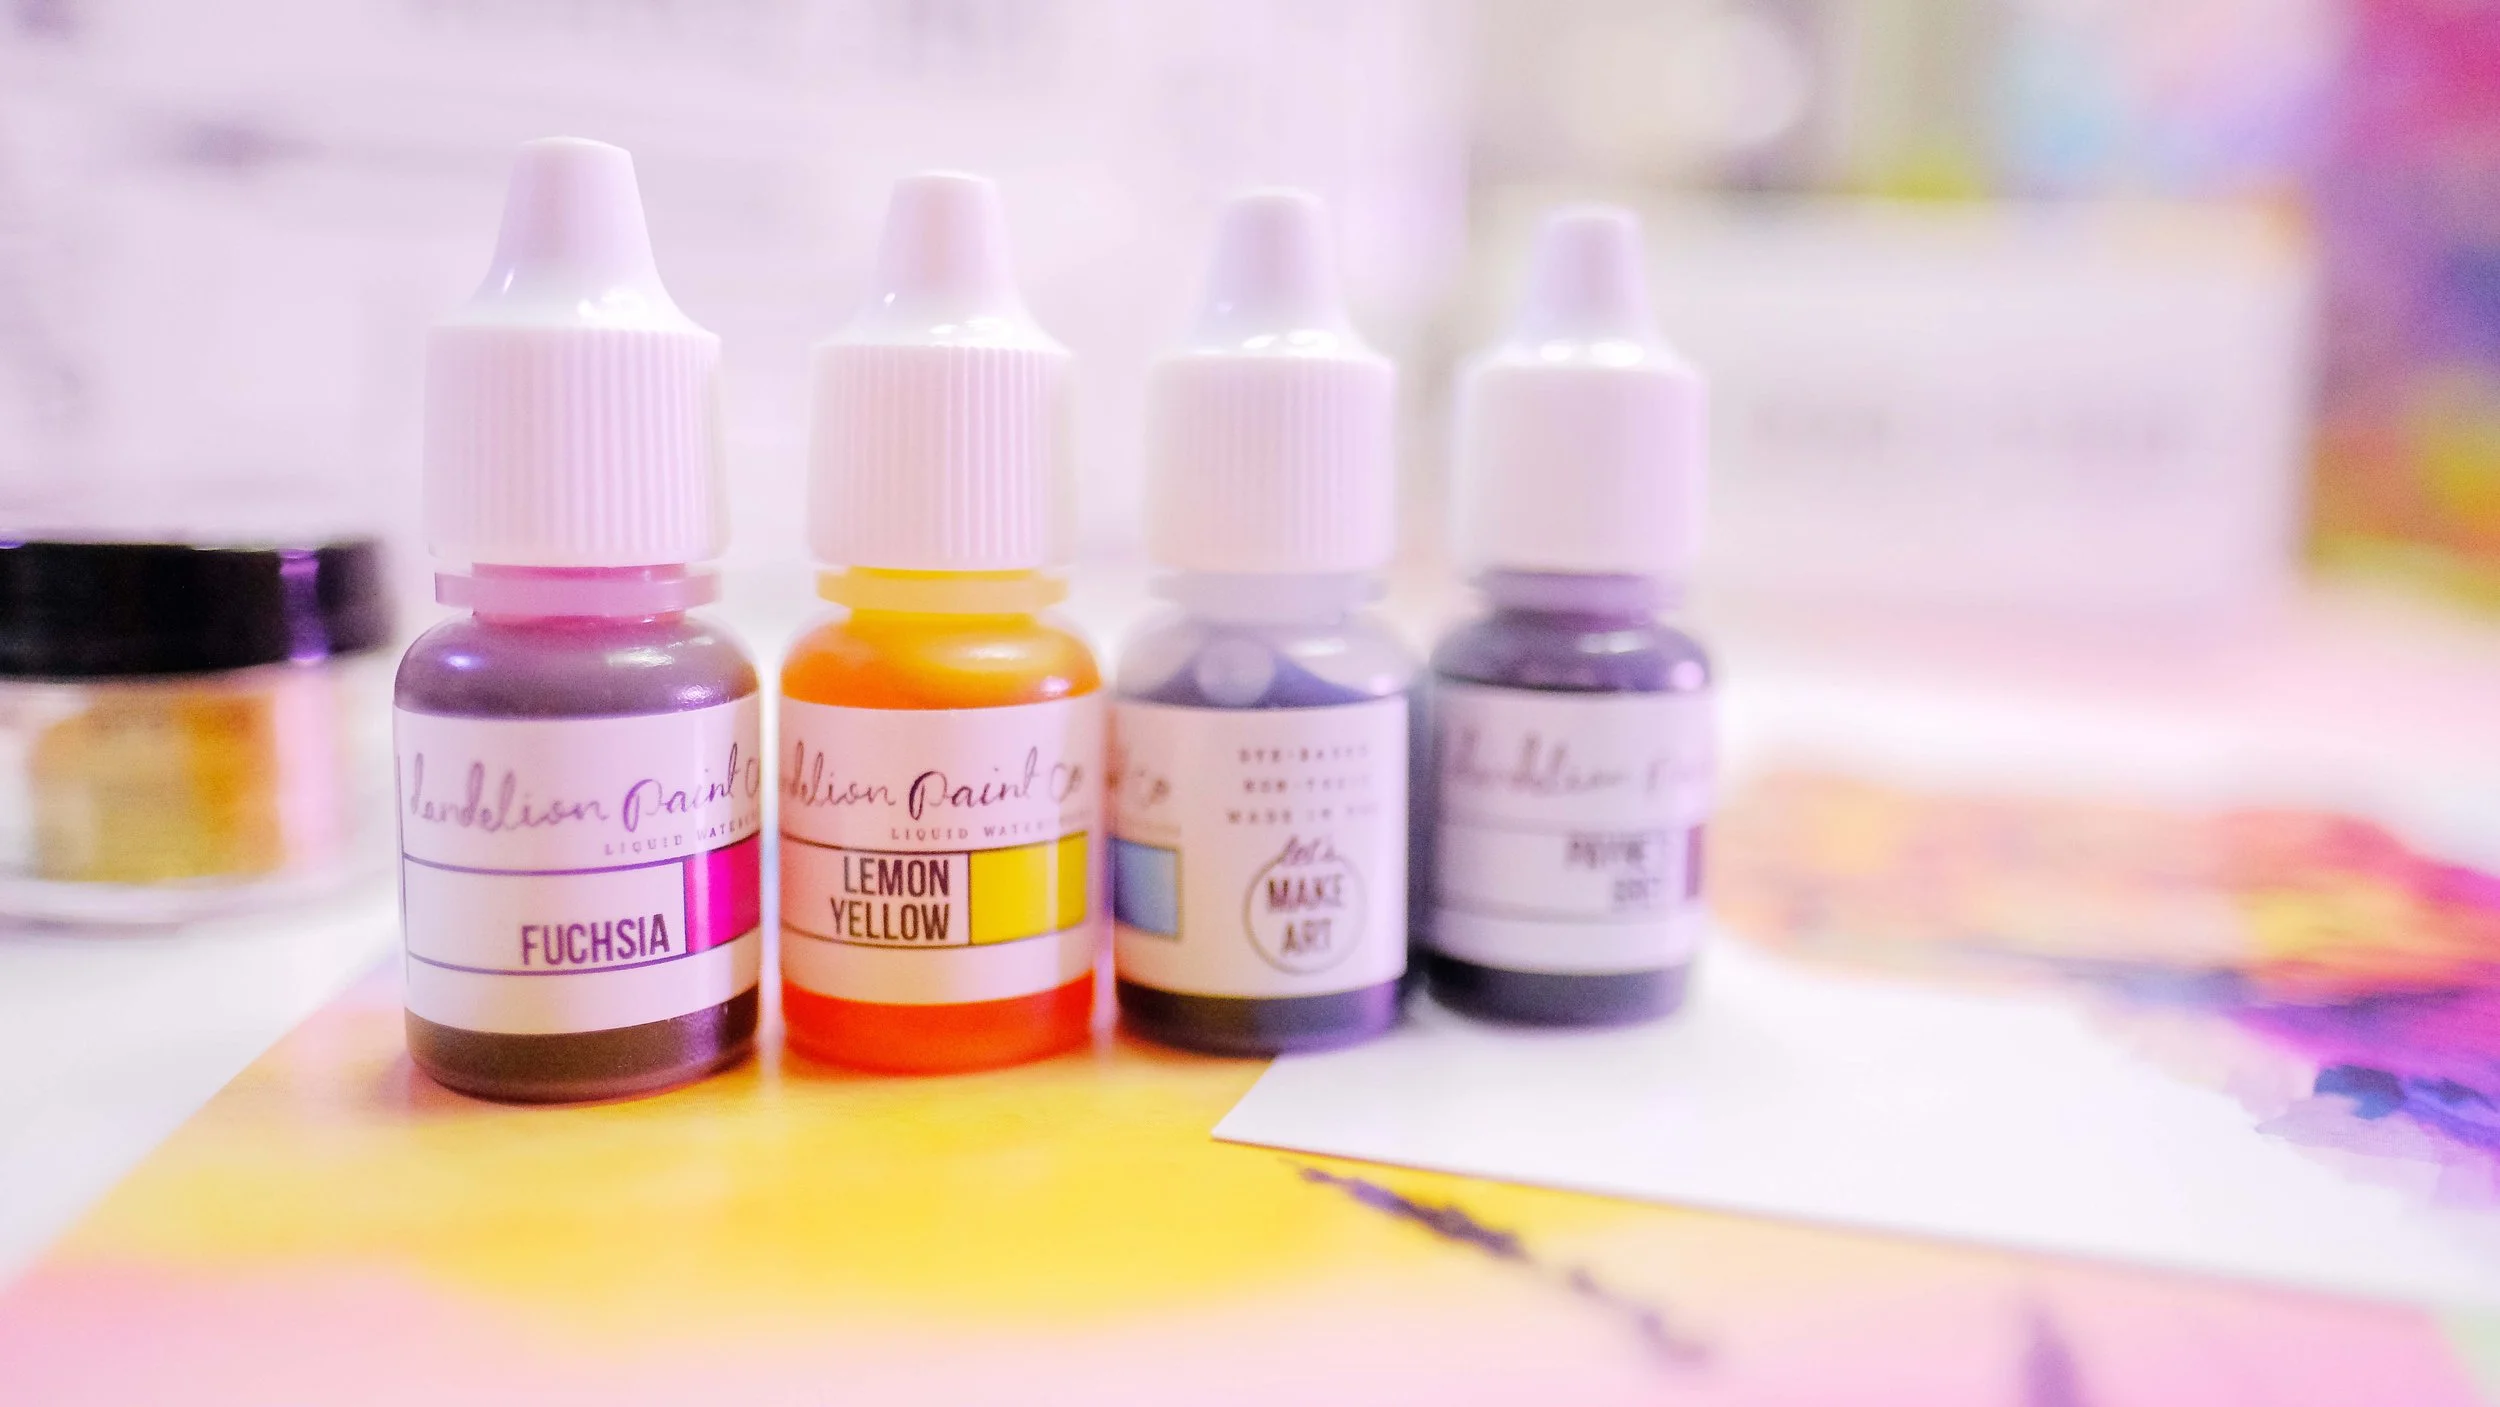
I love that the box wasn’t overwhelming at all. As a matter of fact, it felt very inviting as soon
as I opened it. Here’s for your visual, Imagine me all smiles and acting giddy like a child
opening the kit and going through the contents. It’s so much fun.
This box is packed of yummy art supplies, but most of all you get some amazing contents!
There will be four projects in each kit. You will receive access to videos on the website with
step-by-step instructions on top of all the Instruction Cards that you can already find inside
the box.
This is truly brilliant! I just love the whole concept!

I also love how easy to follow along the instructions provided. It didn’t feel intimidating at all. I
created a video for you to enjoy and watch me create a project from beginning ’til the end
with this fun art kit from Let’s Make Art!
Brand New Faber-Castell Goldfaber Aqua Dual Markers
Here it is, Hooray!!!! The brand new Faber-Castell Goldfaber Aqua Dual Markers! Let’s talk about them shall we? What’s new? How does it compare to some of the brand new markers that are already out in the market, and how does it also compare to the markers under Faber-Castell’s line up. Watch the video to find out more:
ZIG CLEAN COLOR REAL BRUSH | MANGAKA SET
Little Kiddie Cart Makeover with MyColorShot
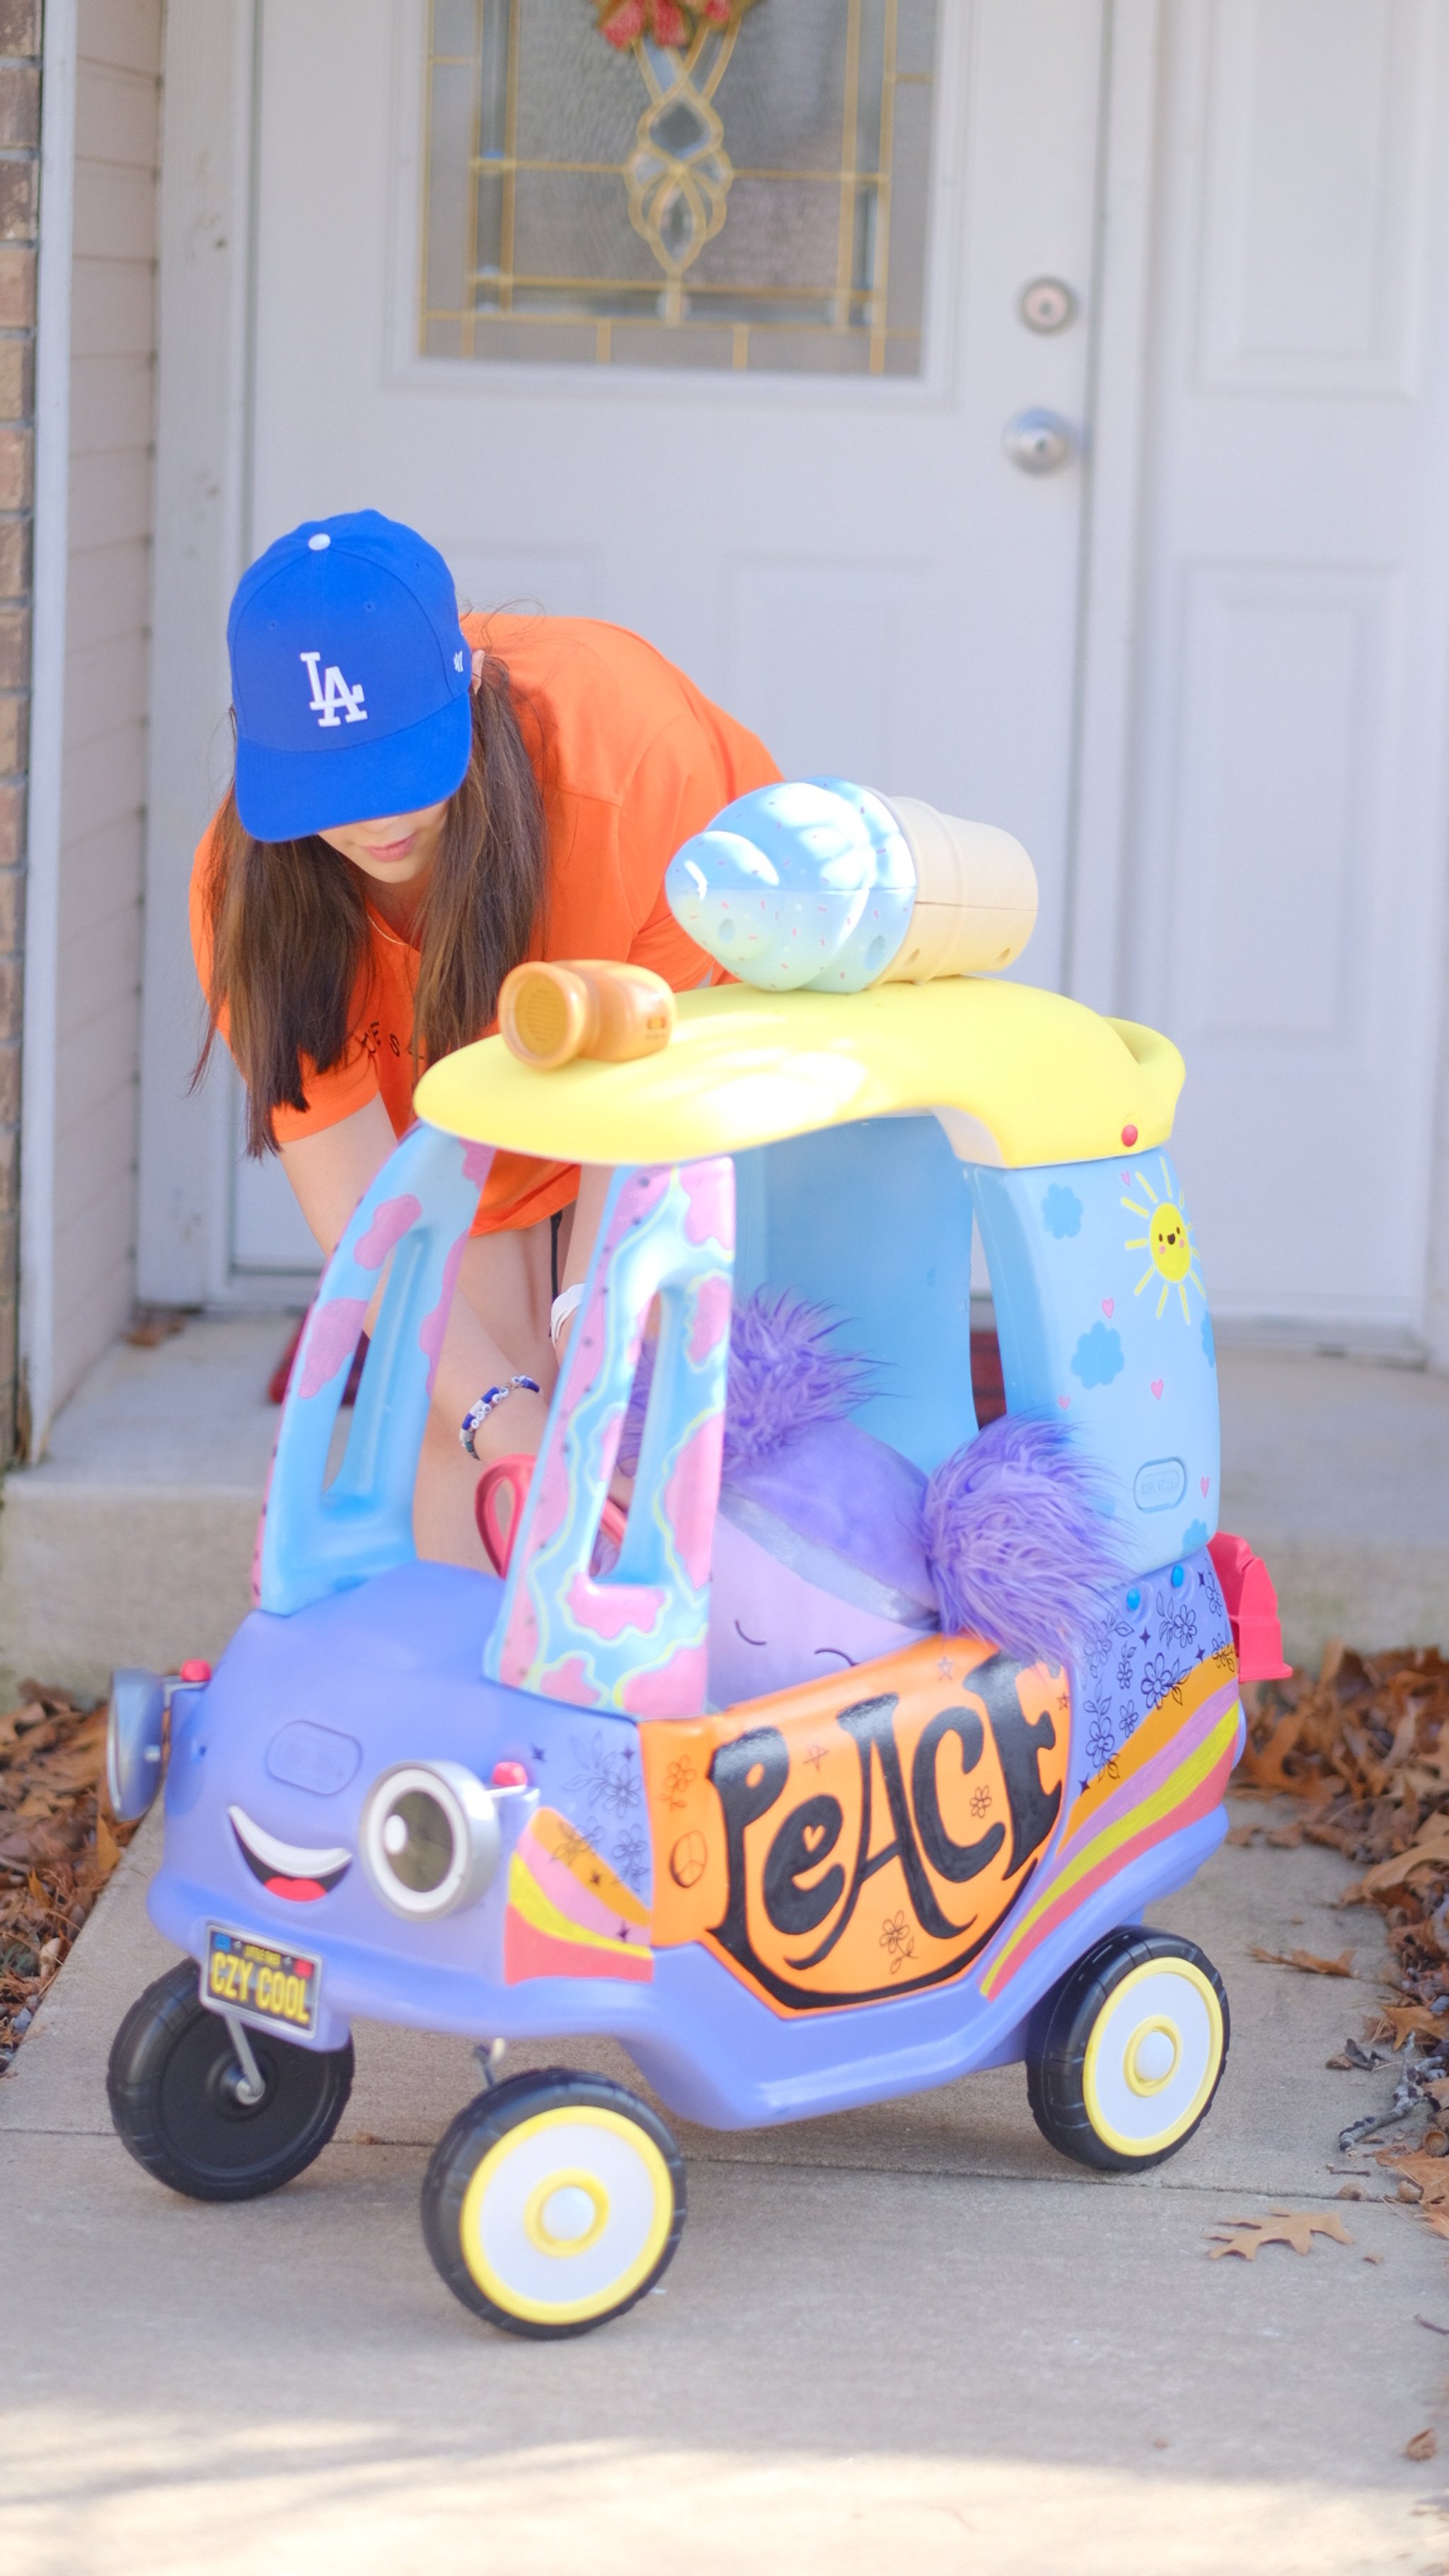
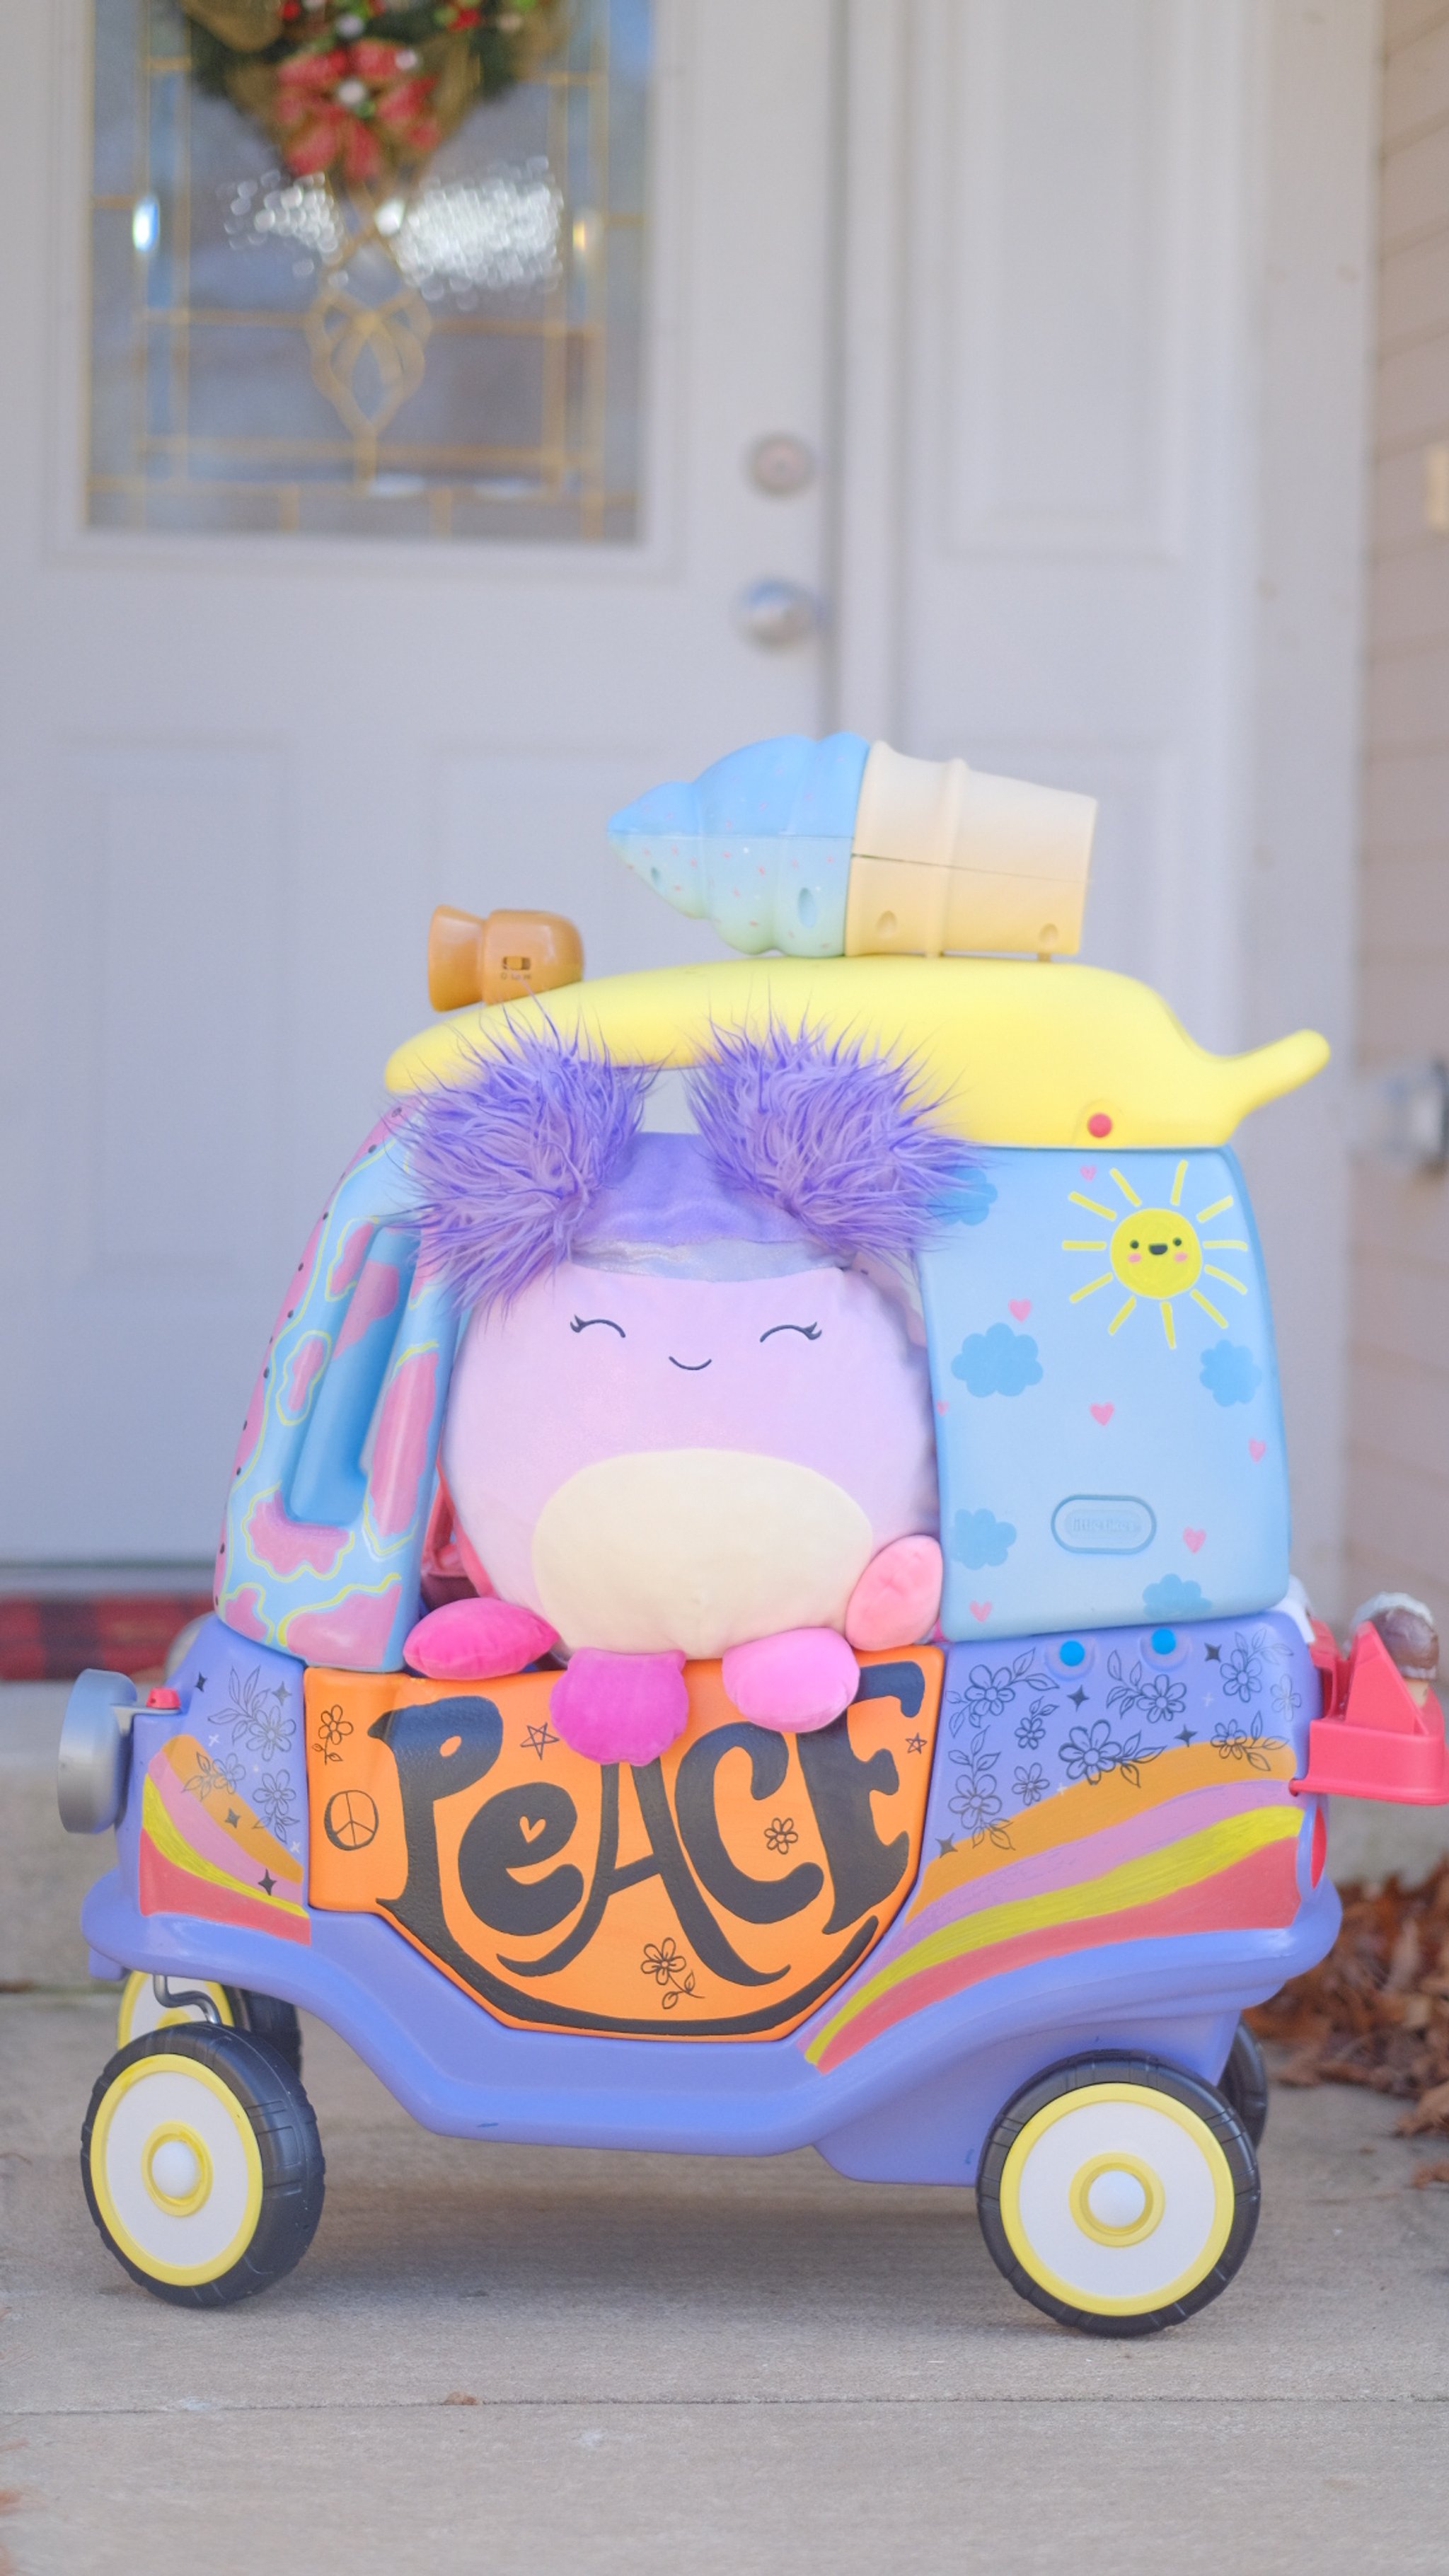
Did you ever started a project where in the middle you start questioning yourself why you started in the first place? Hahahaha! This was IT for me. This was THE project!
In the middle of prepping and spraying, I started questioning my decision. LOL!
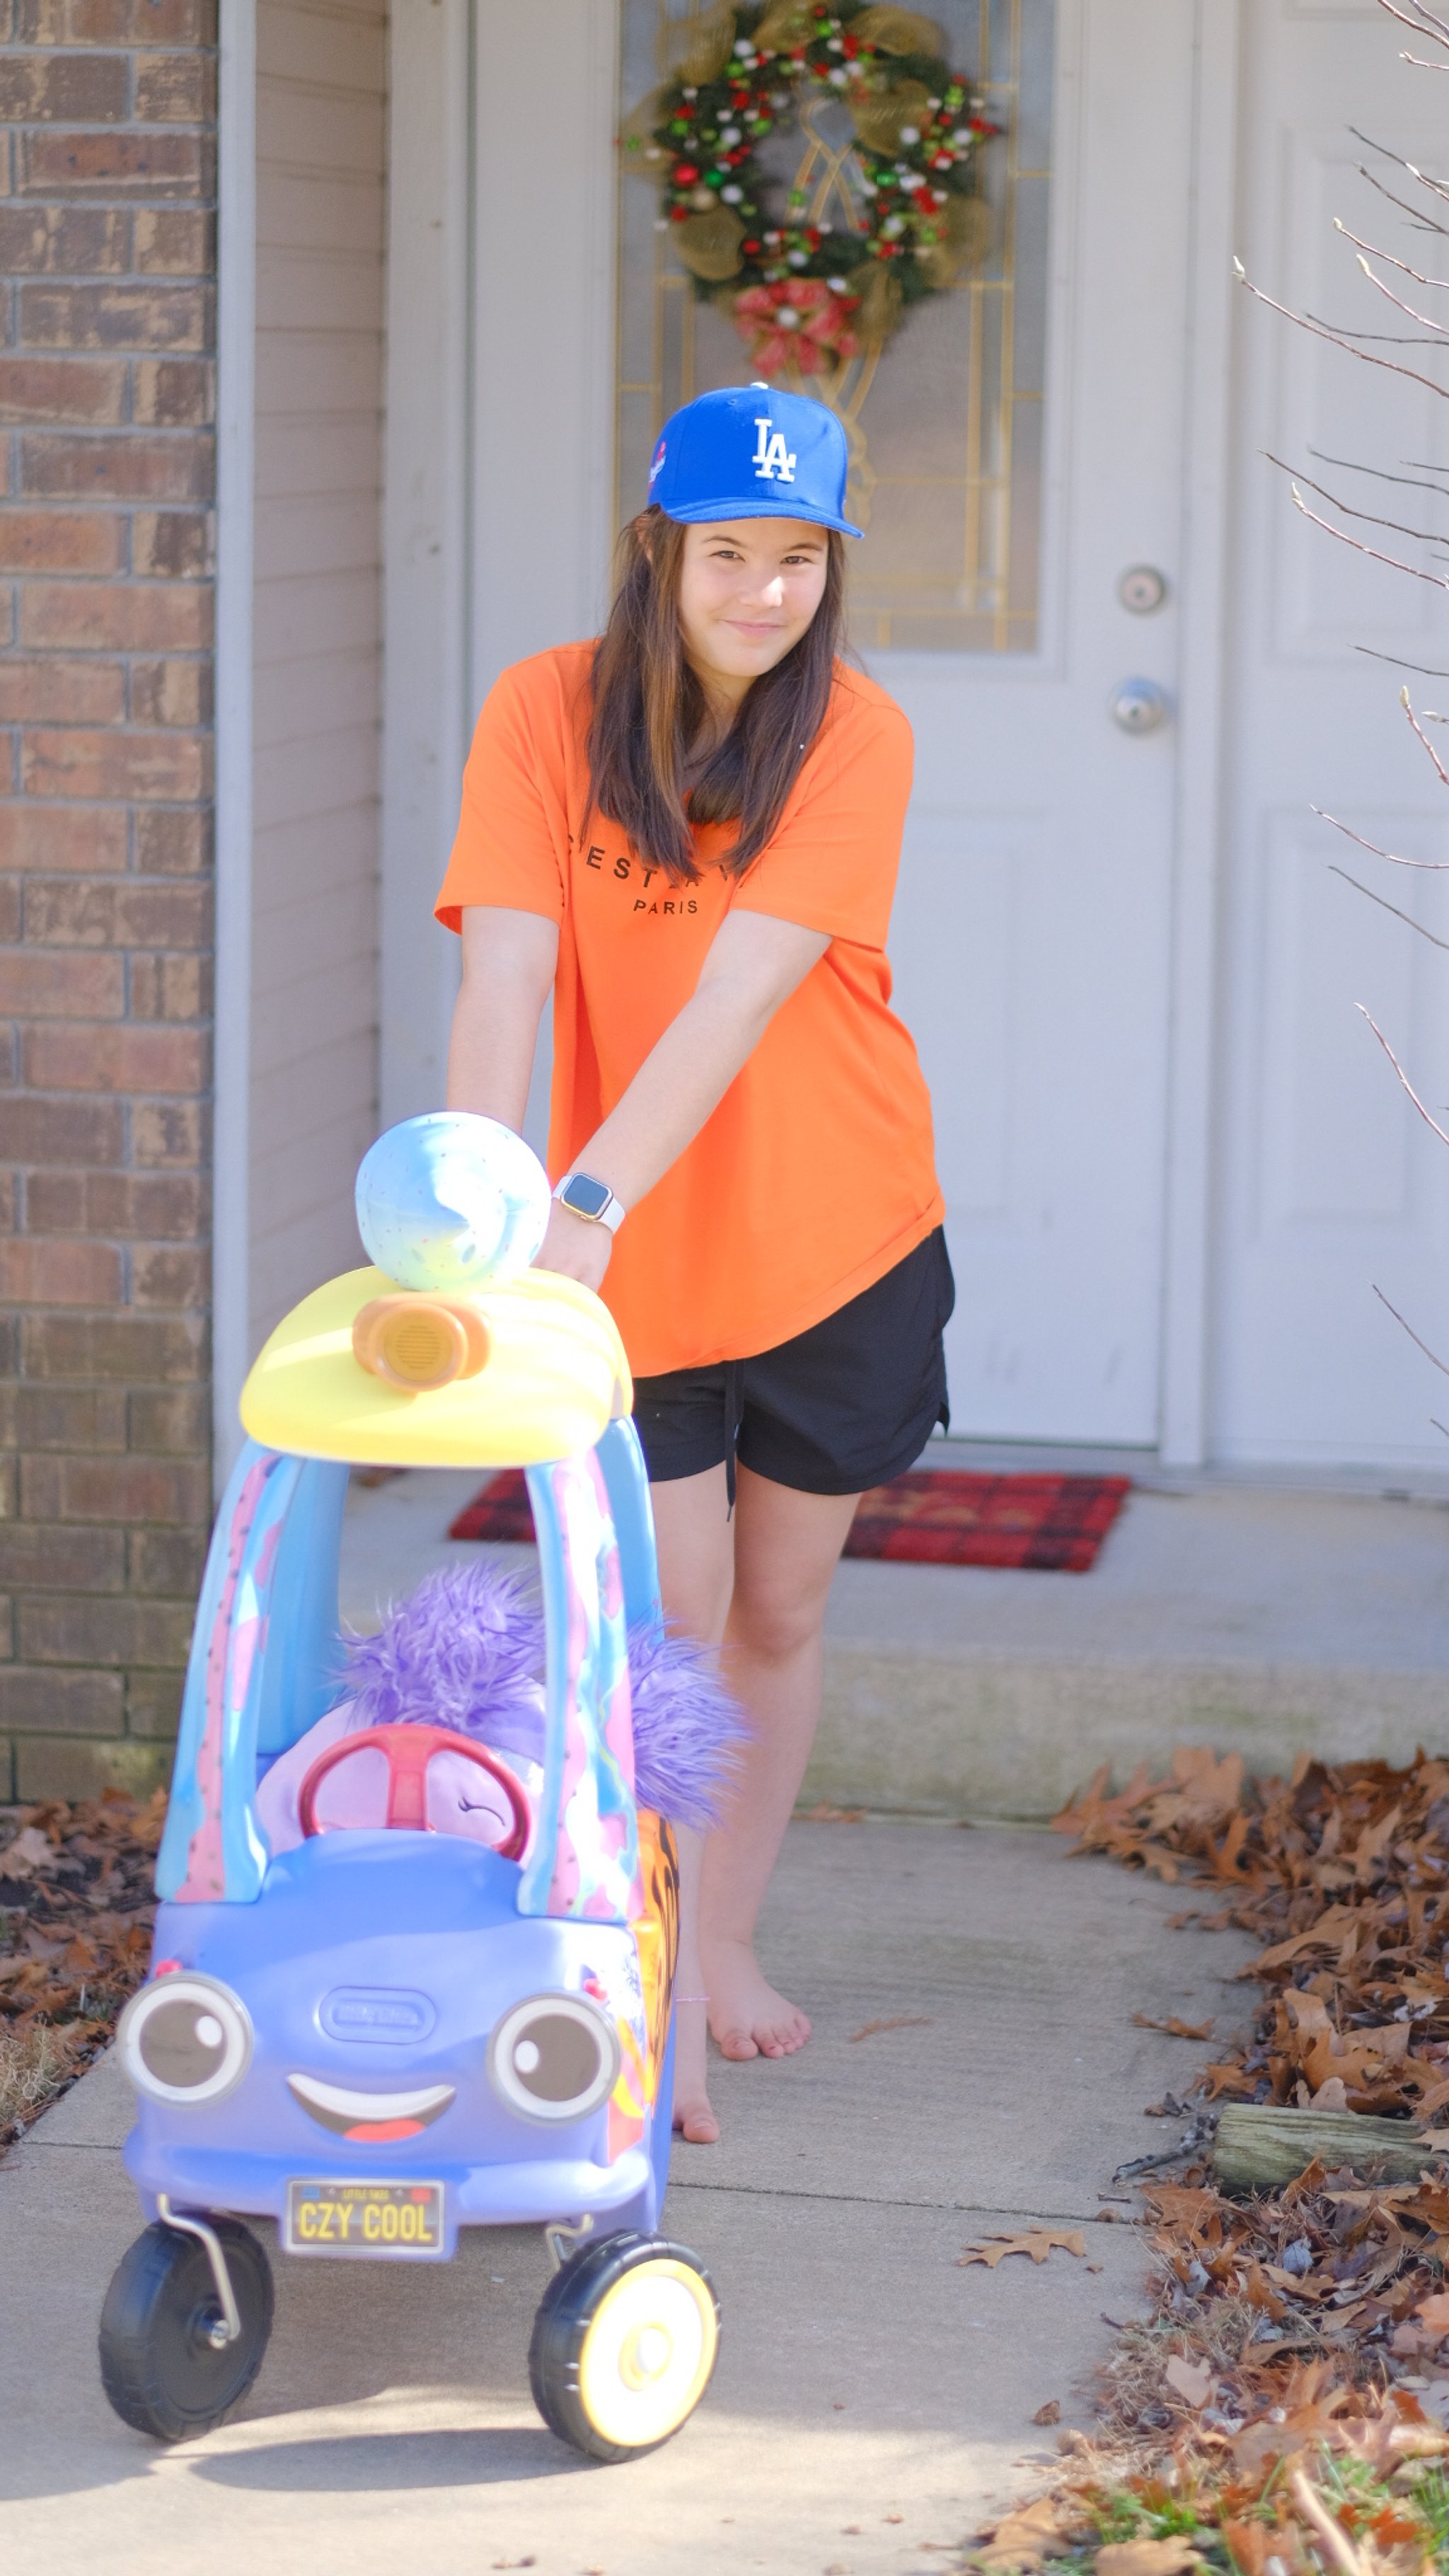
My daughter Raine is obsessed with Squishmallows and she wanted us to find a fun stroller for them. We found this Little Tyke ice cream truck that we weren’t super thrilled about, but we knew we can fix it and do a little makeover. We wanted to create a hippie van look so this is what we came up with. I used some MyColorShot Spray Paint and their paint pens too! The spraying was easy, but the prepping always takes the longest. These Spray Paints are Prime & Paint and that truly saves a lot of time.
You can watch the process video below. Please let me know what you think. Have you ever tried making a big spray project like this? How did it go?

Please don’t forget to check out my blog post sponsor for today.
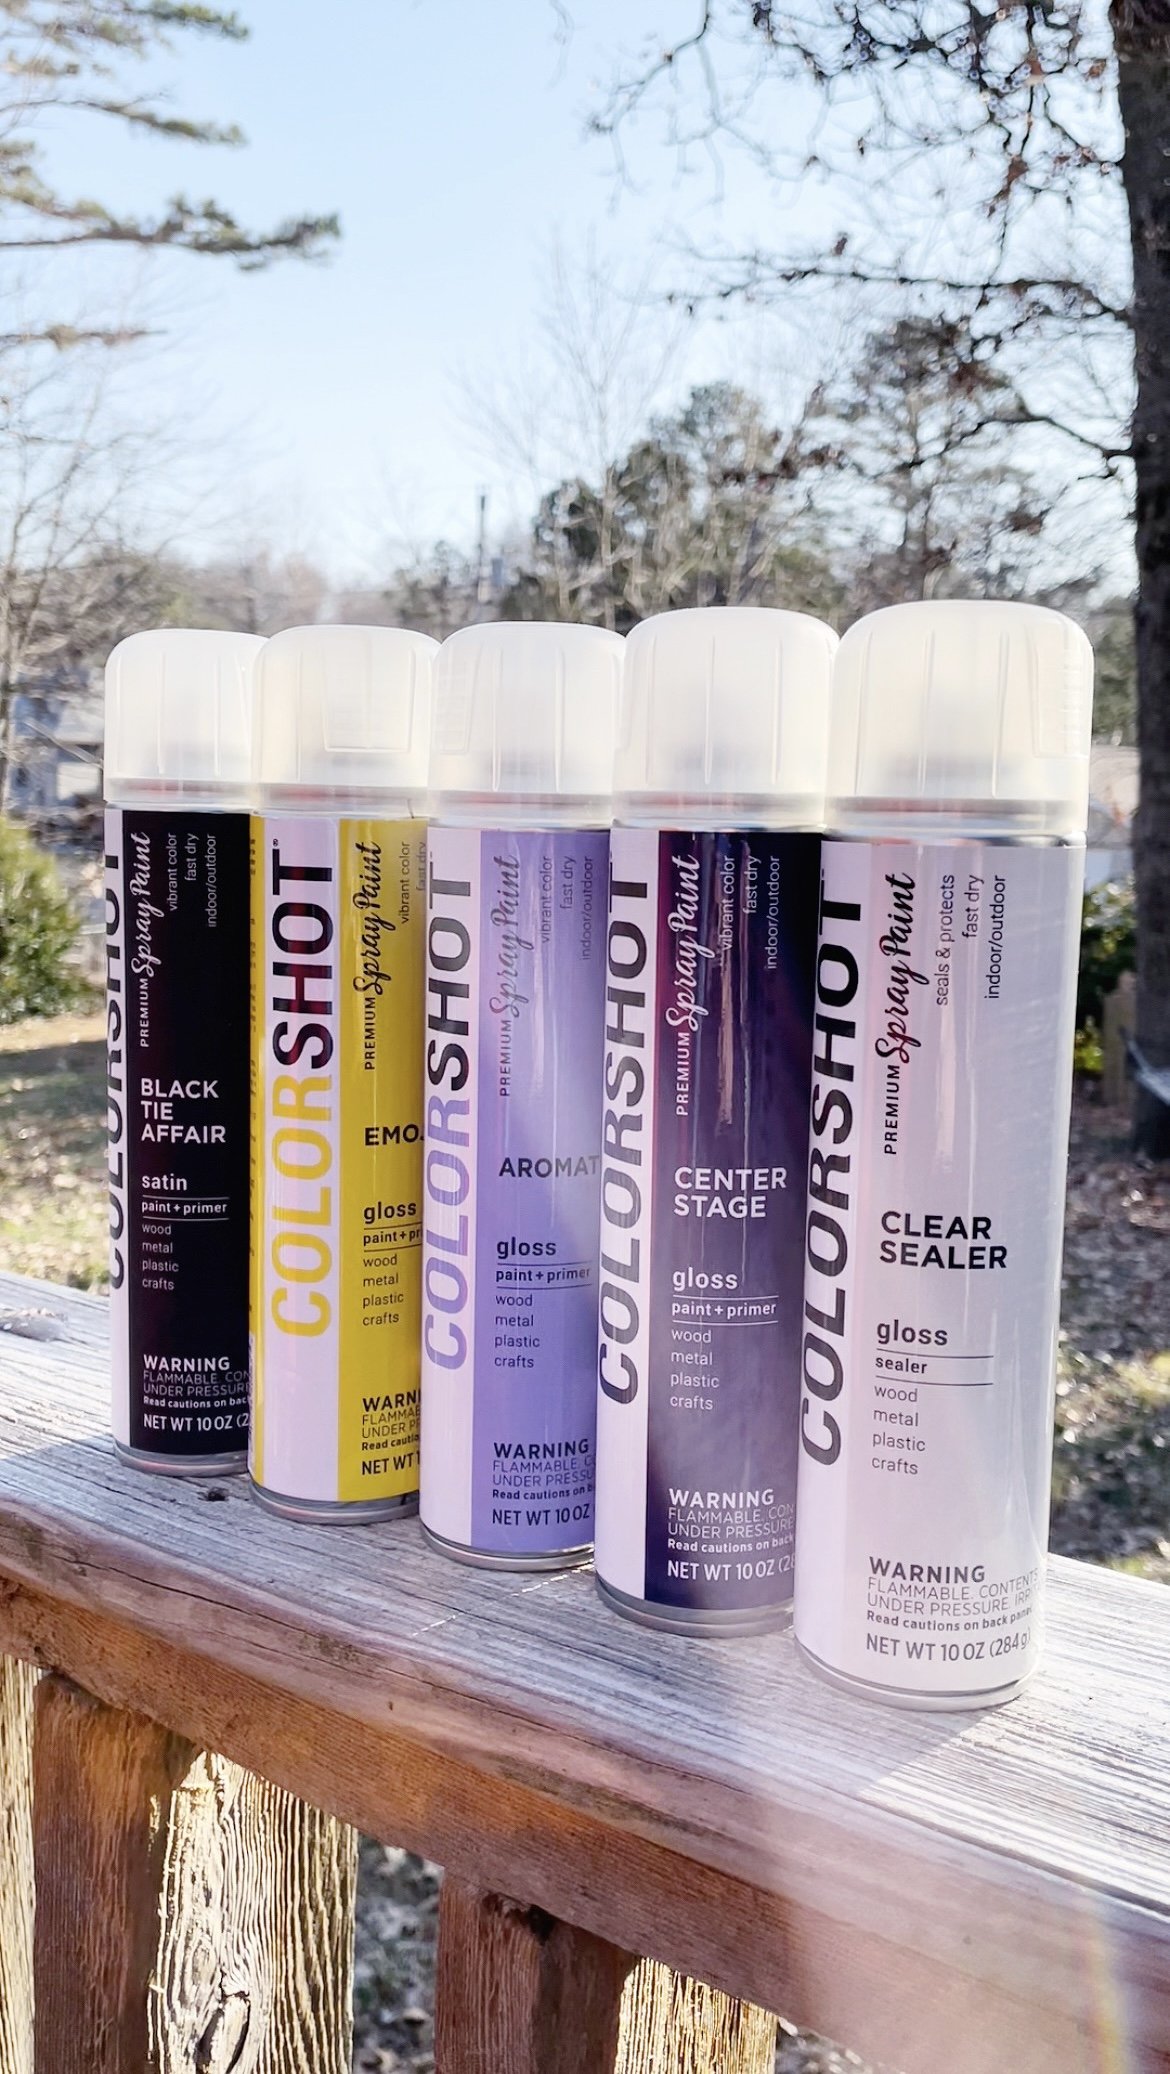
MYCOLOR SHOT SPRAY PAINTS. #mycolorshot Also now available at Walmart!
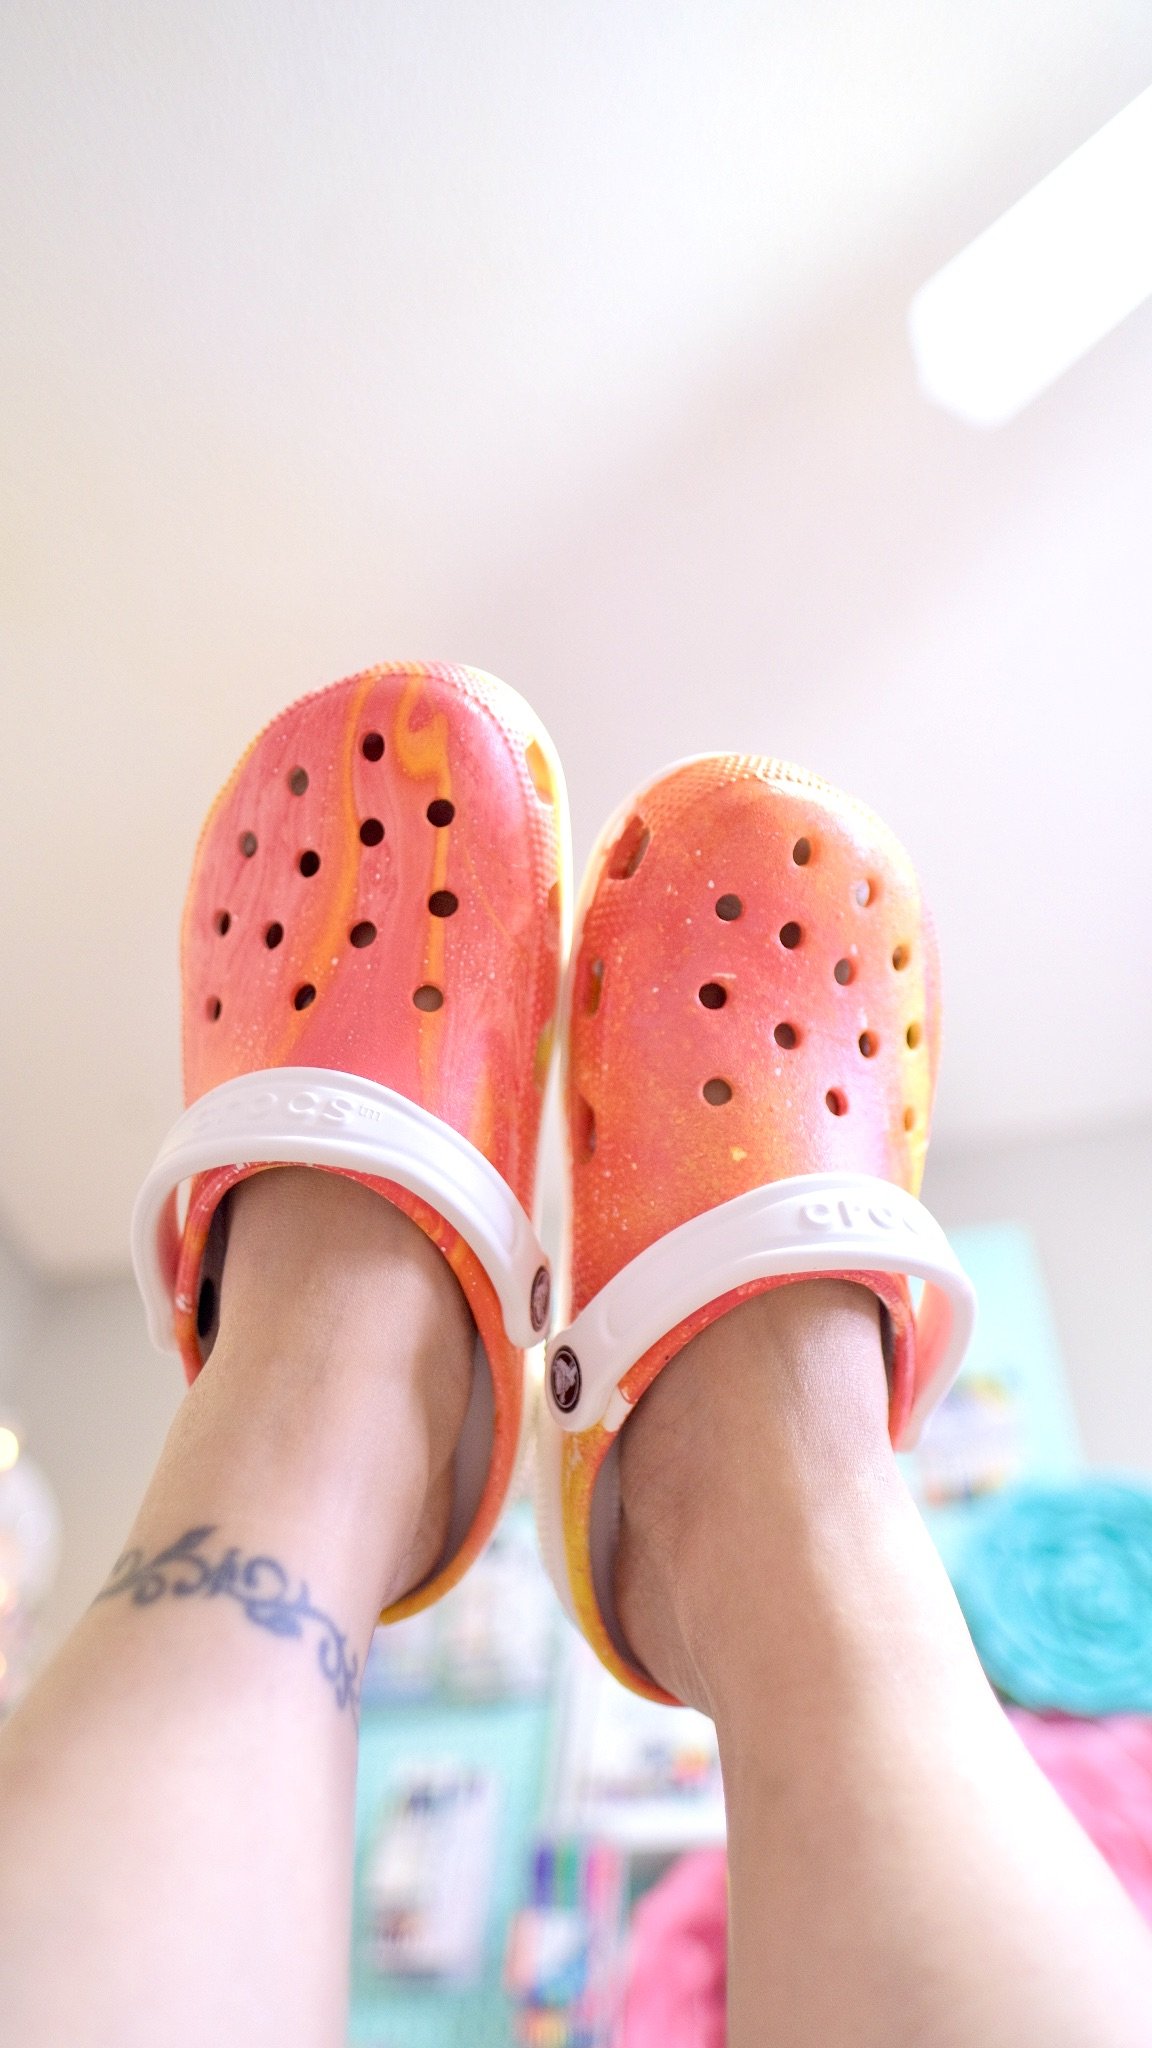
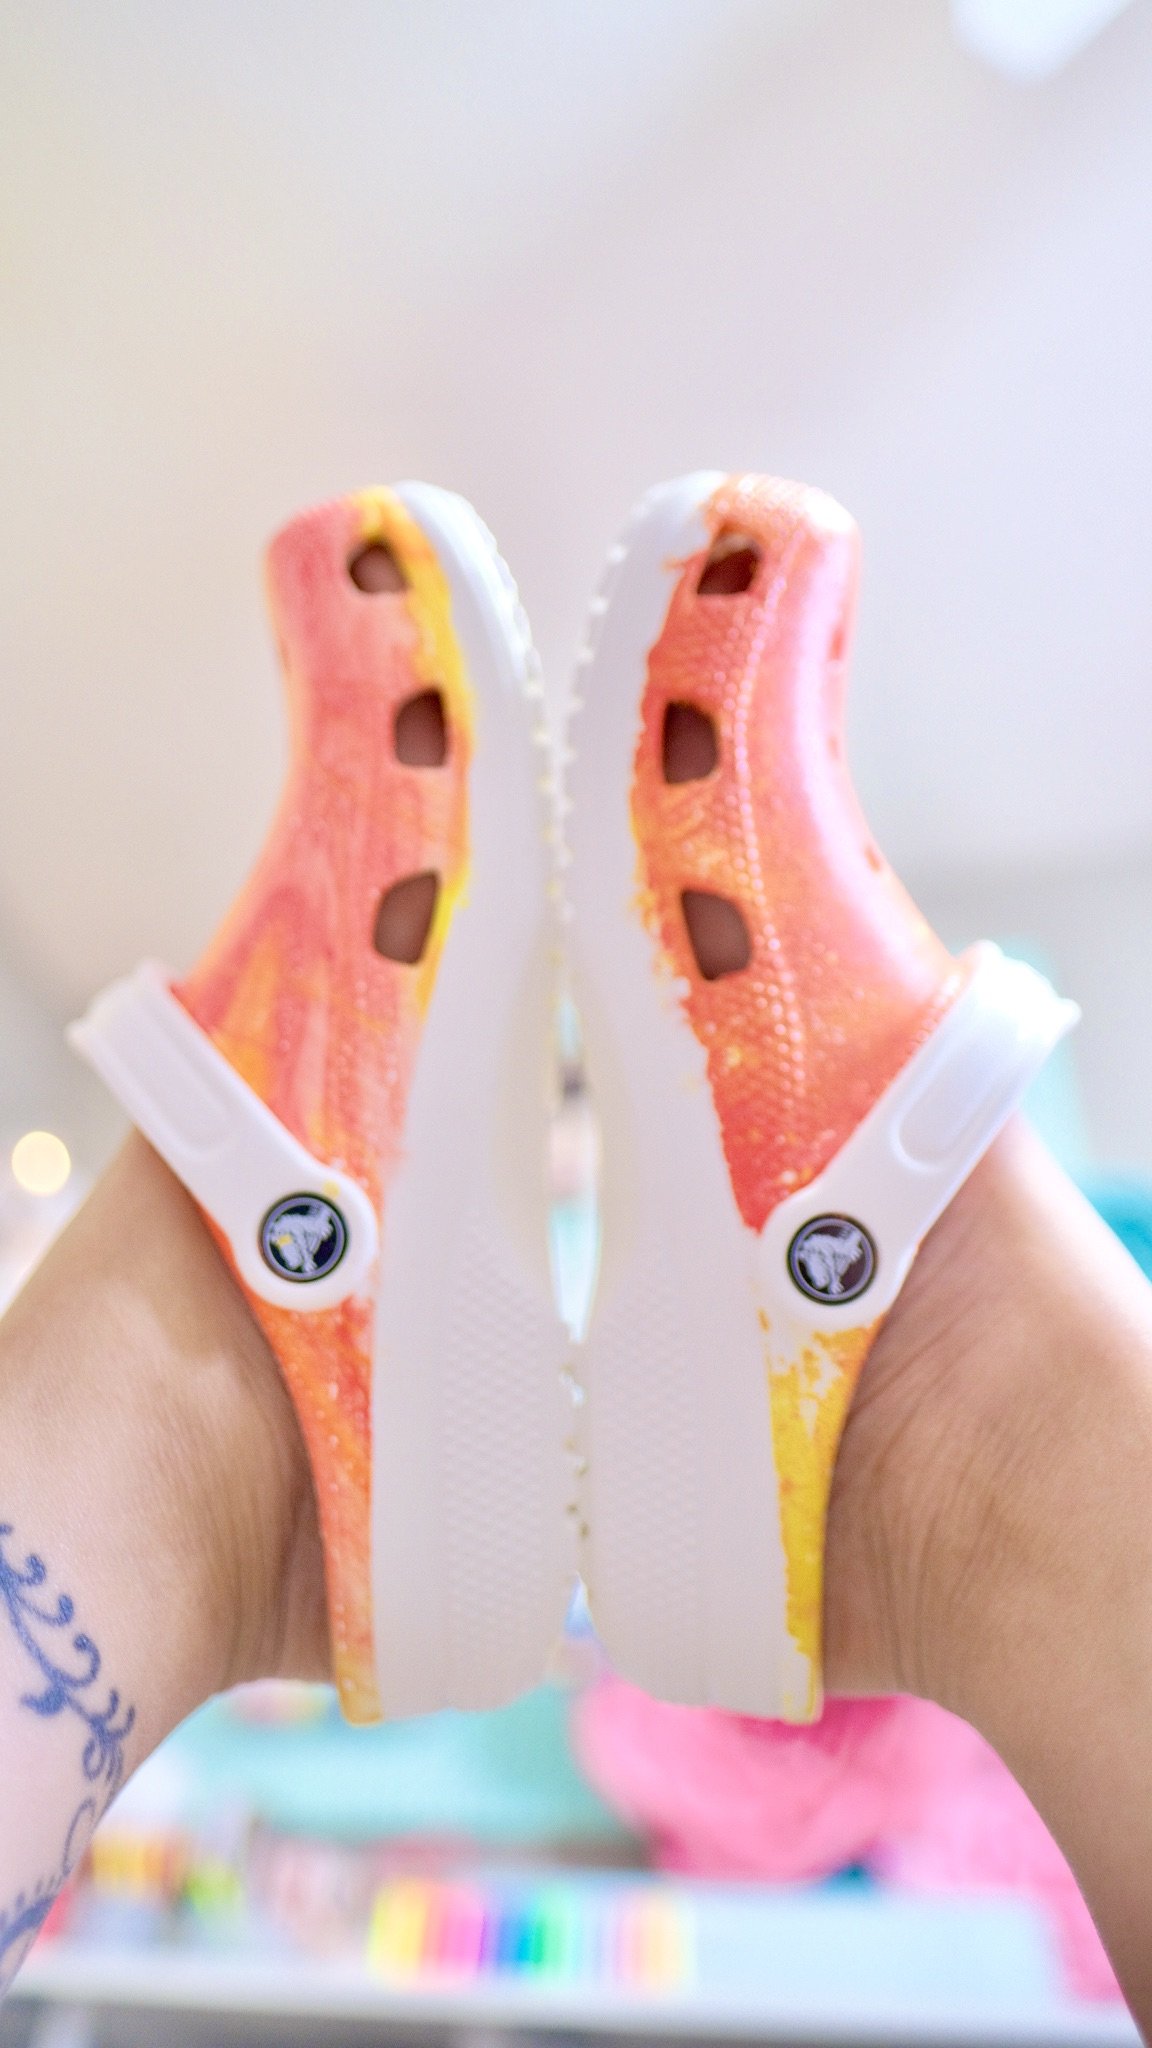
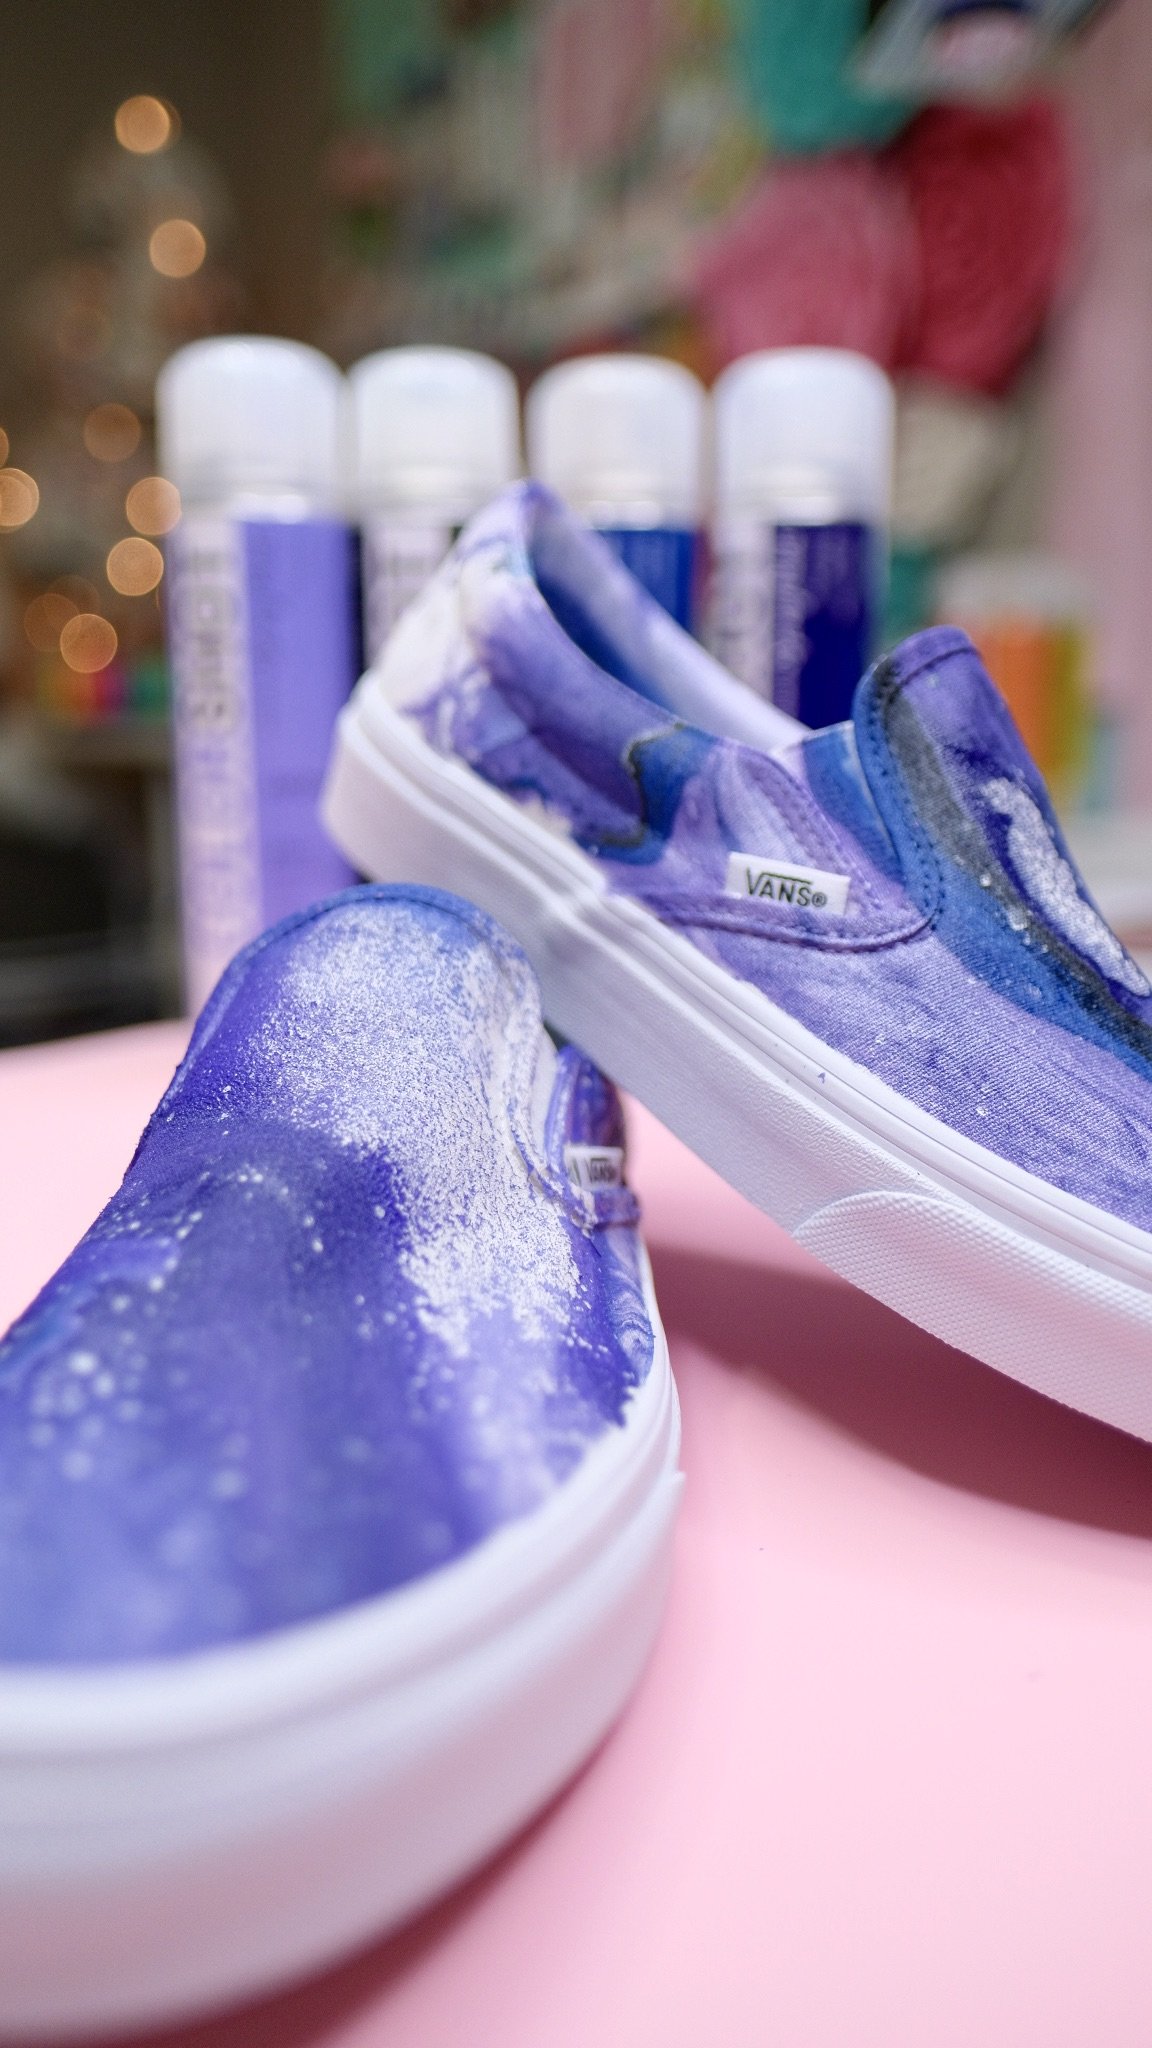
Hydro Dipping Crocs and Vans Shoes with My Color Shot Spray Paint
Hello my loves! With Christmas just a few days away, I’m still super crazy busy with Personalized gifts and projects. And speaking of project, I partnered with @mycolorshot (https://www.mycolorshot.com) Color Shot Premium Spray Paints to create this fun craft with all of you. I’ve been watching a lot of these projects online but I was never brave enough to try them myself. Until 4 days ago. And let me tell you now, it was a lot of trial and error. And I want to share some tips that i’ve learn with you so you can avoid them if you would like to try this project.
Materials:
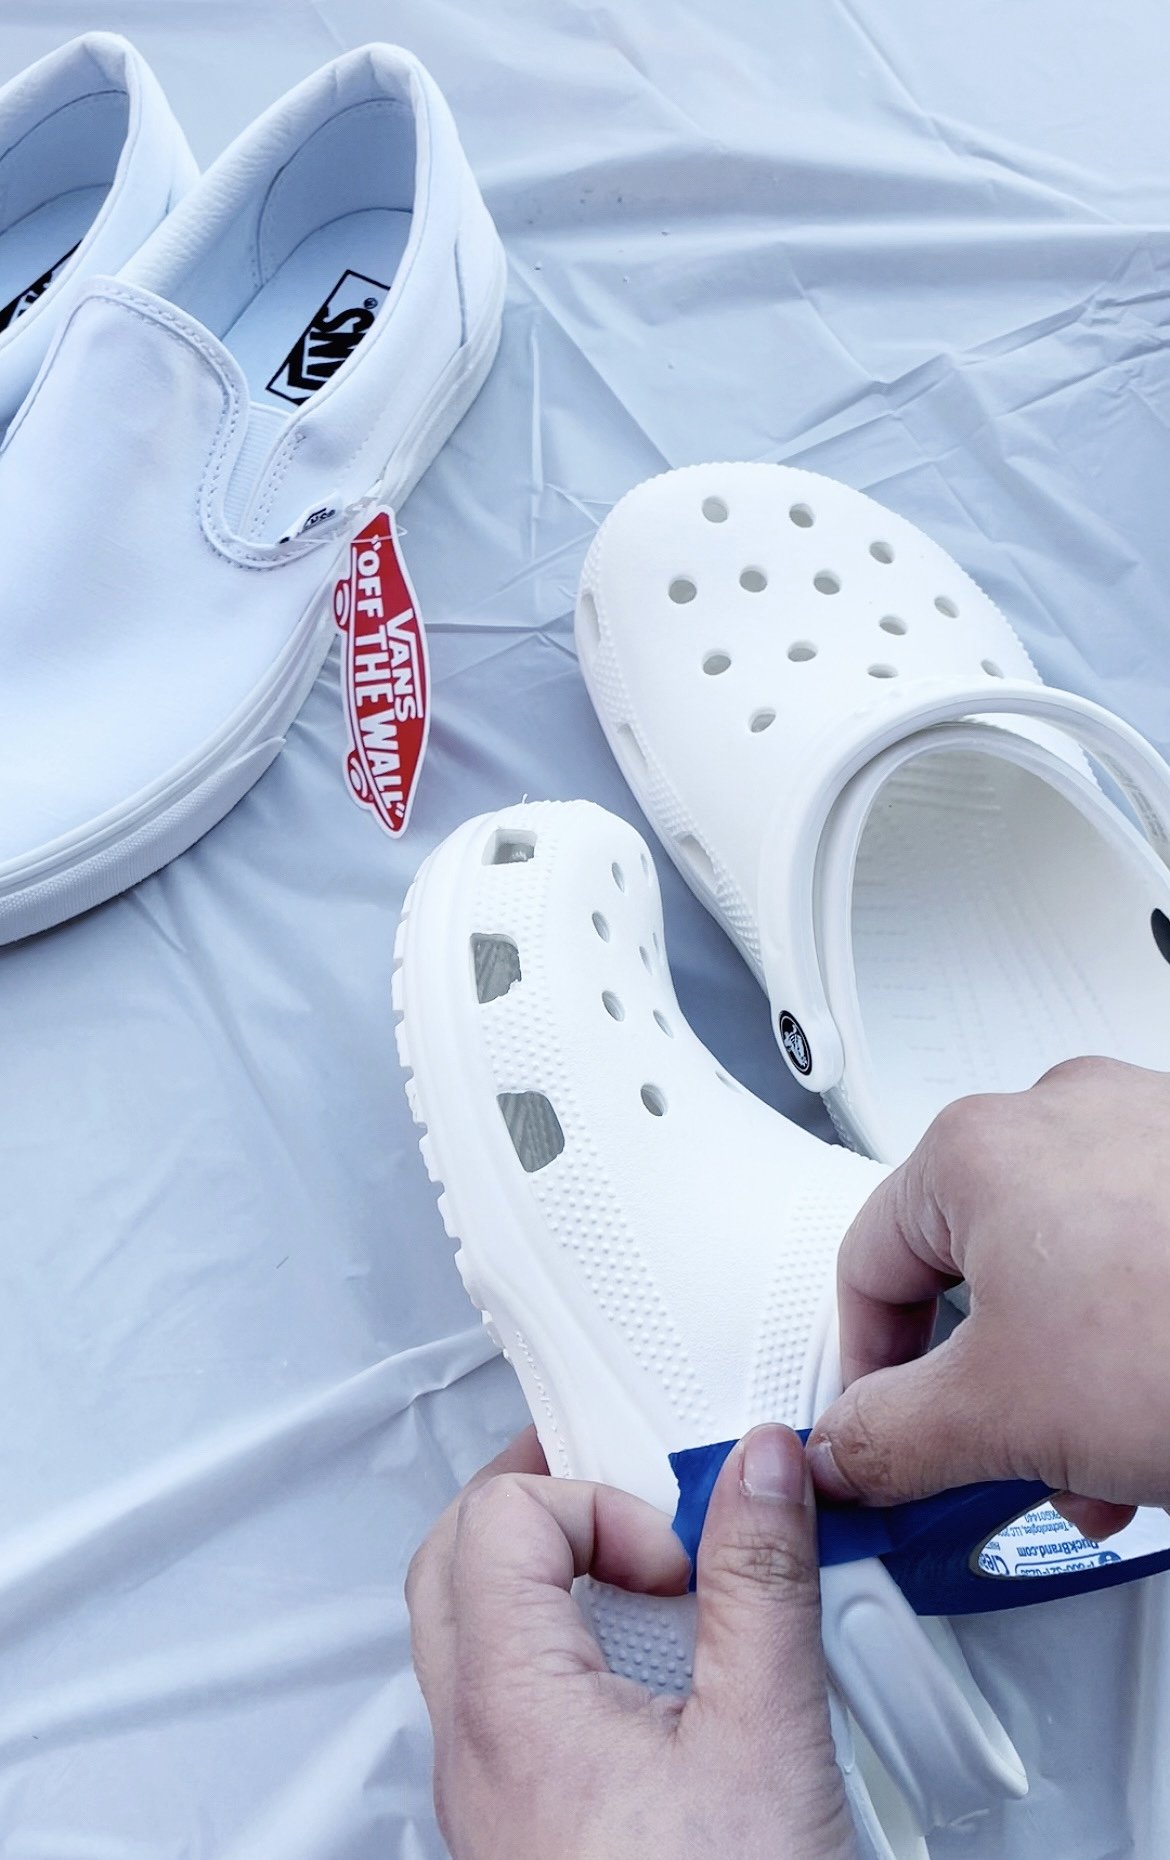
First, let’s talk about materials you will need. You need some white or plain shoes. I picked some Vans Slip On’s and Plain White Crocs for this project. You will need a Plastic Bin for your water. An open space to create your happy mess. Use some mask to avoid inhaling harmful chemicals from the Spray Paint, Gloves, Painter’s Tape, Craft knife And Some Acetone.
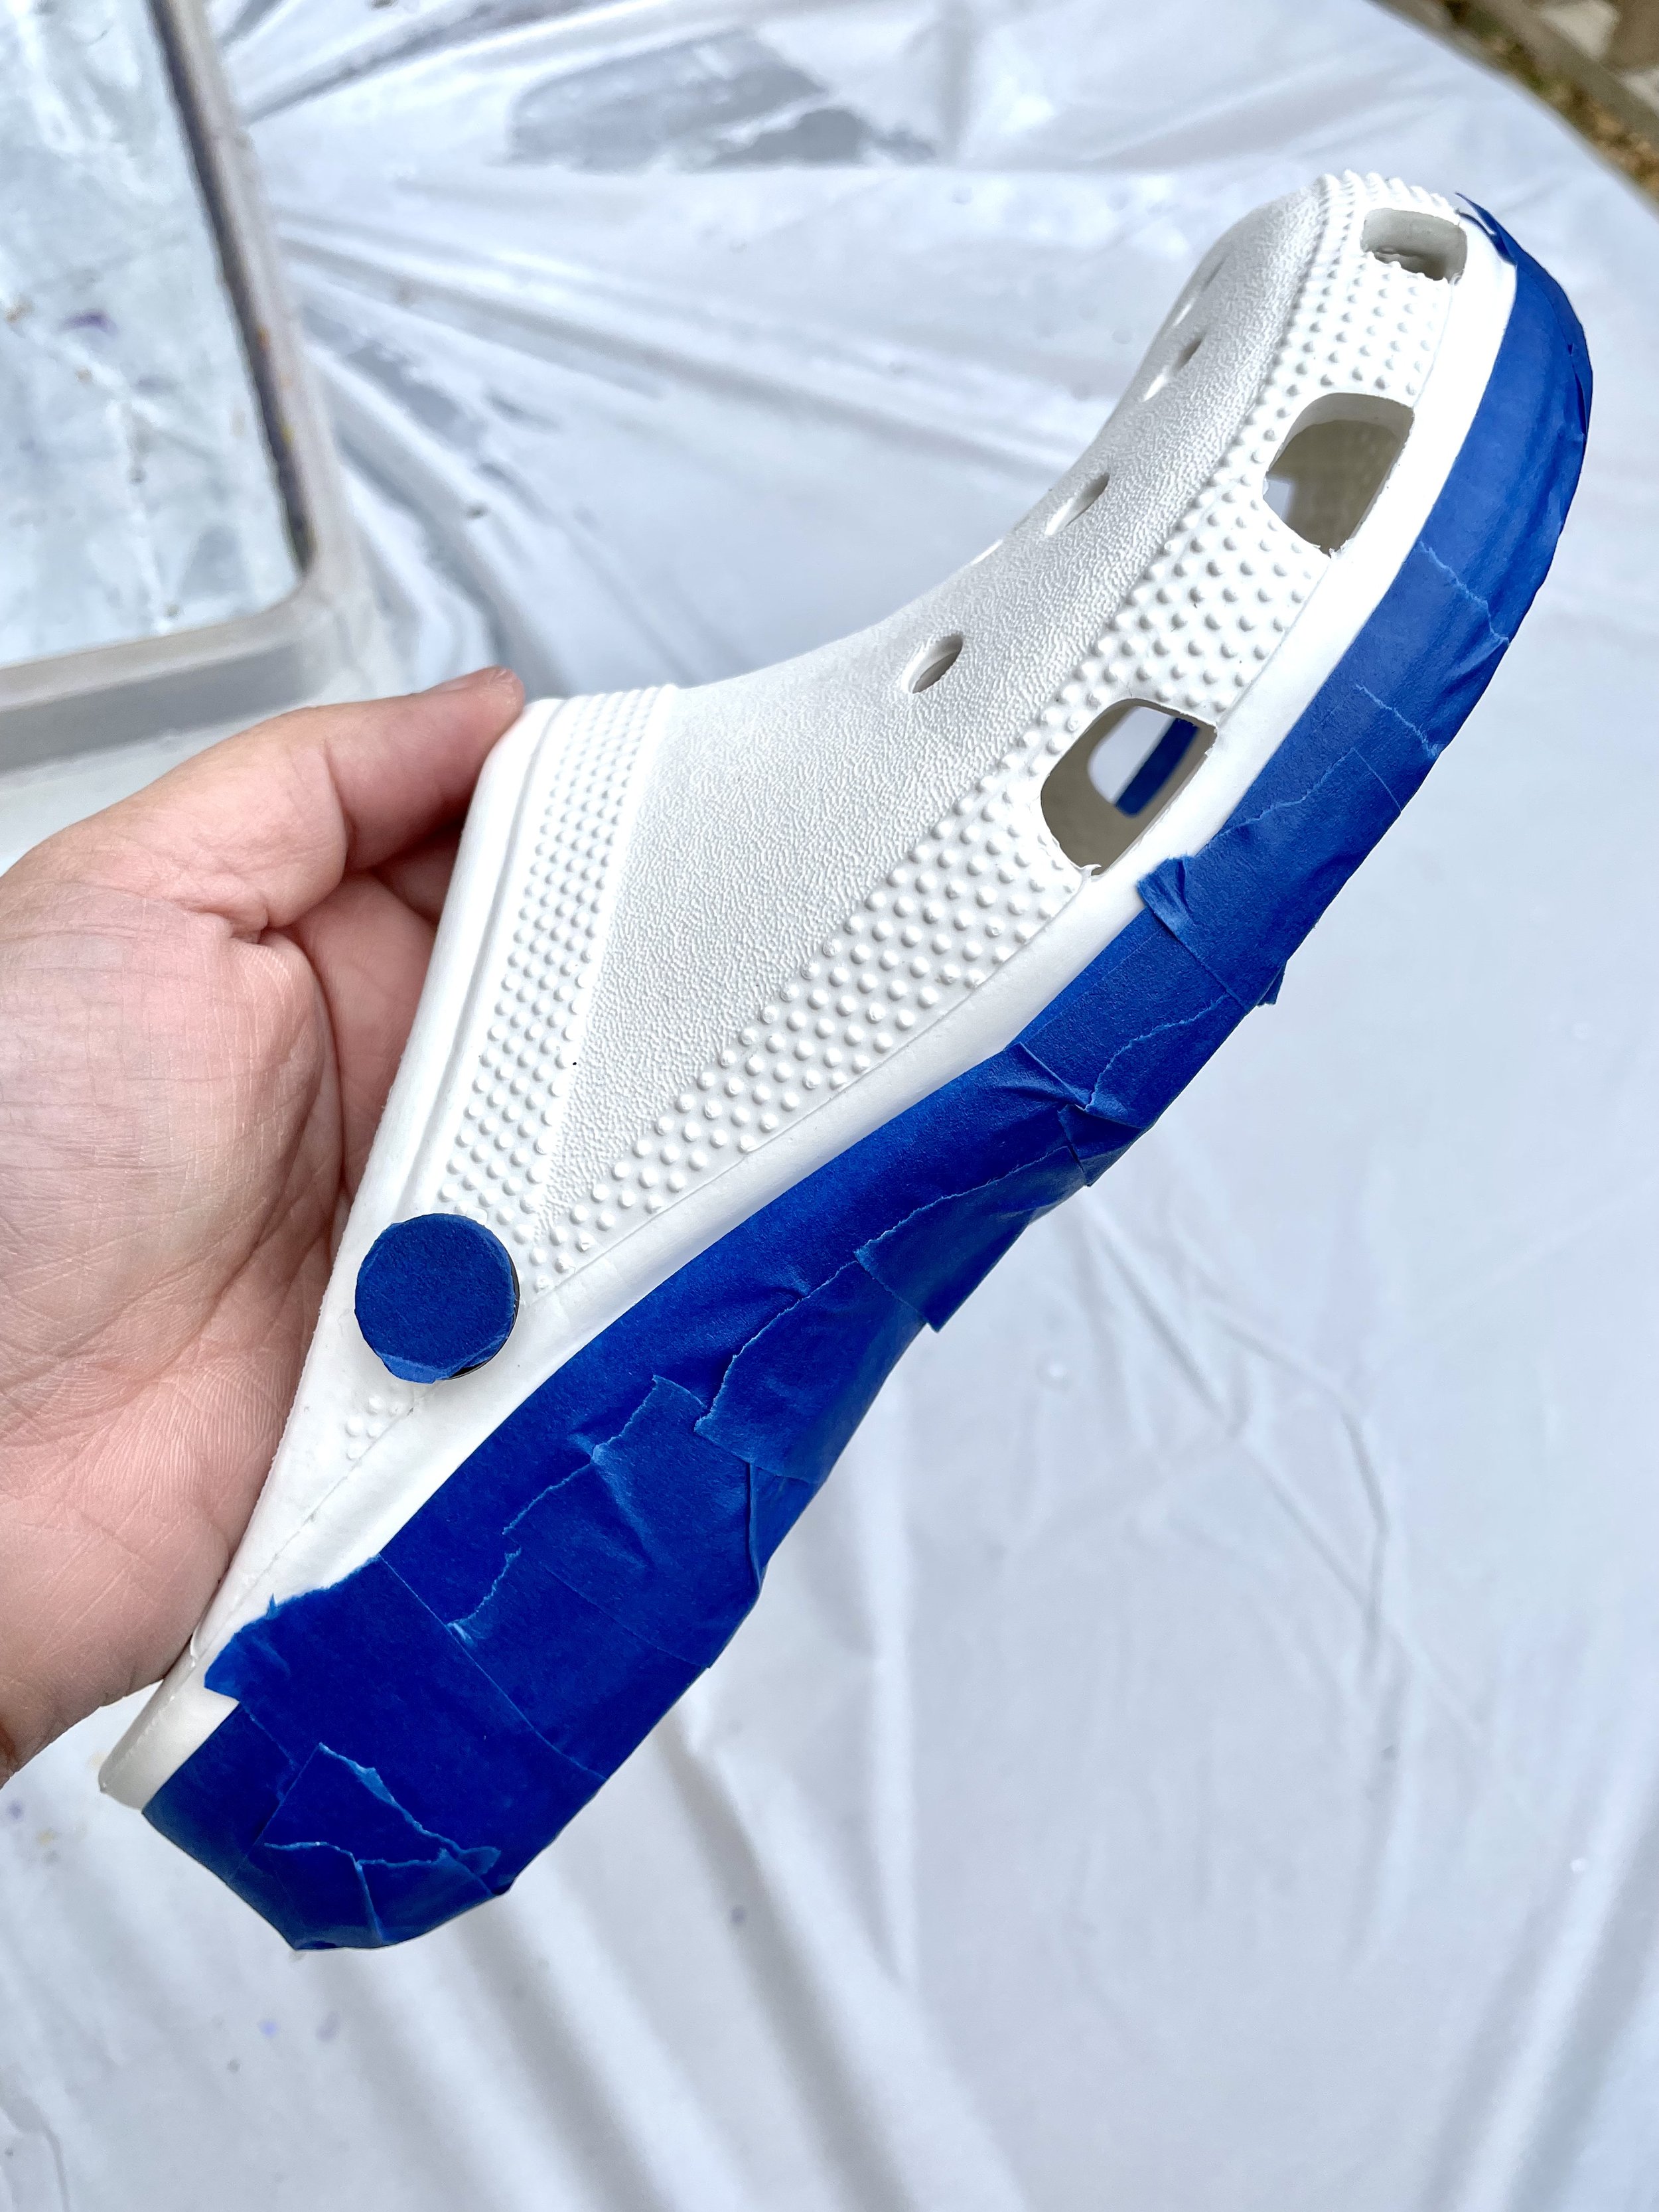
We created two projects with two different materials or surface to paint. The crocs have a plastic/ sleek surface and the Vans is fabric/canvass.
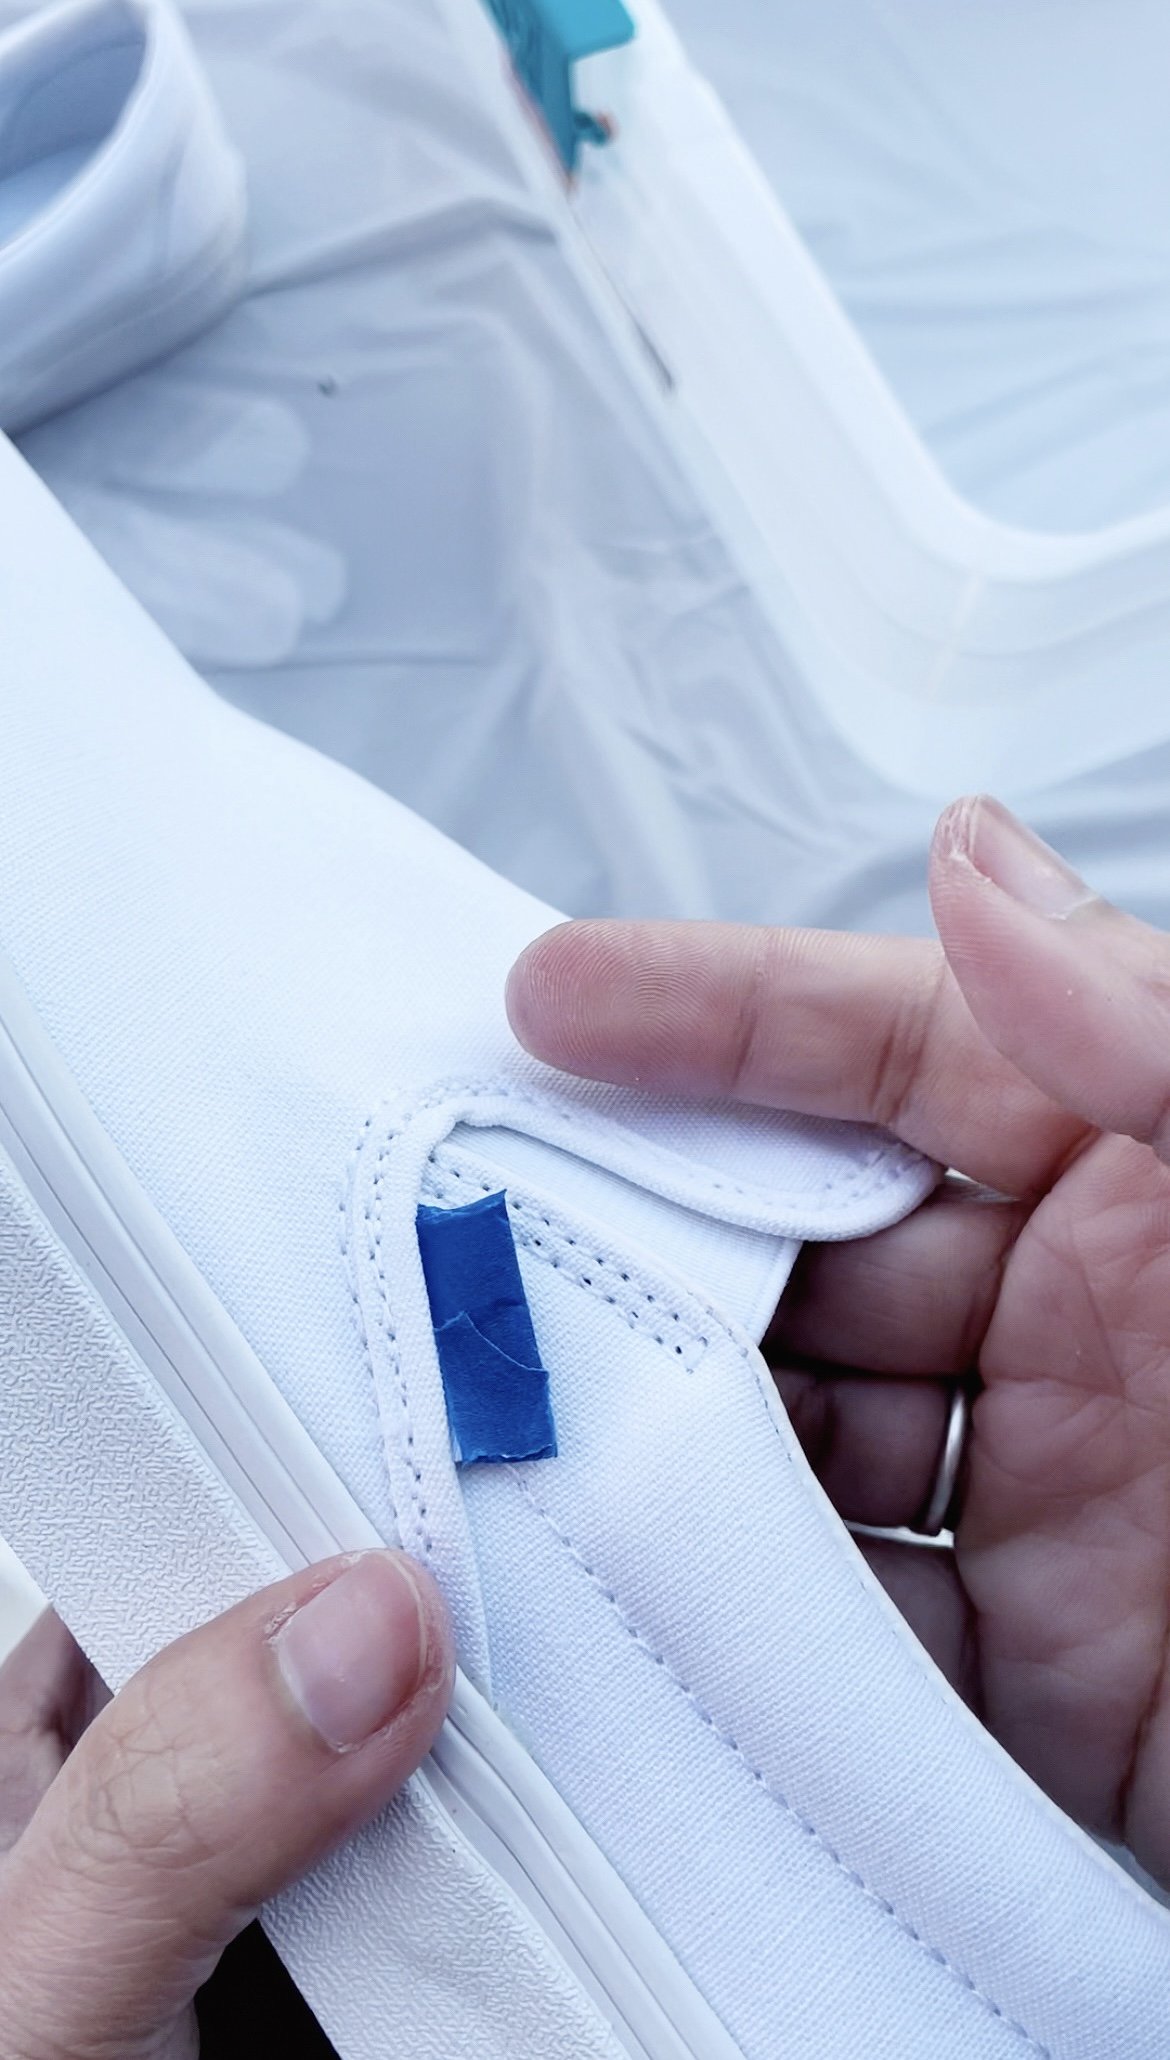
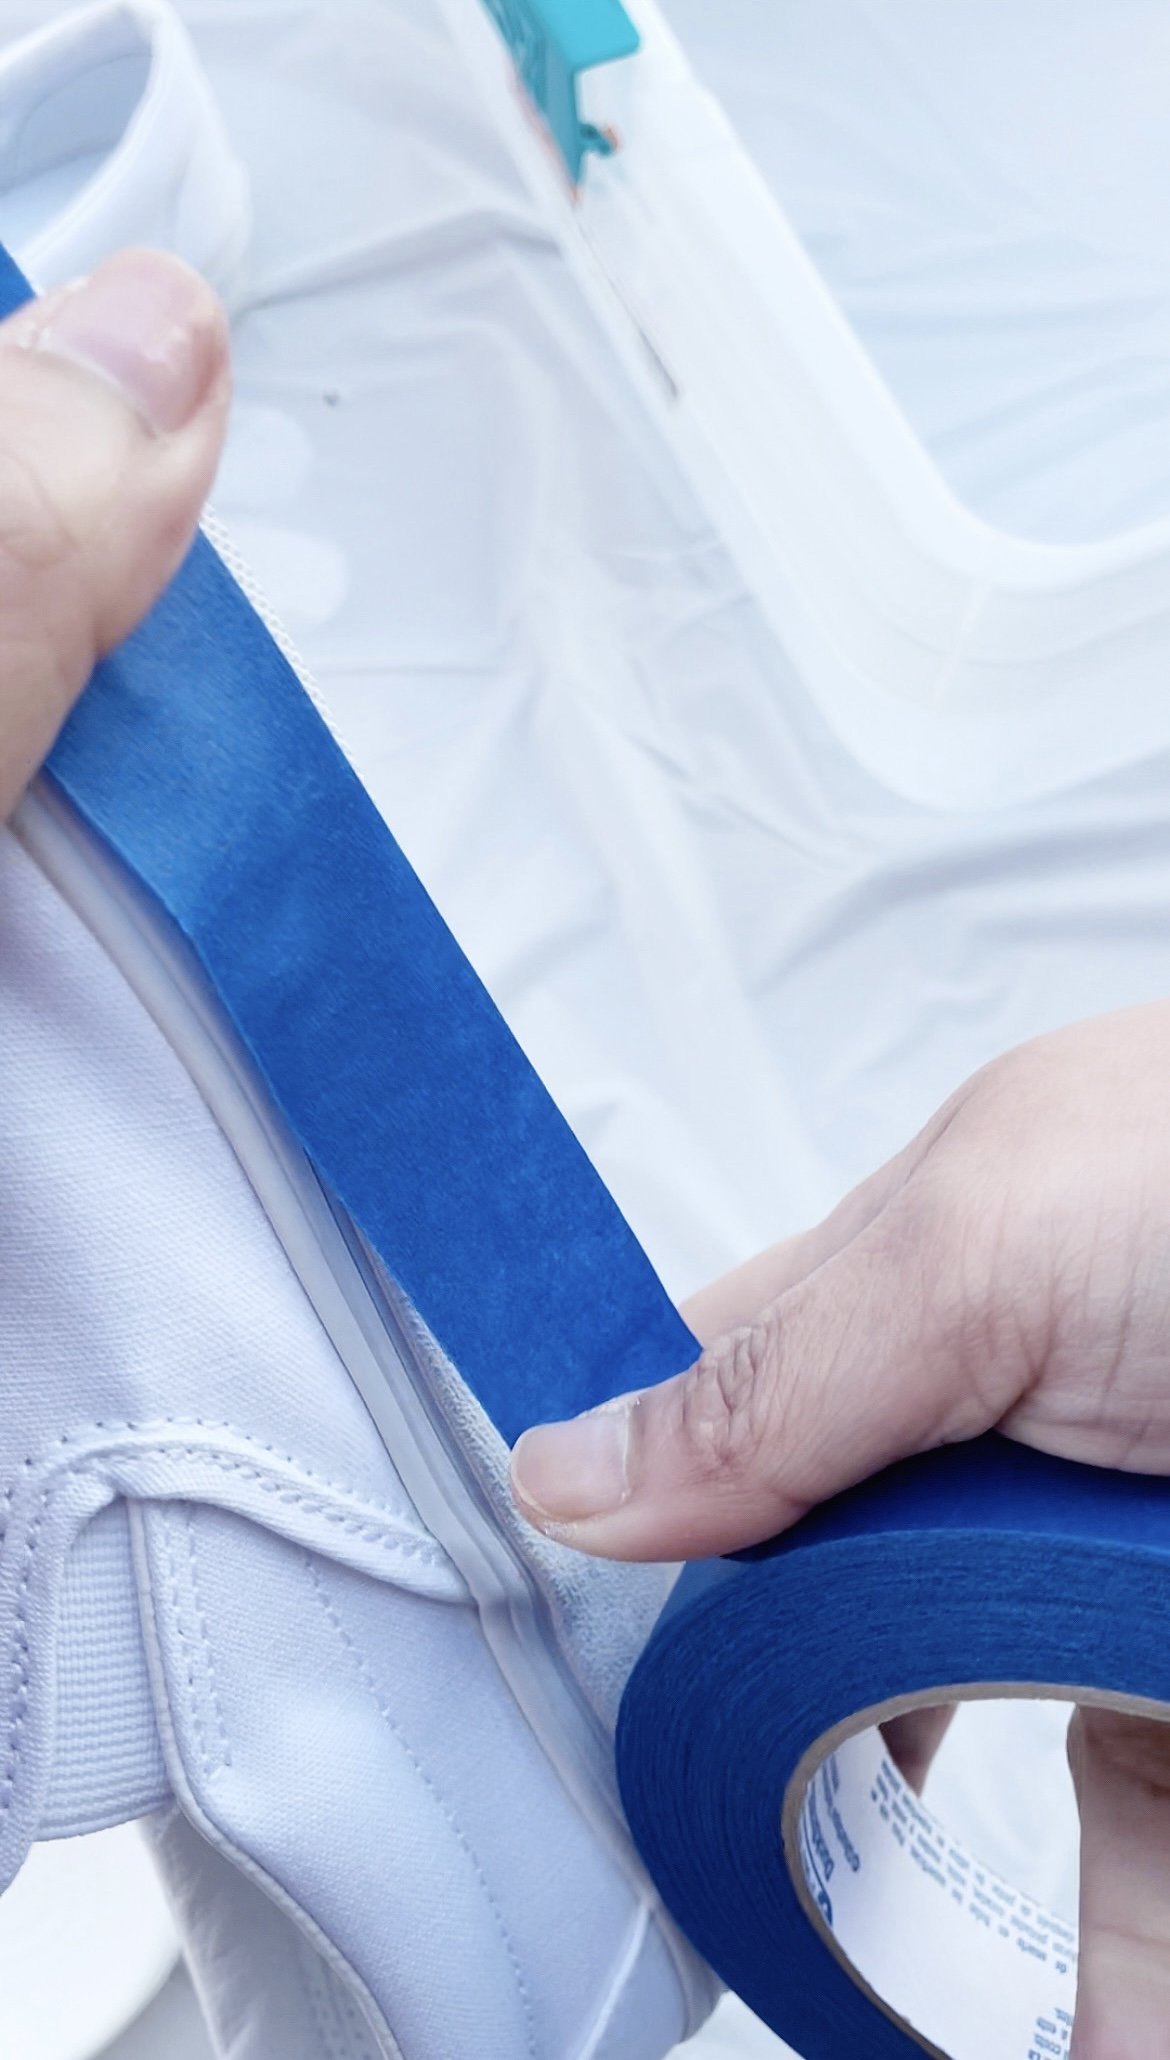
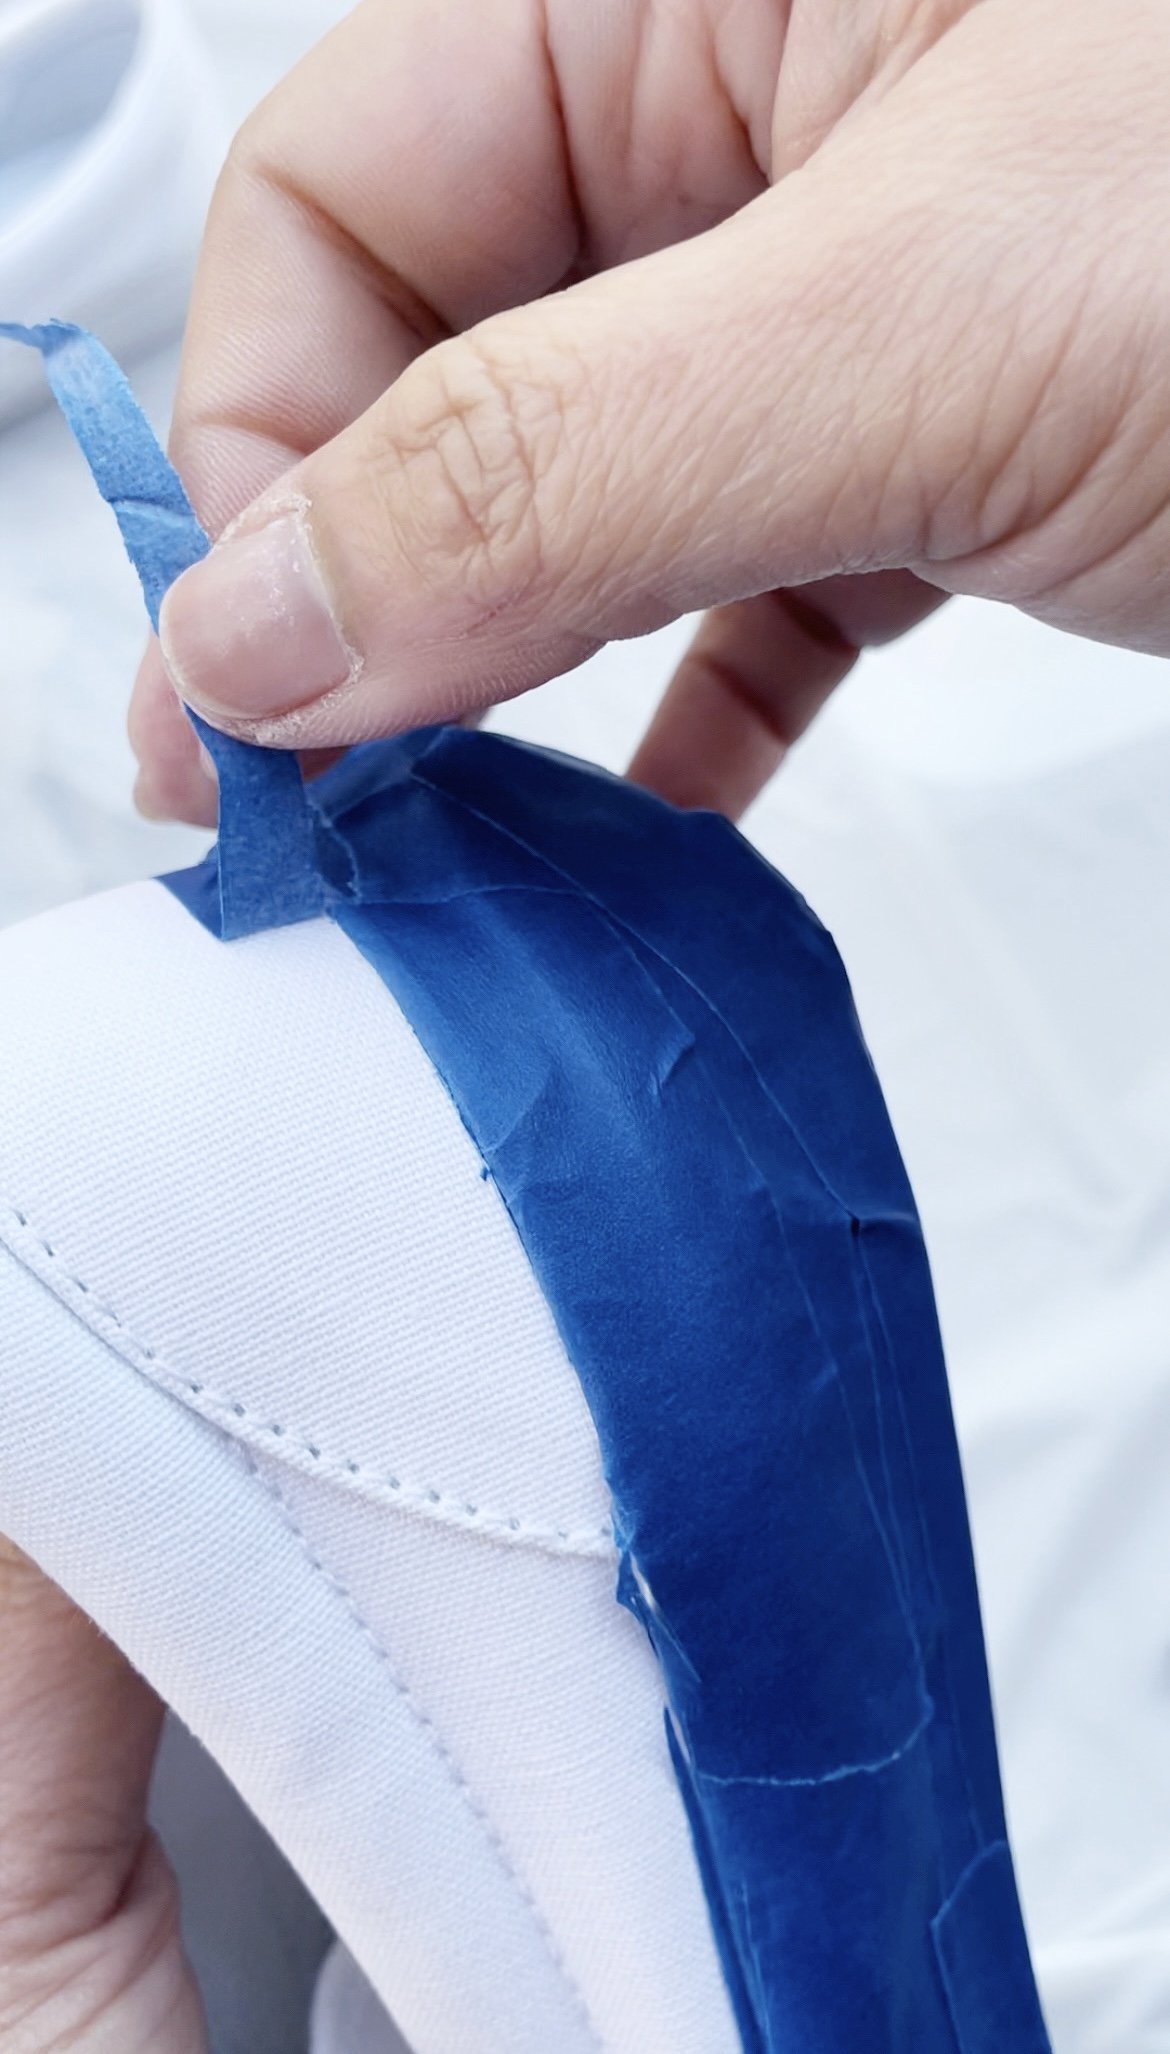
I decided to tape parts of the shoe. This is of course a personal preference. You can dip the whole crocs in the water but I figured the soles are not gonna matter because It’s underneath and will be on the ground, and eventually get ruined. I also took out the strap before dipping.
I also covered the VANS Sides, and the little tag. And then I used a Craft Knife to carefully cut through areas. And peel excess for a clean finish.


Steps to Take:
If you will choose to Hydro Dip your beloved crocs please do not skip this test, it is very important. Use an ACETONE to wipe all over your shoes to strip away the Factory Finish Coating. You need a clean base so that the paint will stick and adhere.

Prepare your work area. It is better to do this outside. And preferably not a windy day. The day we worked on this it was super windy, and it’s just so much harder.
Fill your bin with water. Ours was Room temperature water, not hot and not cold. (Sounded like Goldilocks there) Make sure that your bin is deep enough so you can dip your shoes completely.


This is the most important advice I can give! Practice many many times before you dip your expensive shoes. We bought similar shoes with similar finish to practice on. Also, wear your gloves!
Choose your colors and spray in the water. Make sure you don’t spray too close in the water so the paint can travel and create a natural swirl in the water.

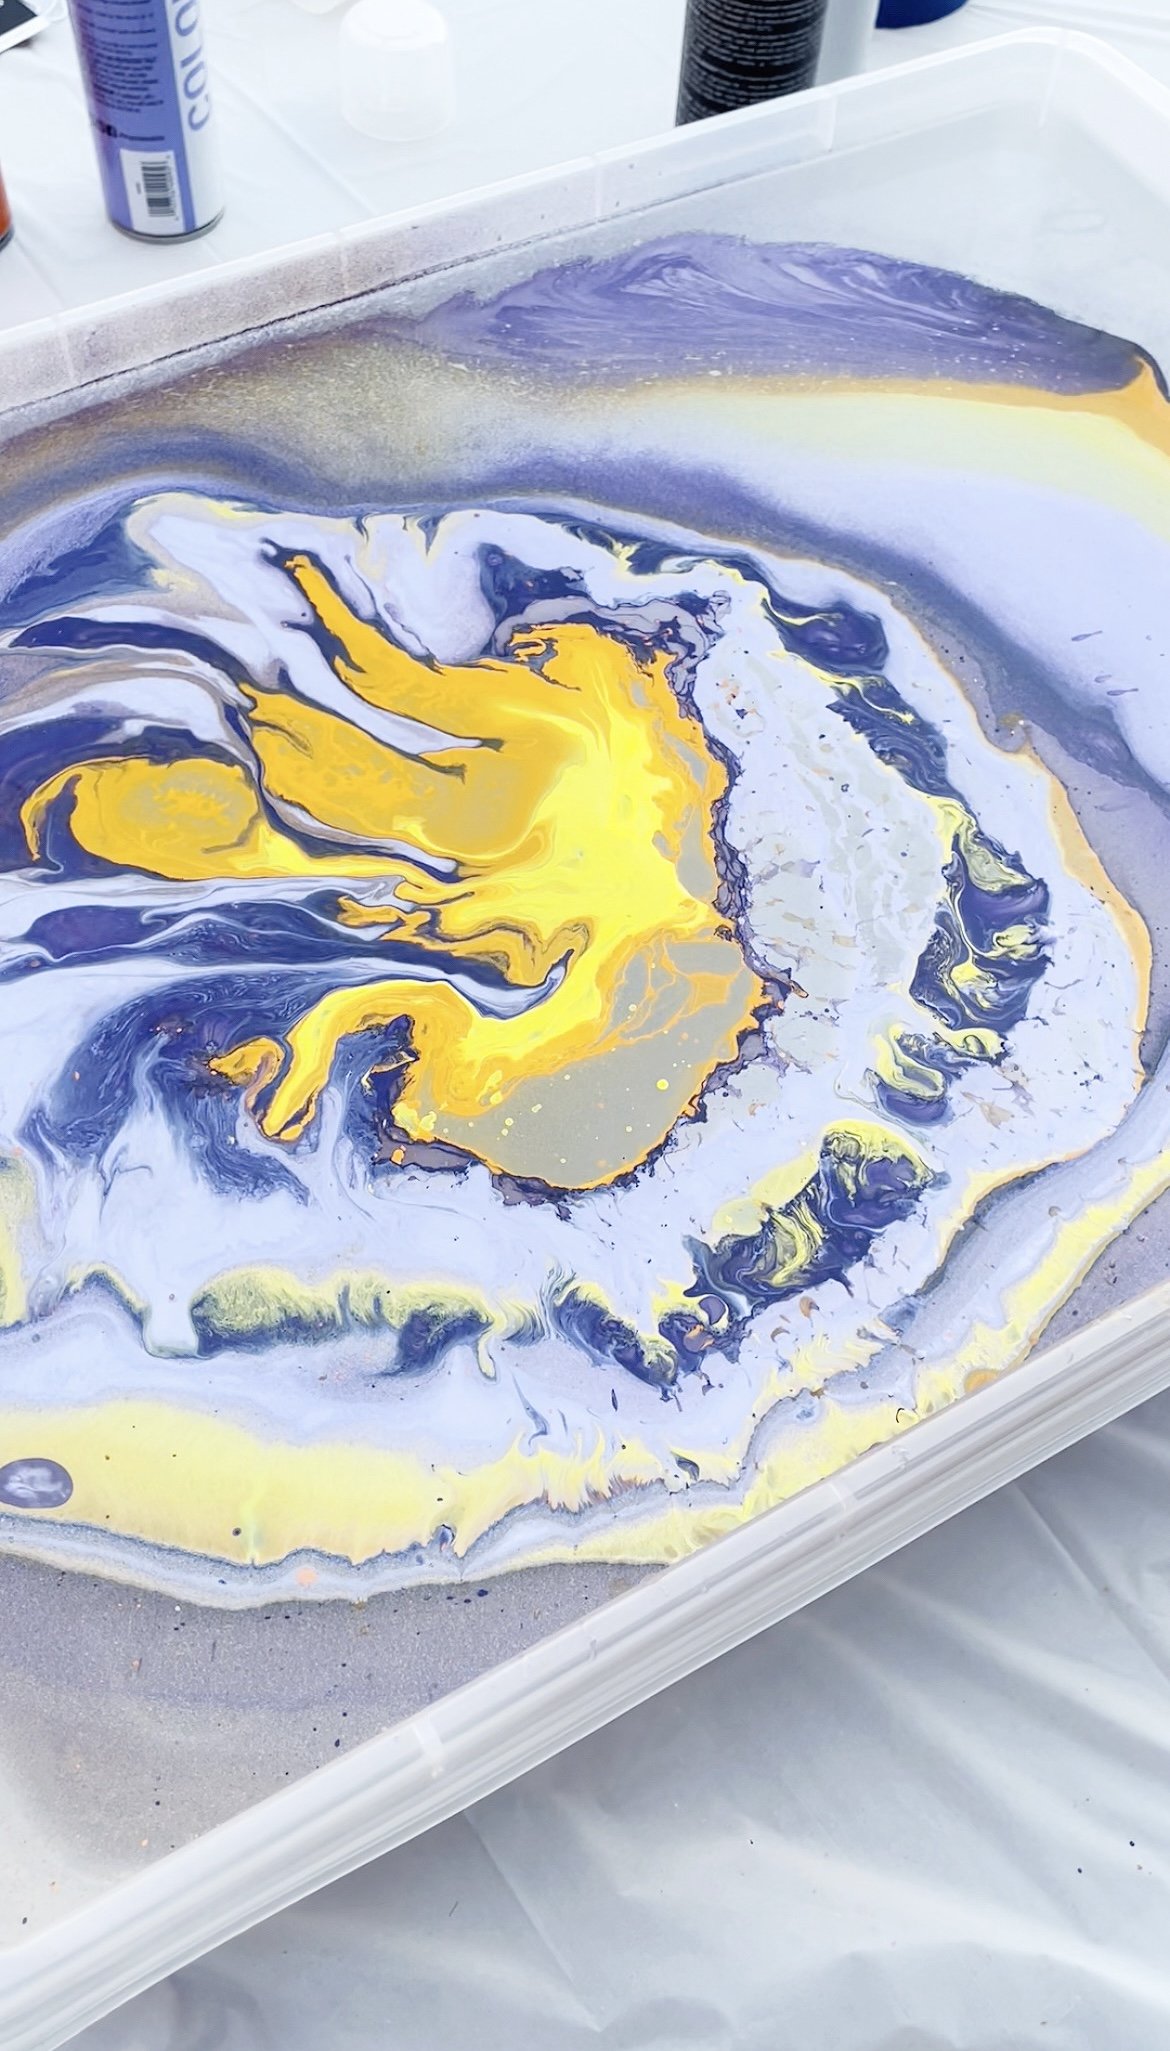
Once you feel happy with the desired effects of the paint. Slowly dip your shoes. Be mindful of the position of your shoes. It’s best to have a relatively 45* Angle. I started with the tip of the shoes and slowly worked my way in. It is important to dip the shoes completely and then quickly clean the surface and swoosh away the rest of the paint (watch the video for reference)
Allow a lot of drying time. And then spray a generous amount of Sealer to seal in the paint.
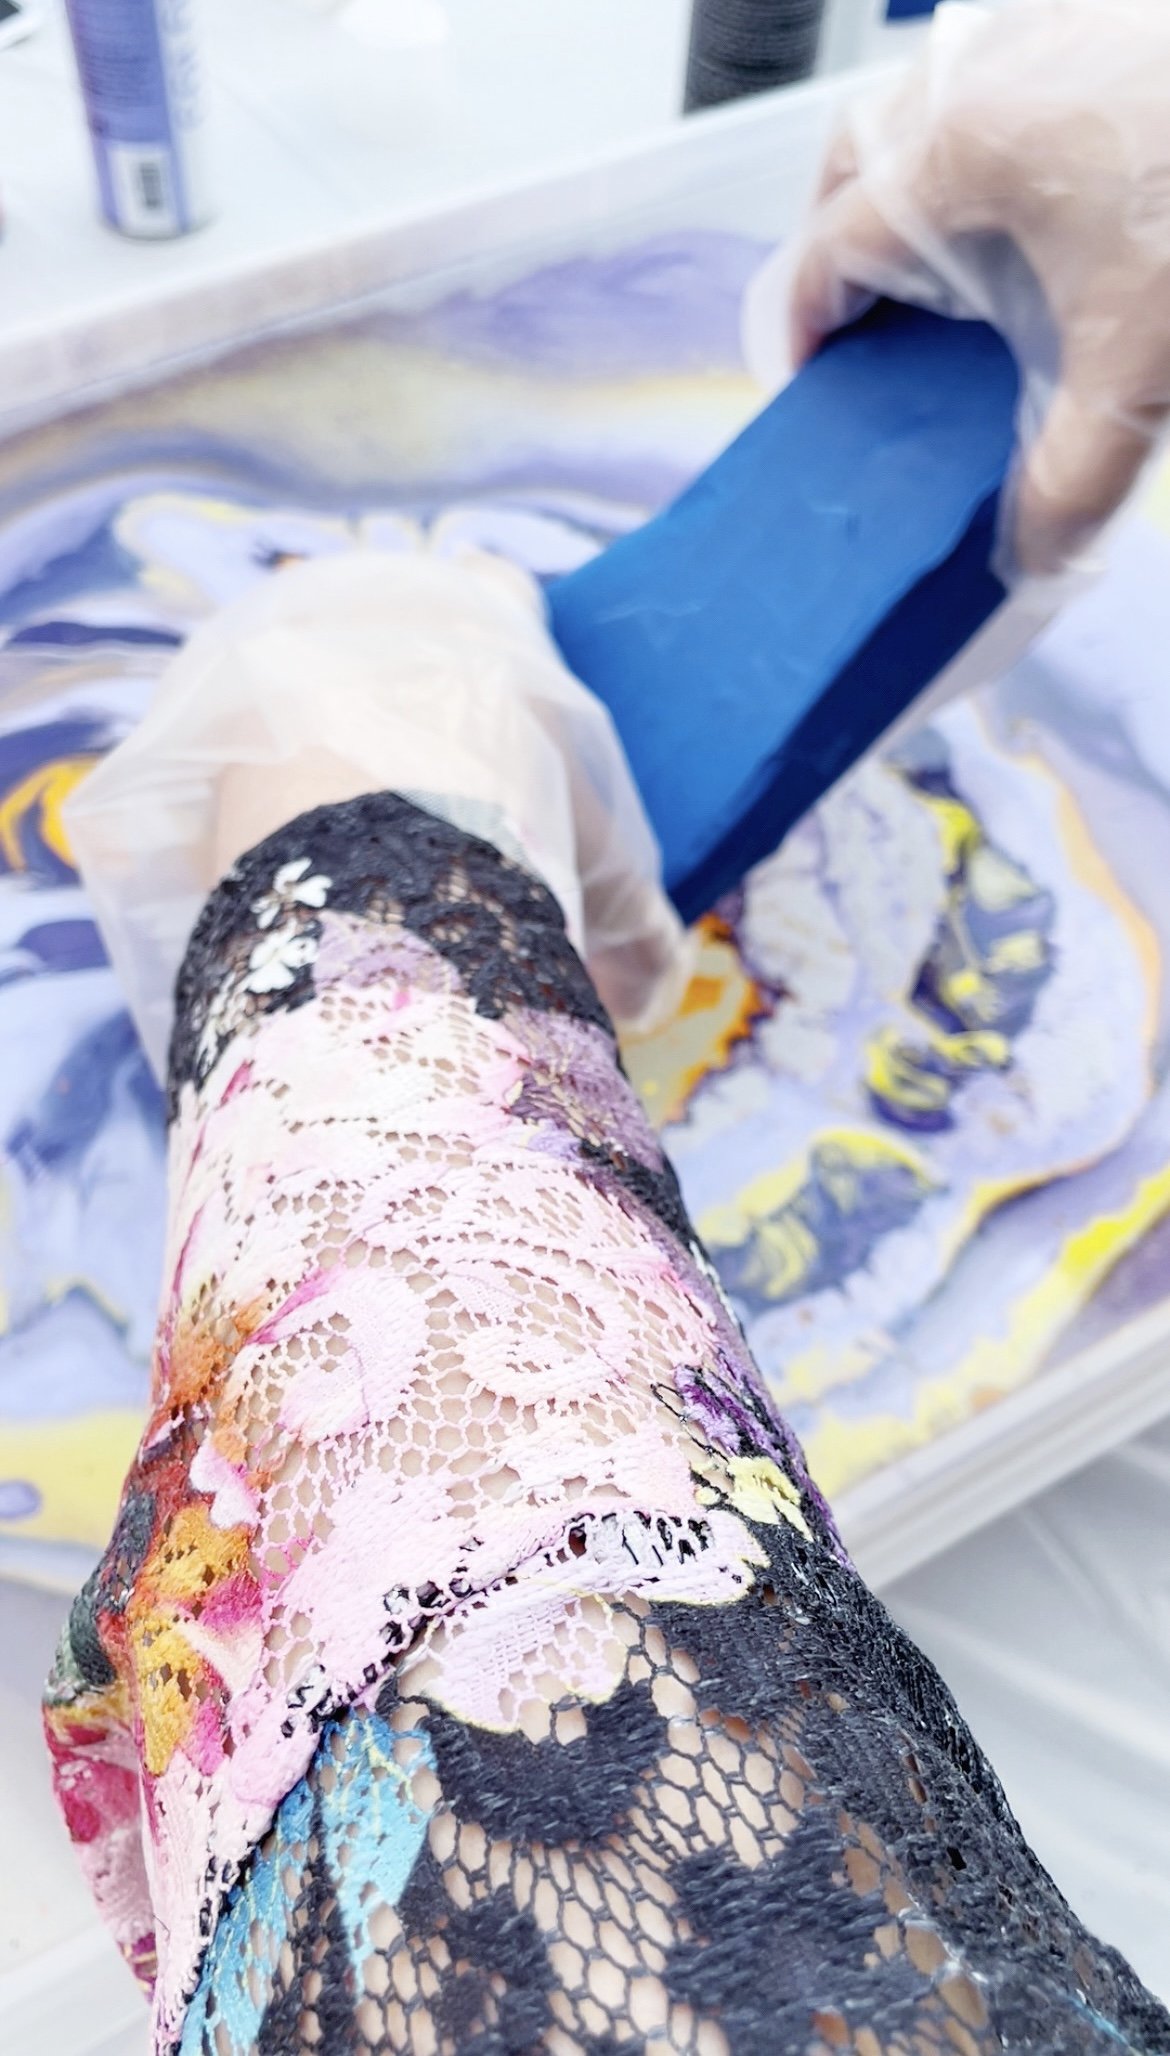
Last step is to enjoy the satisfying pleasure of peeling the tape, lol! :)


Extra Step I added for the galaxy was used a white acrylic paint to create some white splatters.
Here are the colors I picked for the Crocs Project:
Summer Pedicure (Gloss Finish)
Emoji (Gloss Finish)
Orange Slice (Gloss Finish)


Here are the colors for the Galaxy Color Project for the Vans Shoes
Aromatherapy (Gloss)
Center Stage (Gloss)
Hello Handsome (Gloss)
Little Black Dress (Gloss)


This project is definitely Not the easiest to create but definitely so worth it.
I actually enjoyed all the learning curve and all my trial and errors. I think overall, I became a much patient crafter and definitely much wiser.
Lessons Learned:
The process of taping the shoes took the longest.
Spraying Paint was the most Fun.
Dipping the shoes was the most nerve-wracking.
Peeling the tape was satisfying.
Hope you enjoyed this post! And please show some love and check out today’s post sponsor:
WEBSITE: https://www.mycolorshot.com
My Color Shot Spray Paints are also now available at Walmart!

COLORSHOT (@mycolorshot) • Instagram photos and videos
Thank you for letting me be part of your crafty life! Until next project.
Stay Creative & Stay Happy!
Love,
Lhey
Tulip Festival Body Art
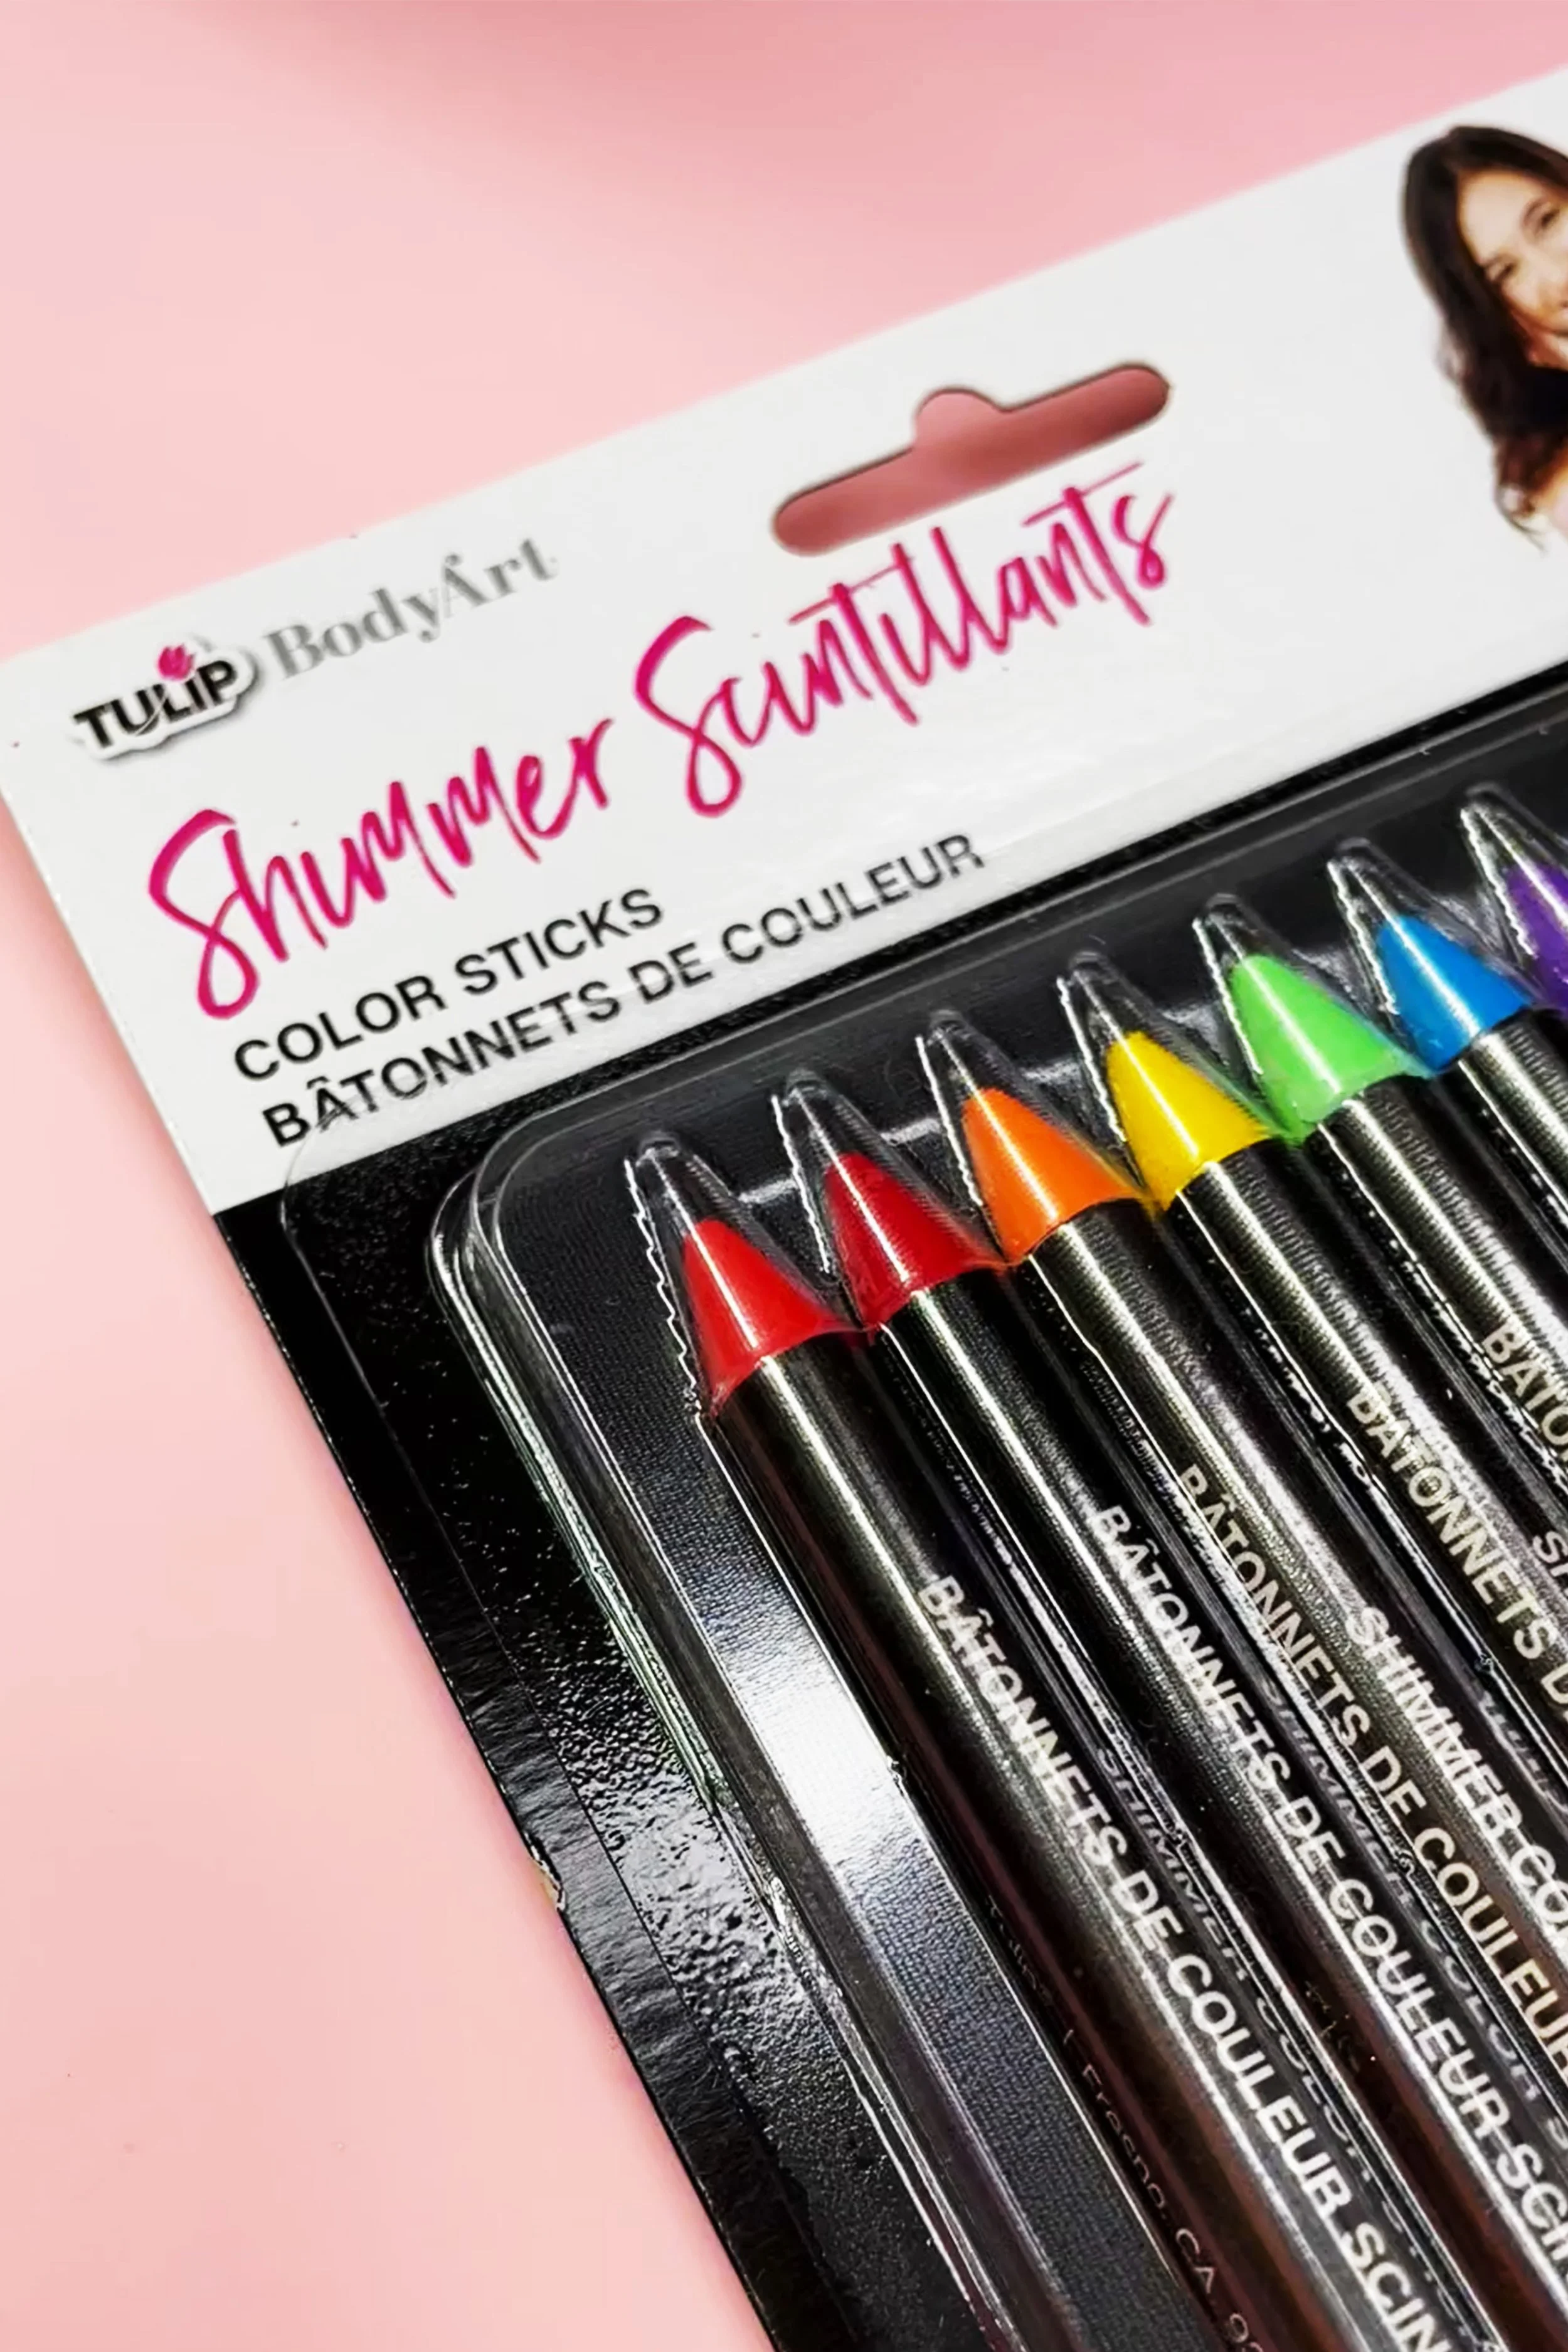
Hey guys! This new project that I want to share with all of you is dear to my heart. Why is that you may ask? Well because when I was a little child I remember I used to love to write on my body. I would doodle, draw and pretend like they were tattoos. And I remember my mom would get so mad because I would come home with lots of body art, but I took the yelling because art’s always been an escape for me. Aside from music, it was one of my favorite escape and a way to express myself. I mean look at what I do now for a living. I get to enjoy creating products using some amazing products like these Body Art Color Sticks from TulipColors.
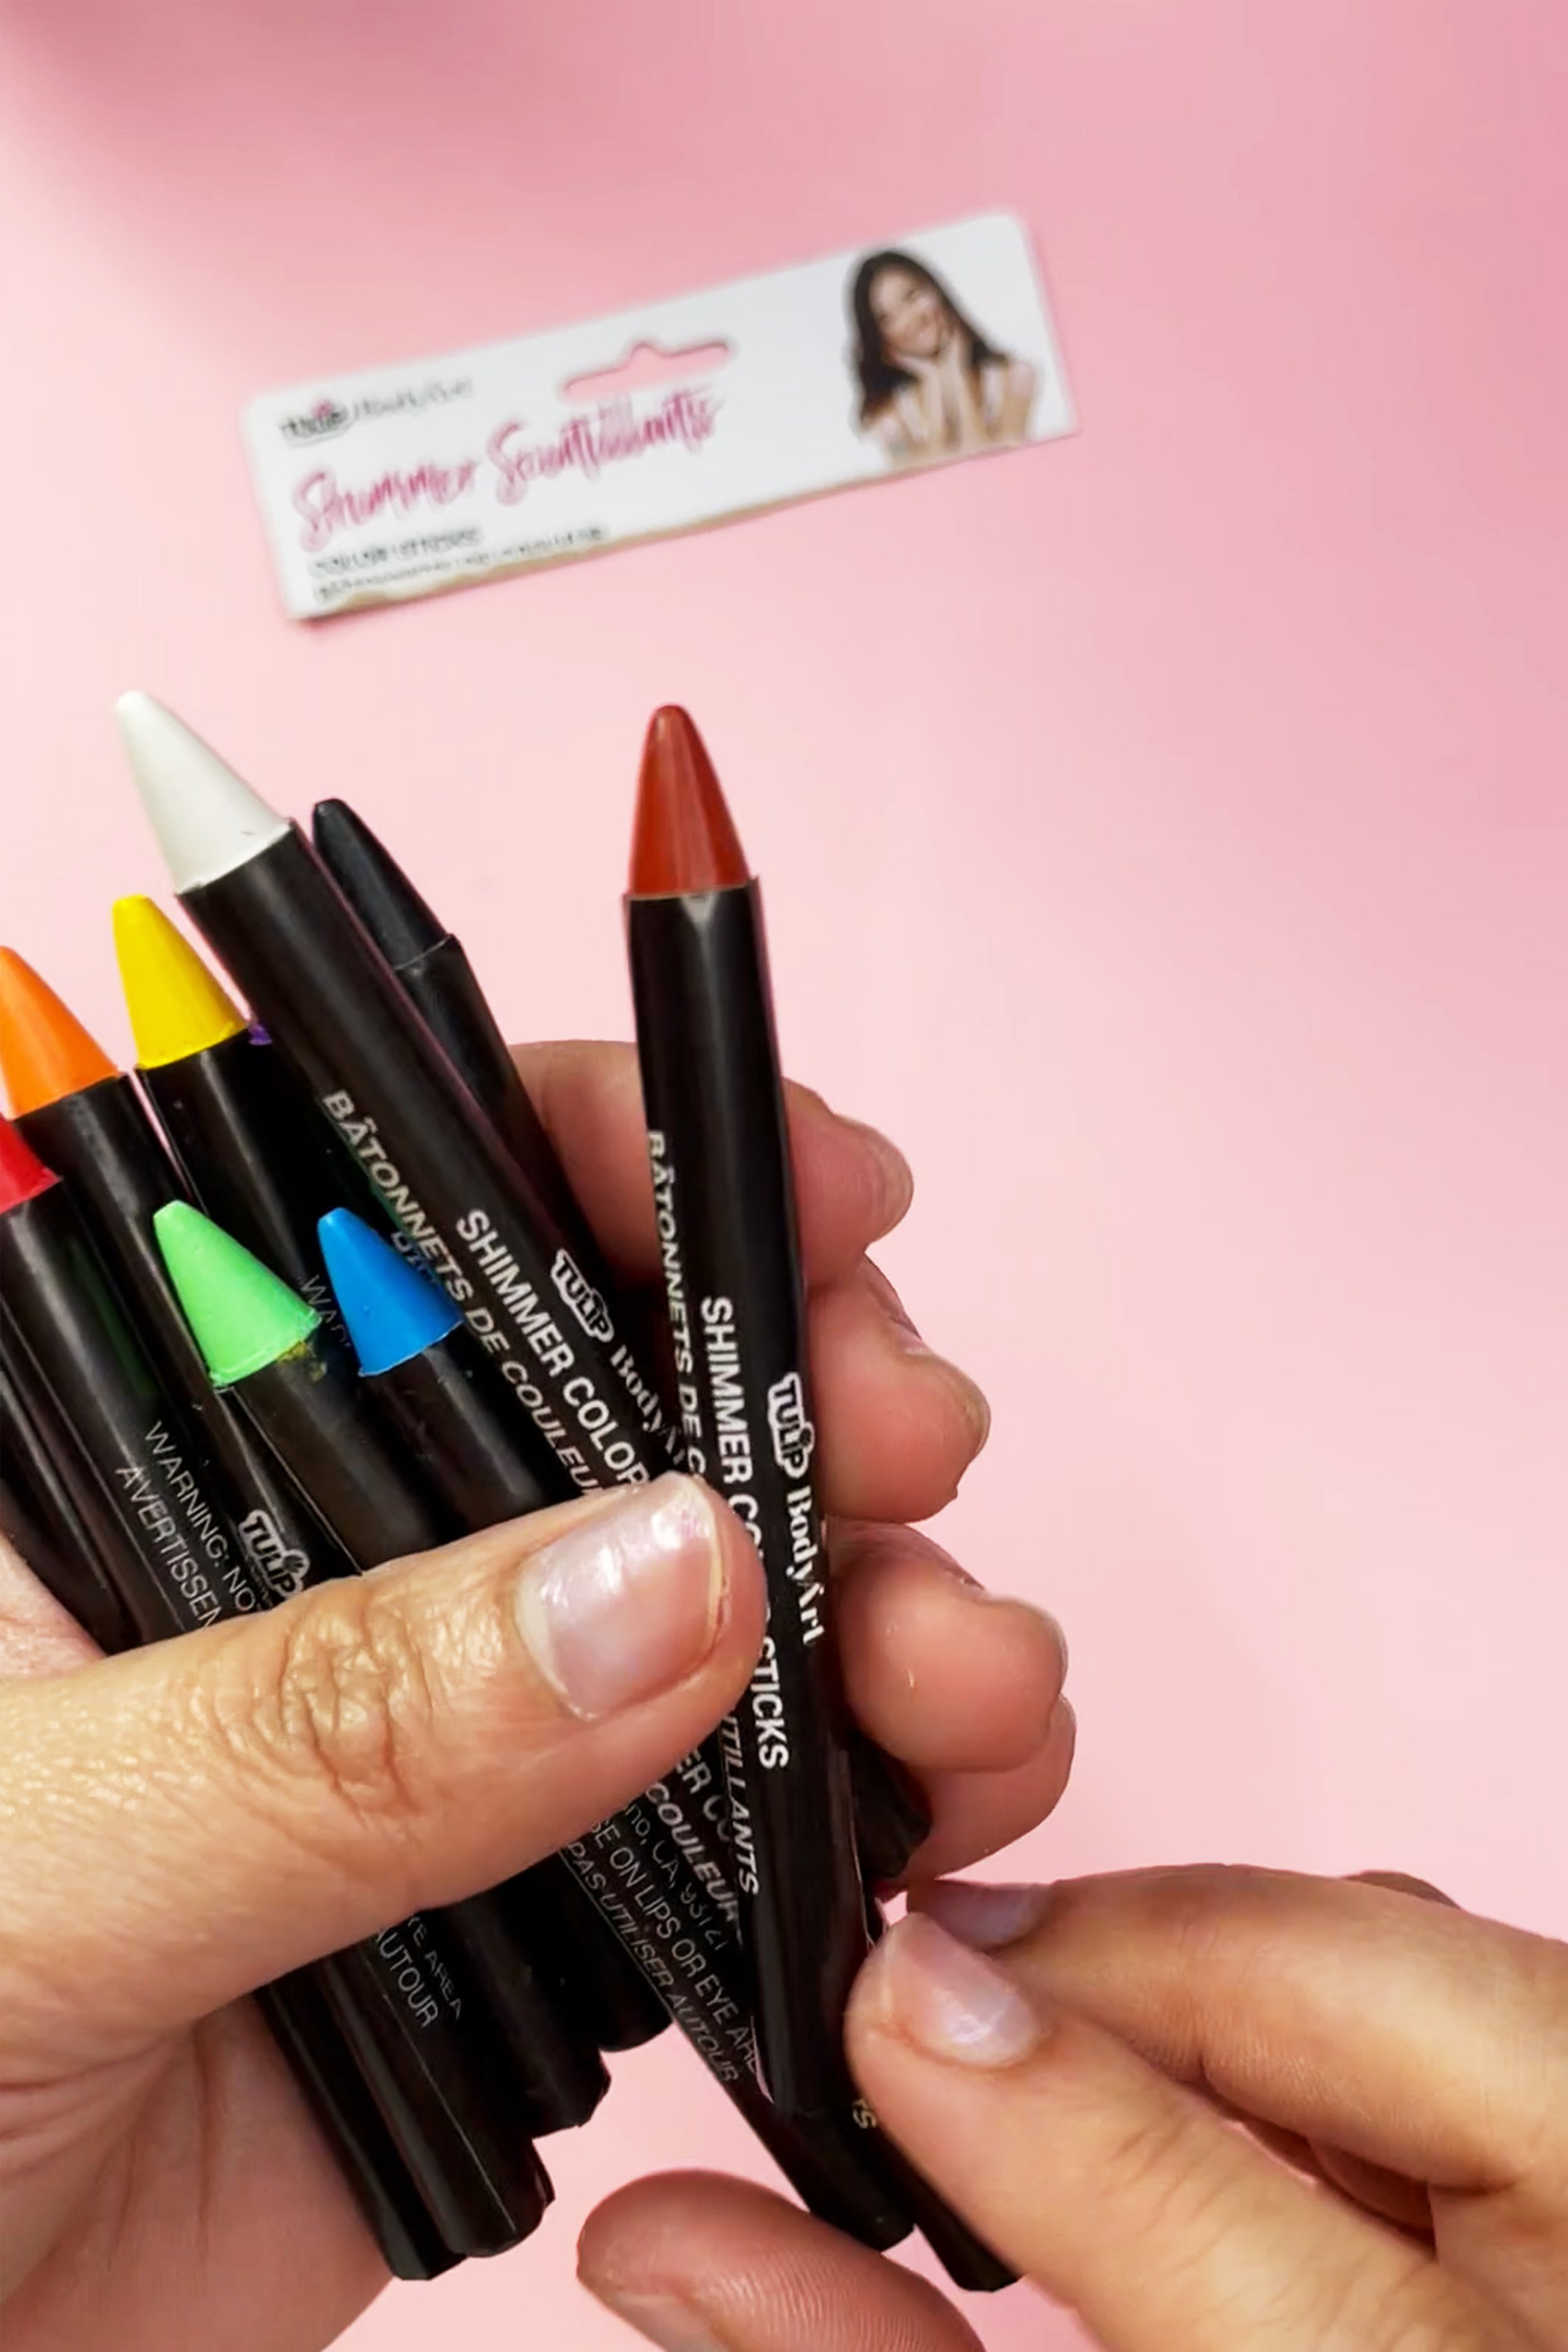
I honestly didn’t know what to expect by looking at them inside their packaging. I wasn’t sure what would the pens feel like. They looked like bright crayons to me. But to my surprise once I started applying them, they felt like creamy lipsticks. So fun.
So okay, let’s do a little housekeeping first. it is recommended that every time you will use a brand new product that you will apply on your skin. Always make sure to test the product first. Apply a small amount on your skin, and see if you will get any reaction from it. And if you feel any Itchiness, or see redness or anything of that sort, please do not proceed using the product.
Before you start drawing, make sure to wash and clean your skin to get rid of any excess oil.
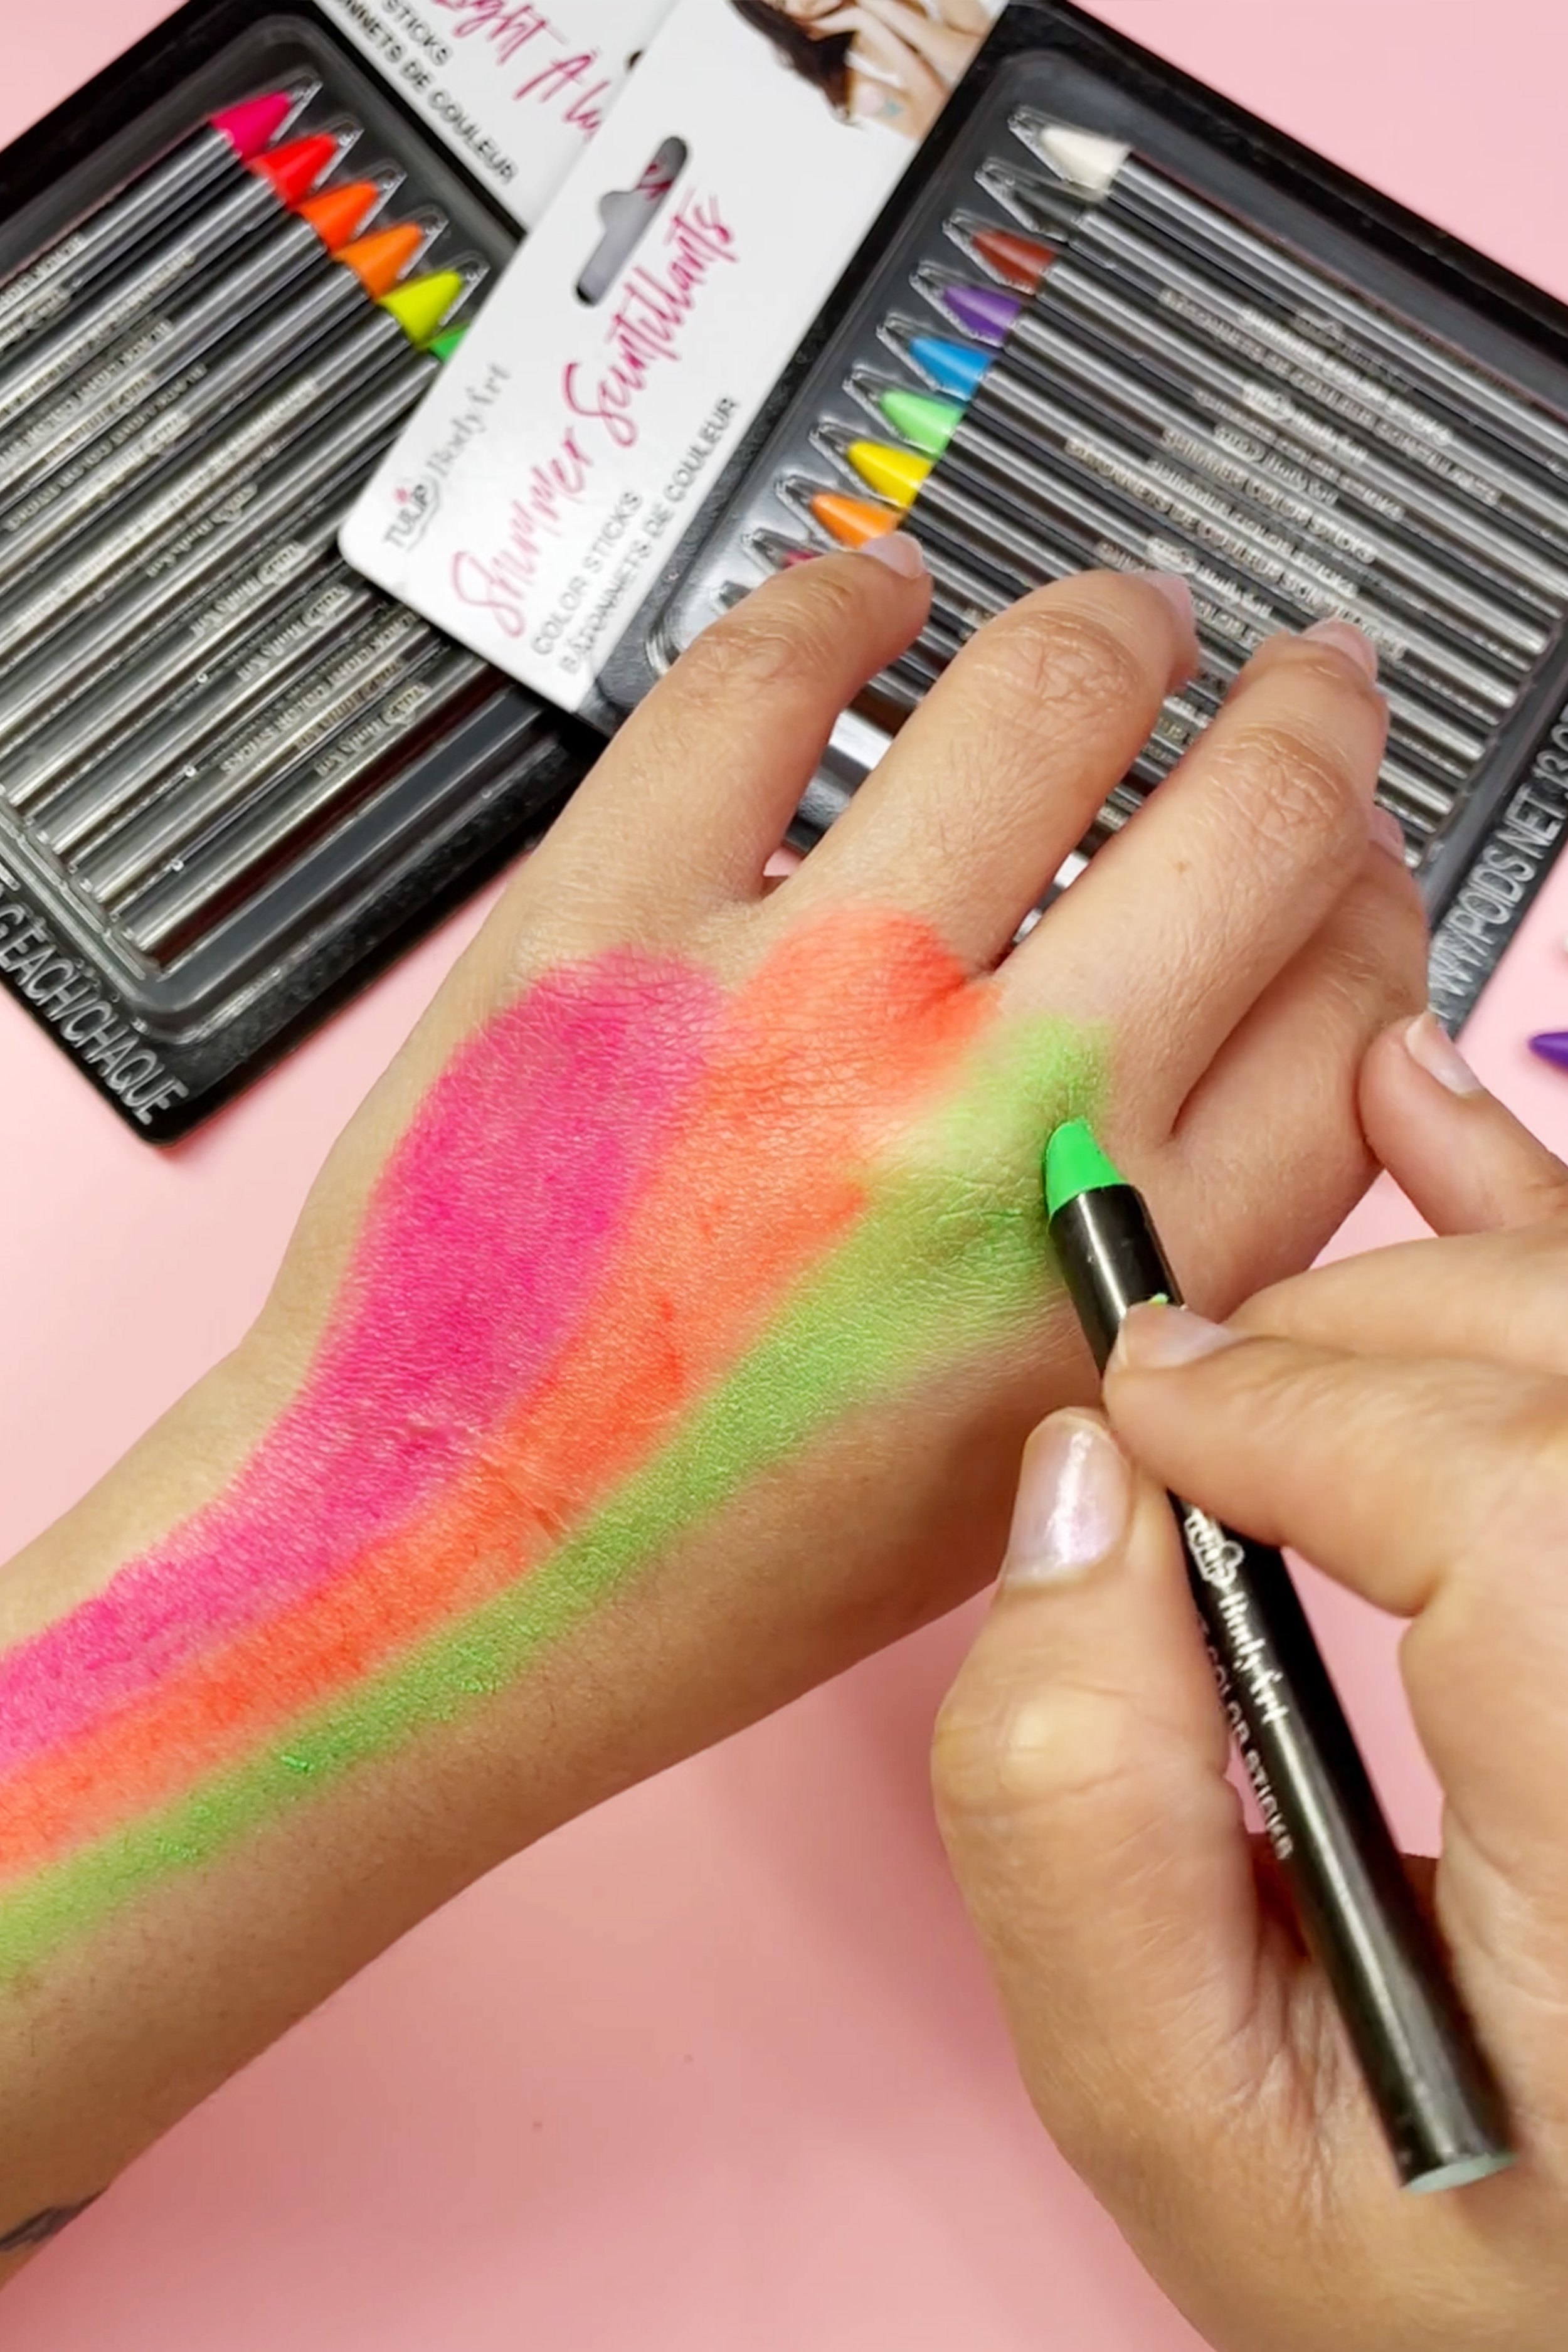

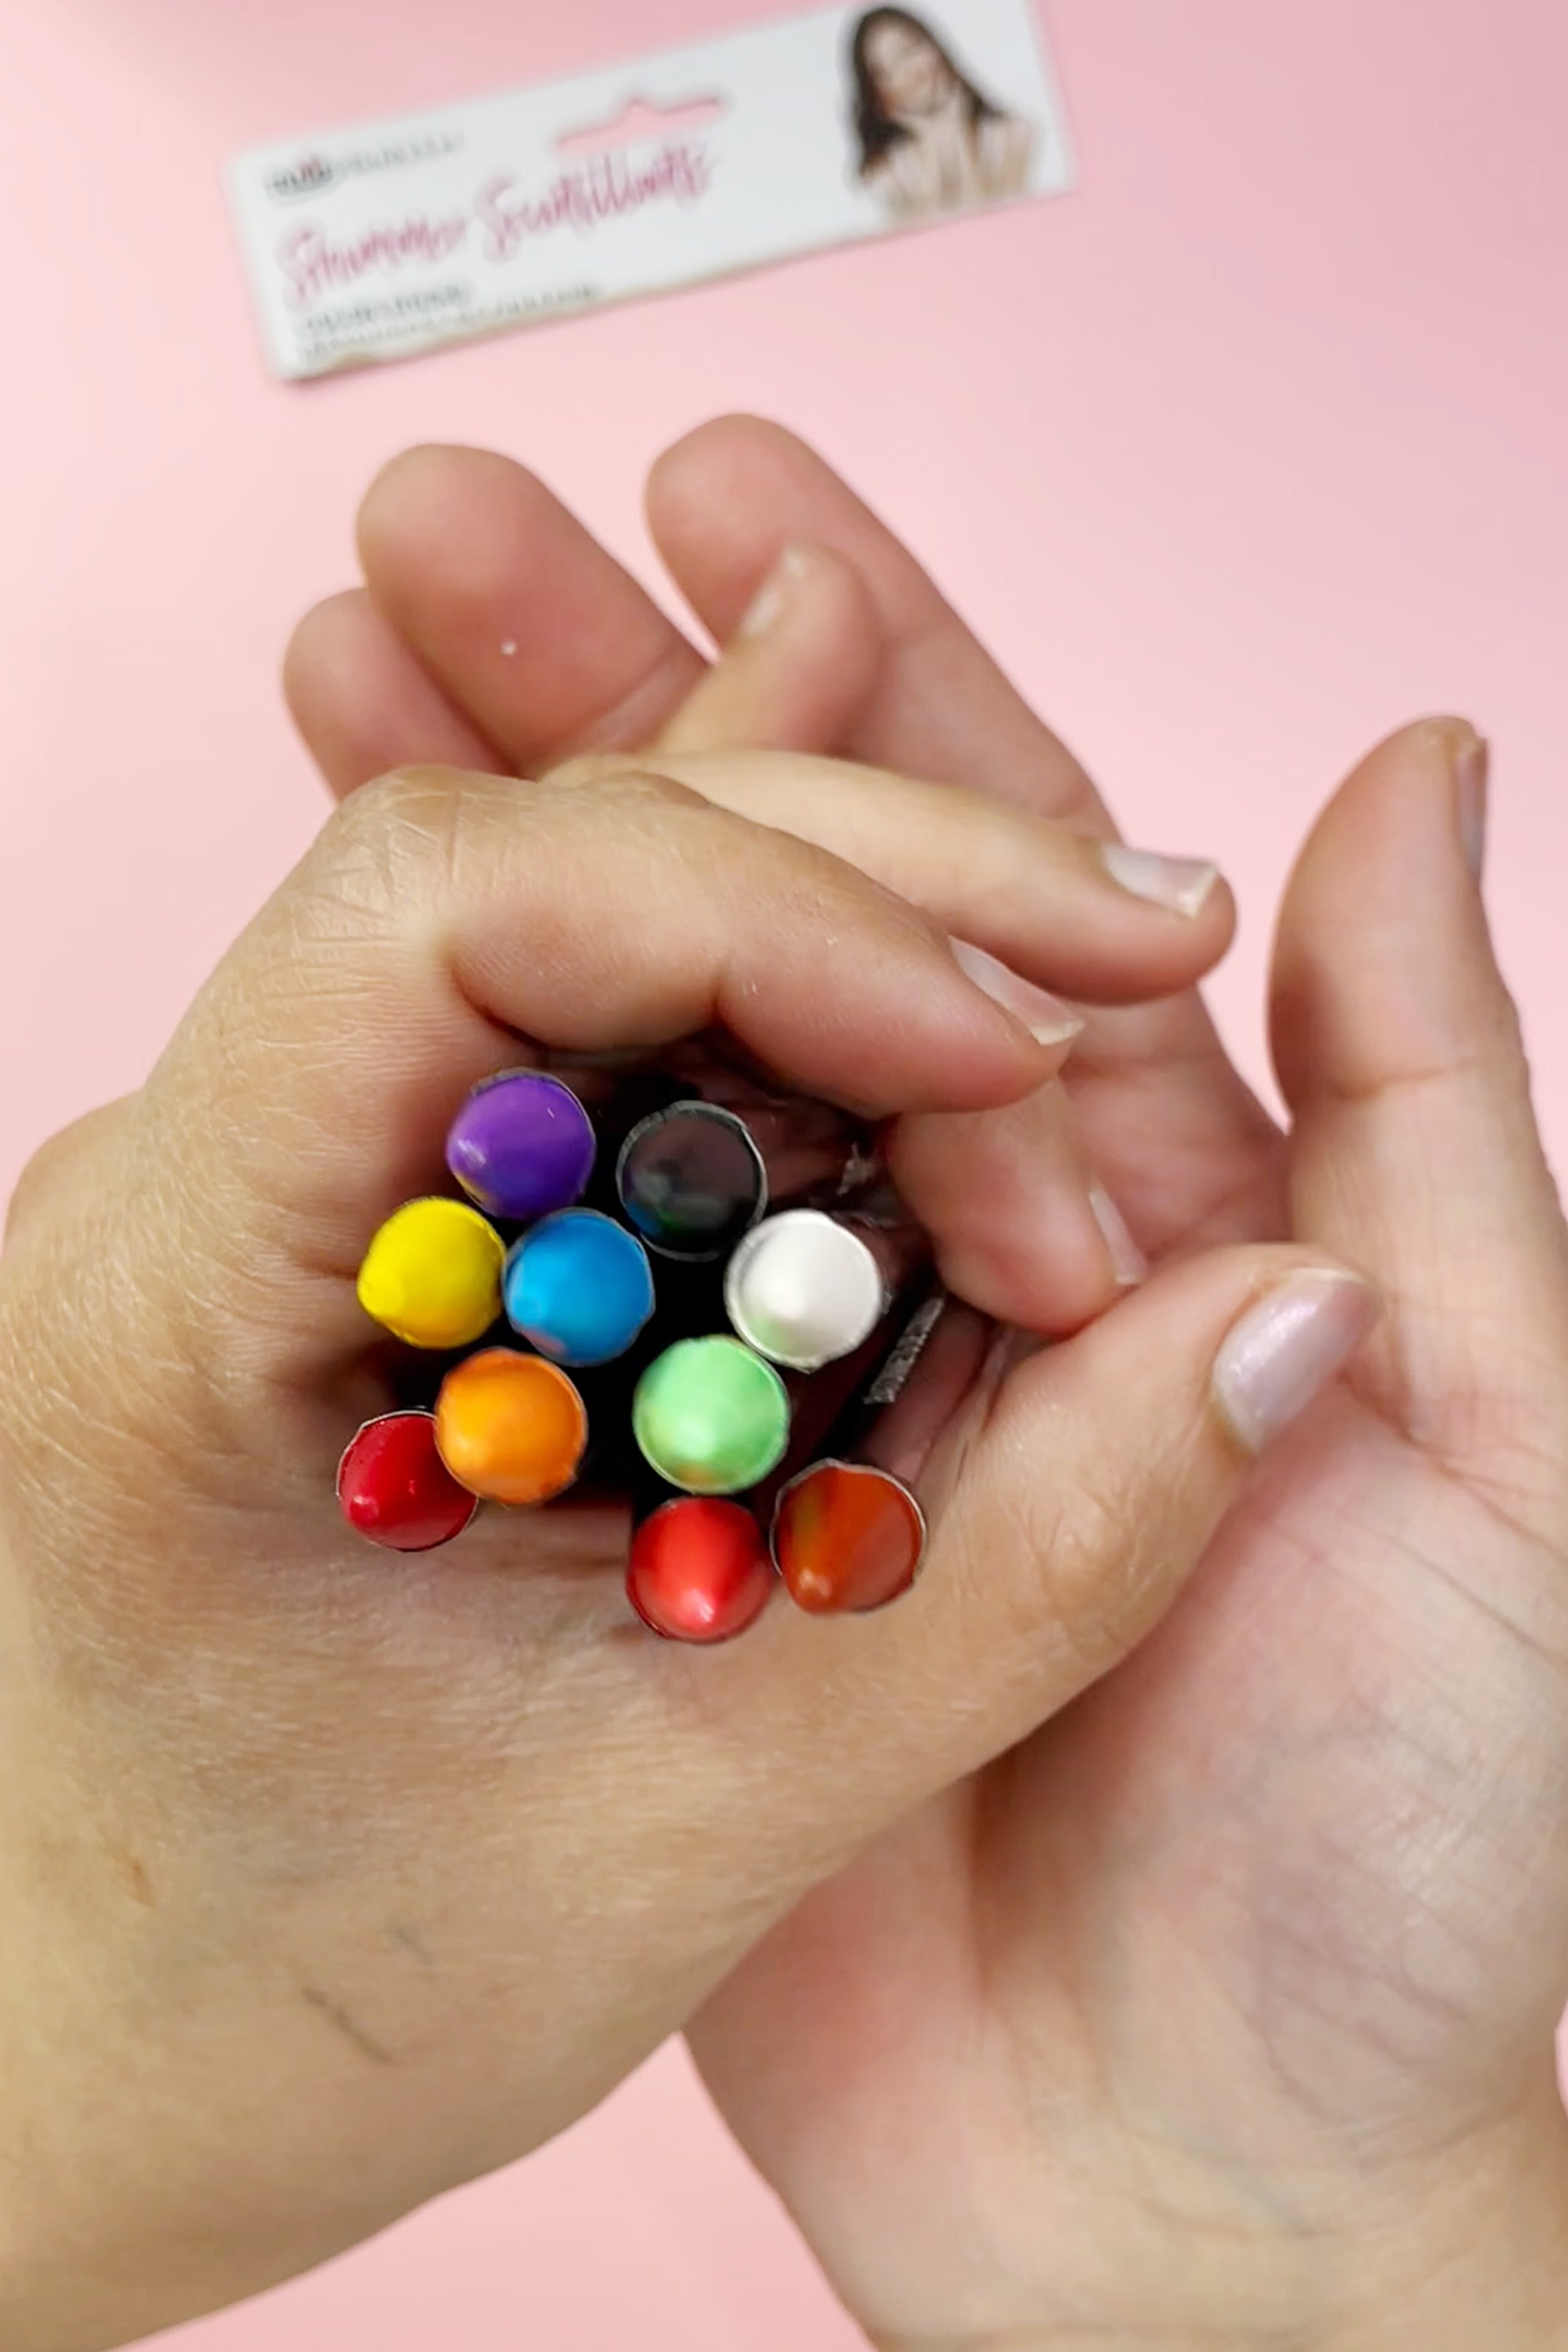
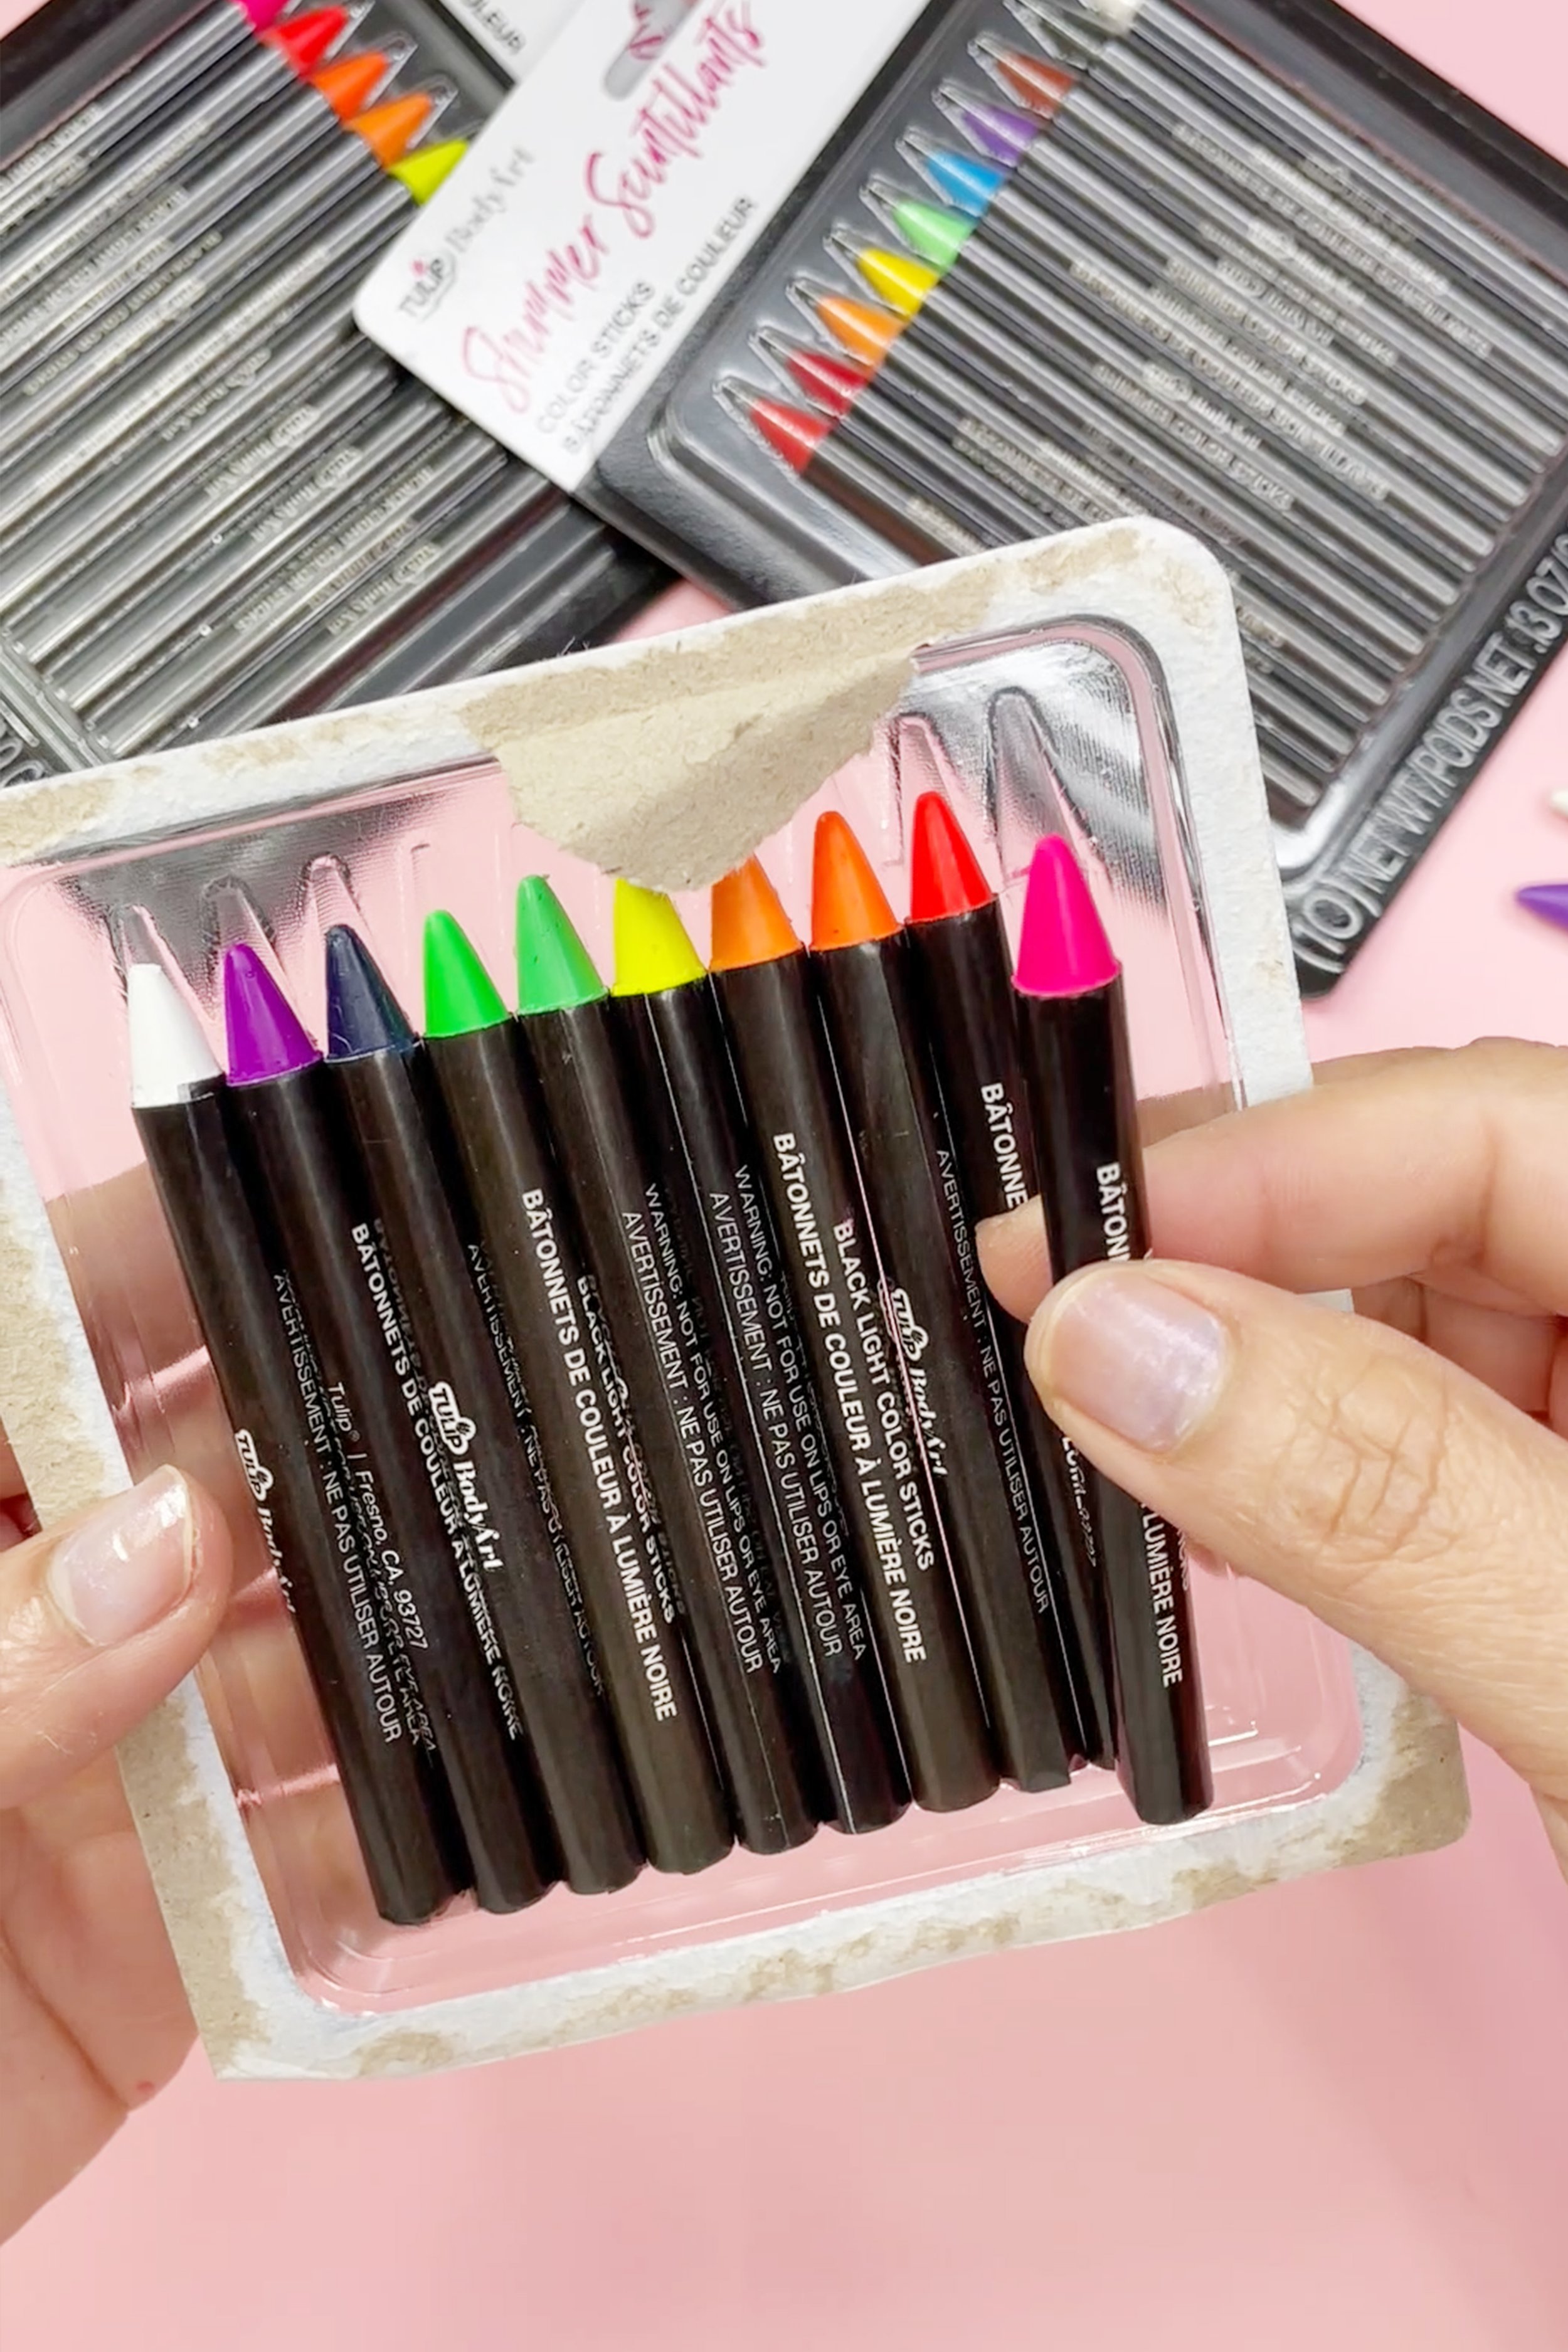
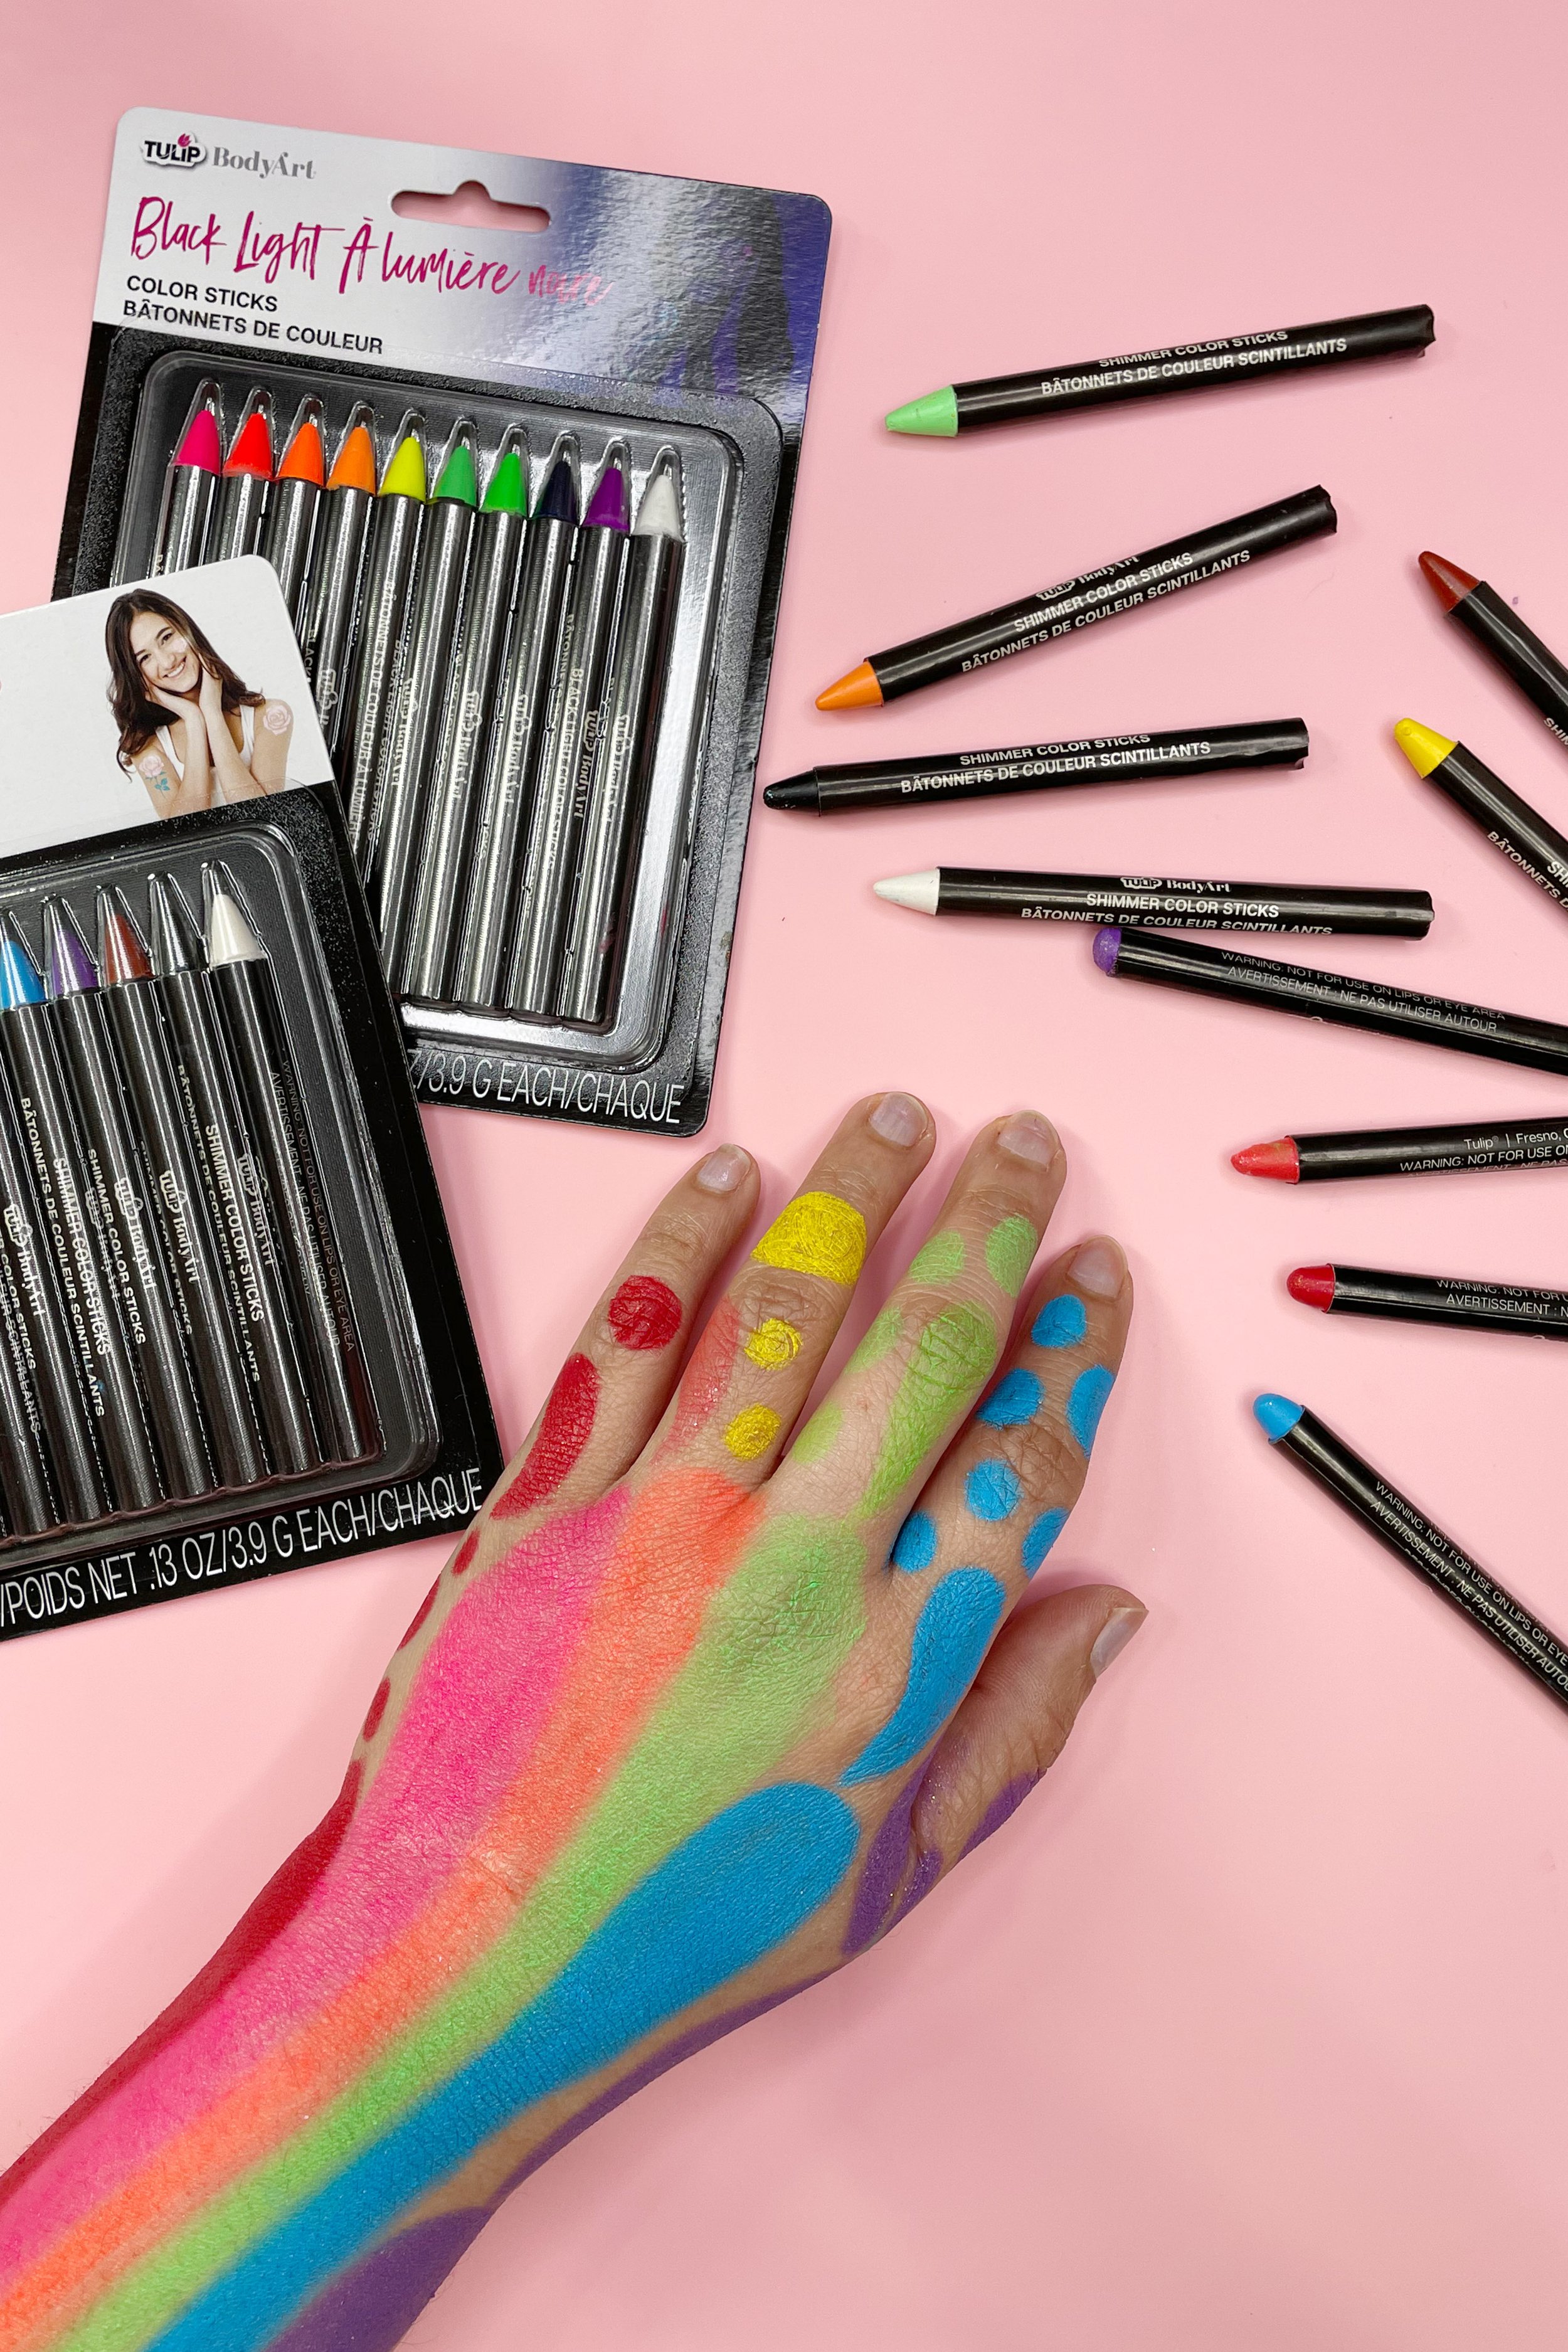
The two sets that was sent to me by TulipColors are The Shimmer and Black Light Set. I couldn’t decide which set I want to work with, so I decided to try and use both.
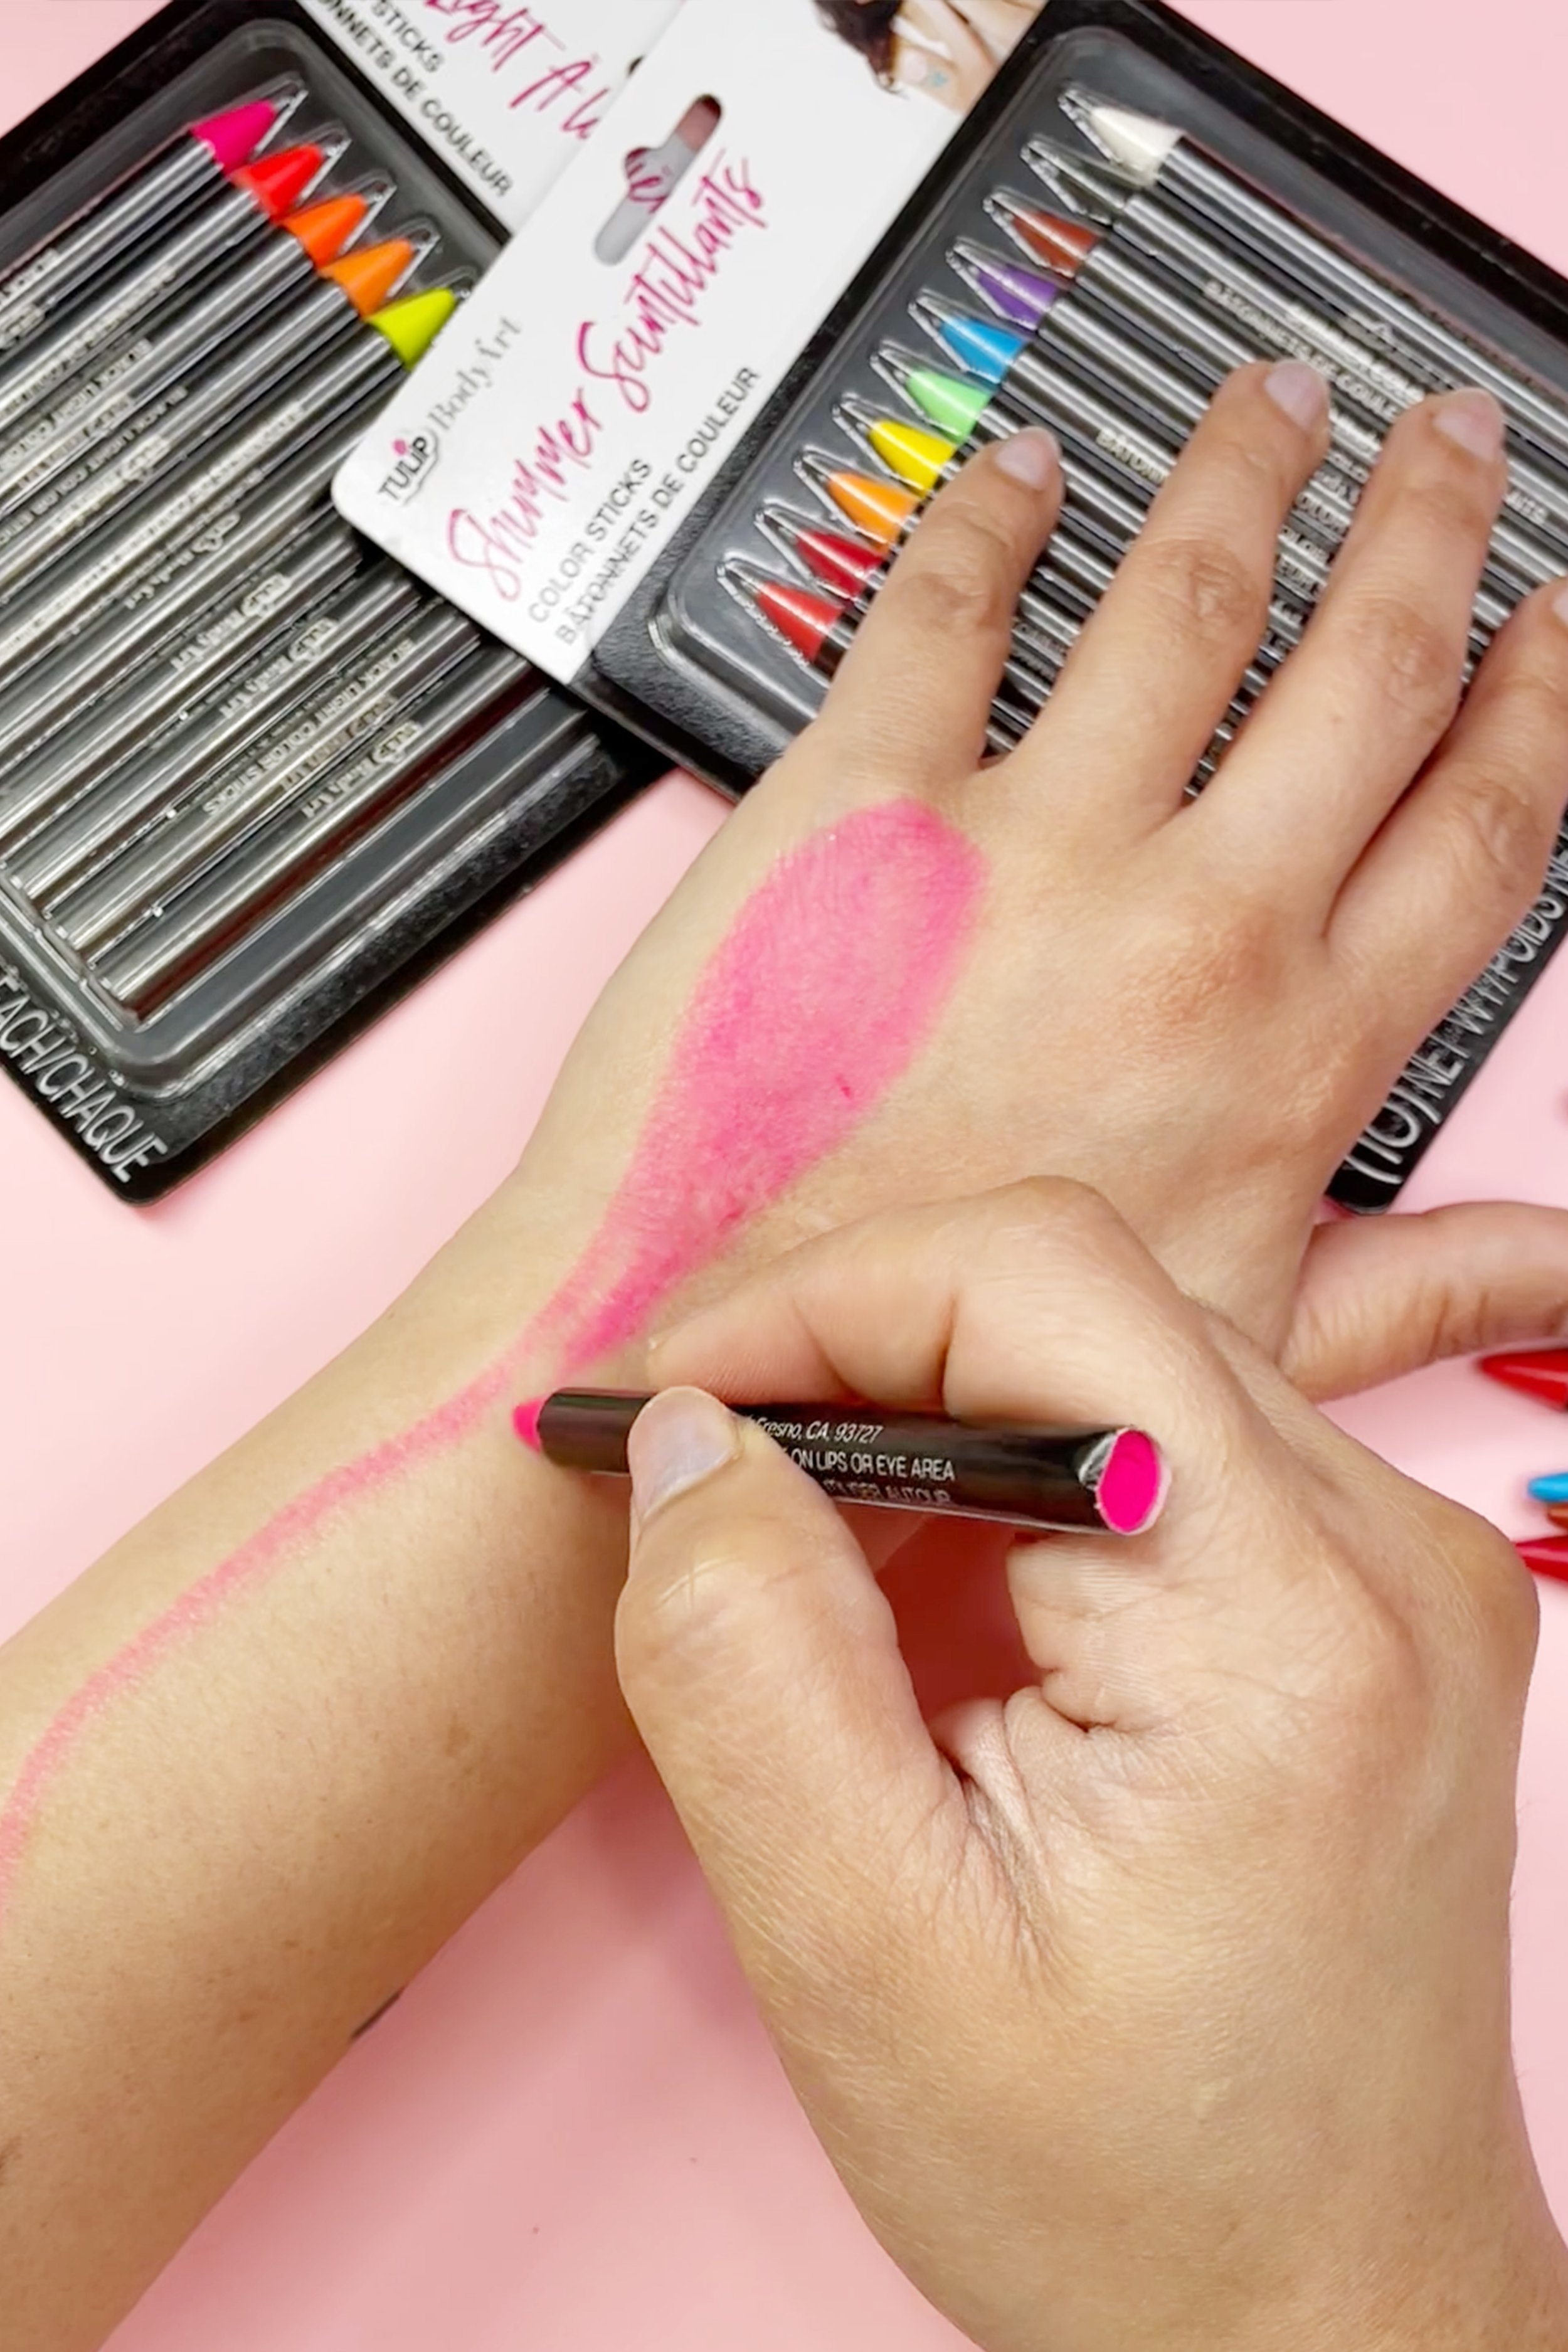
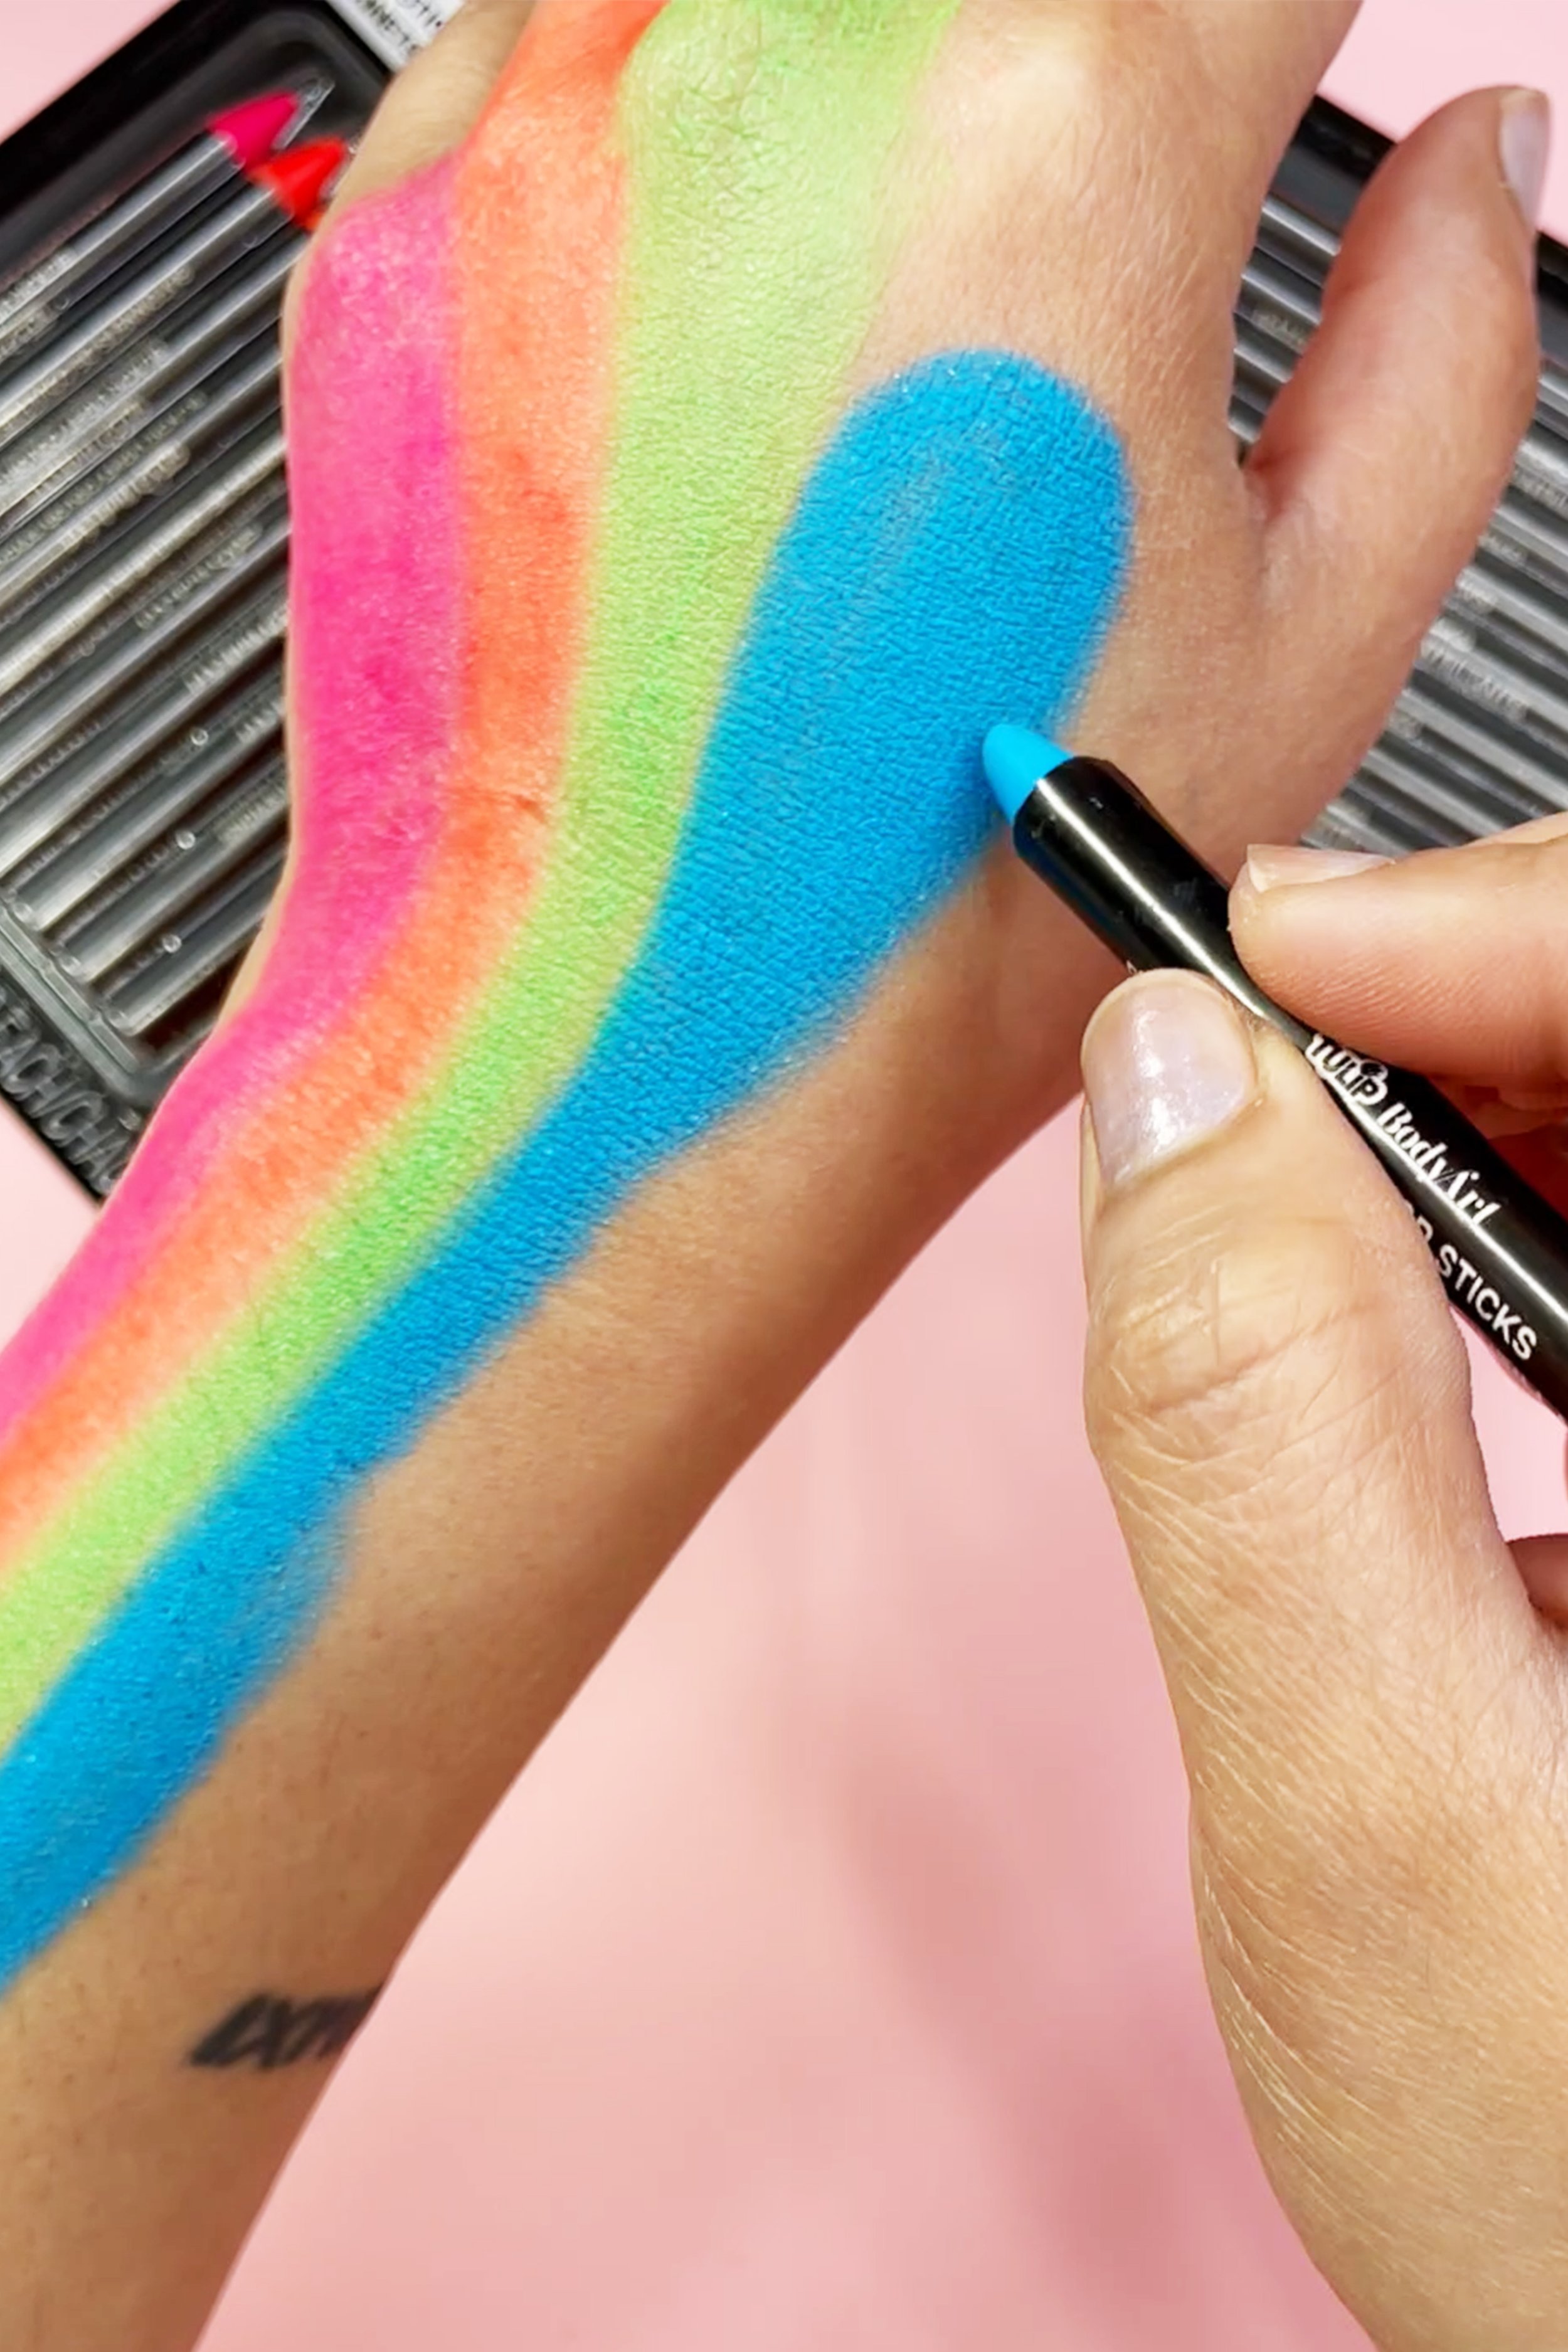
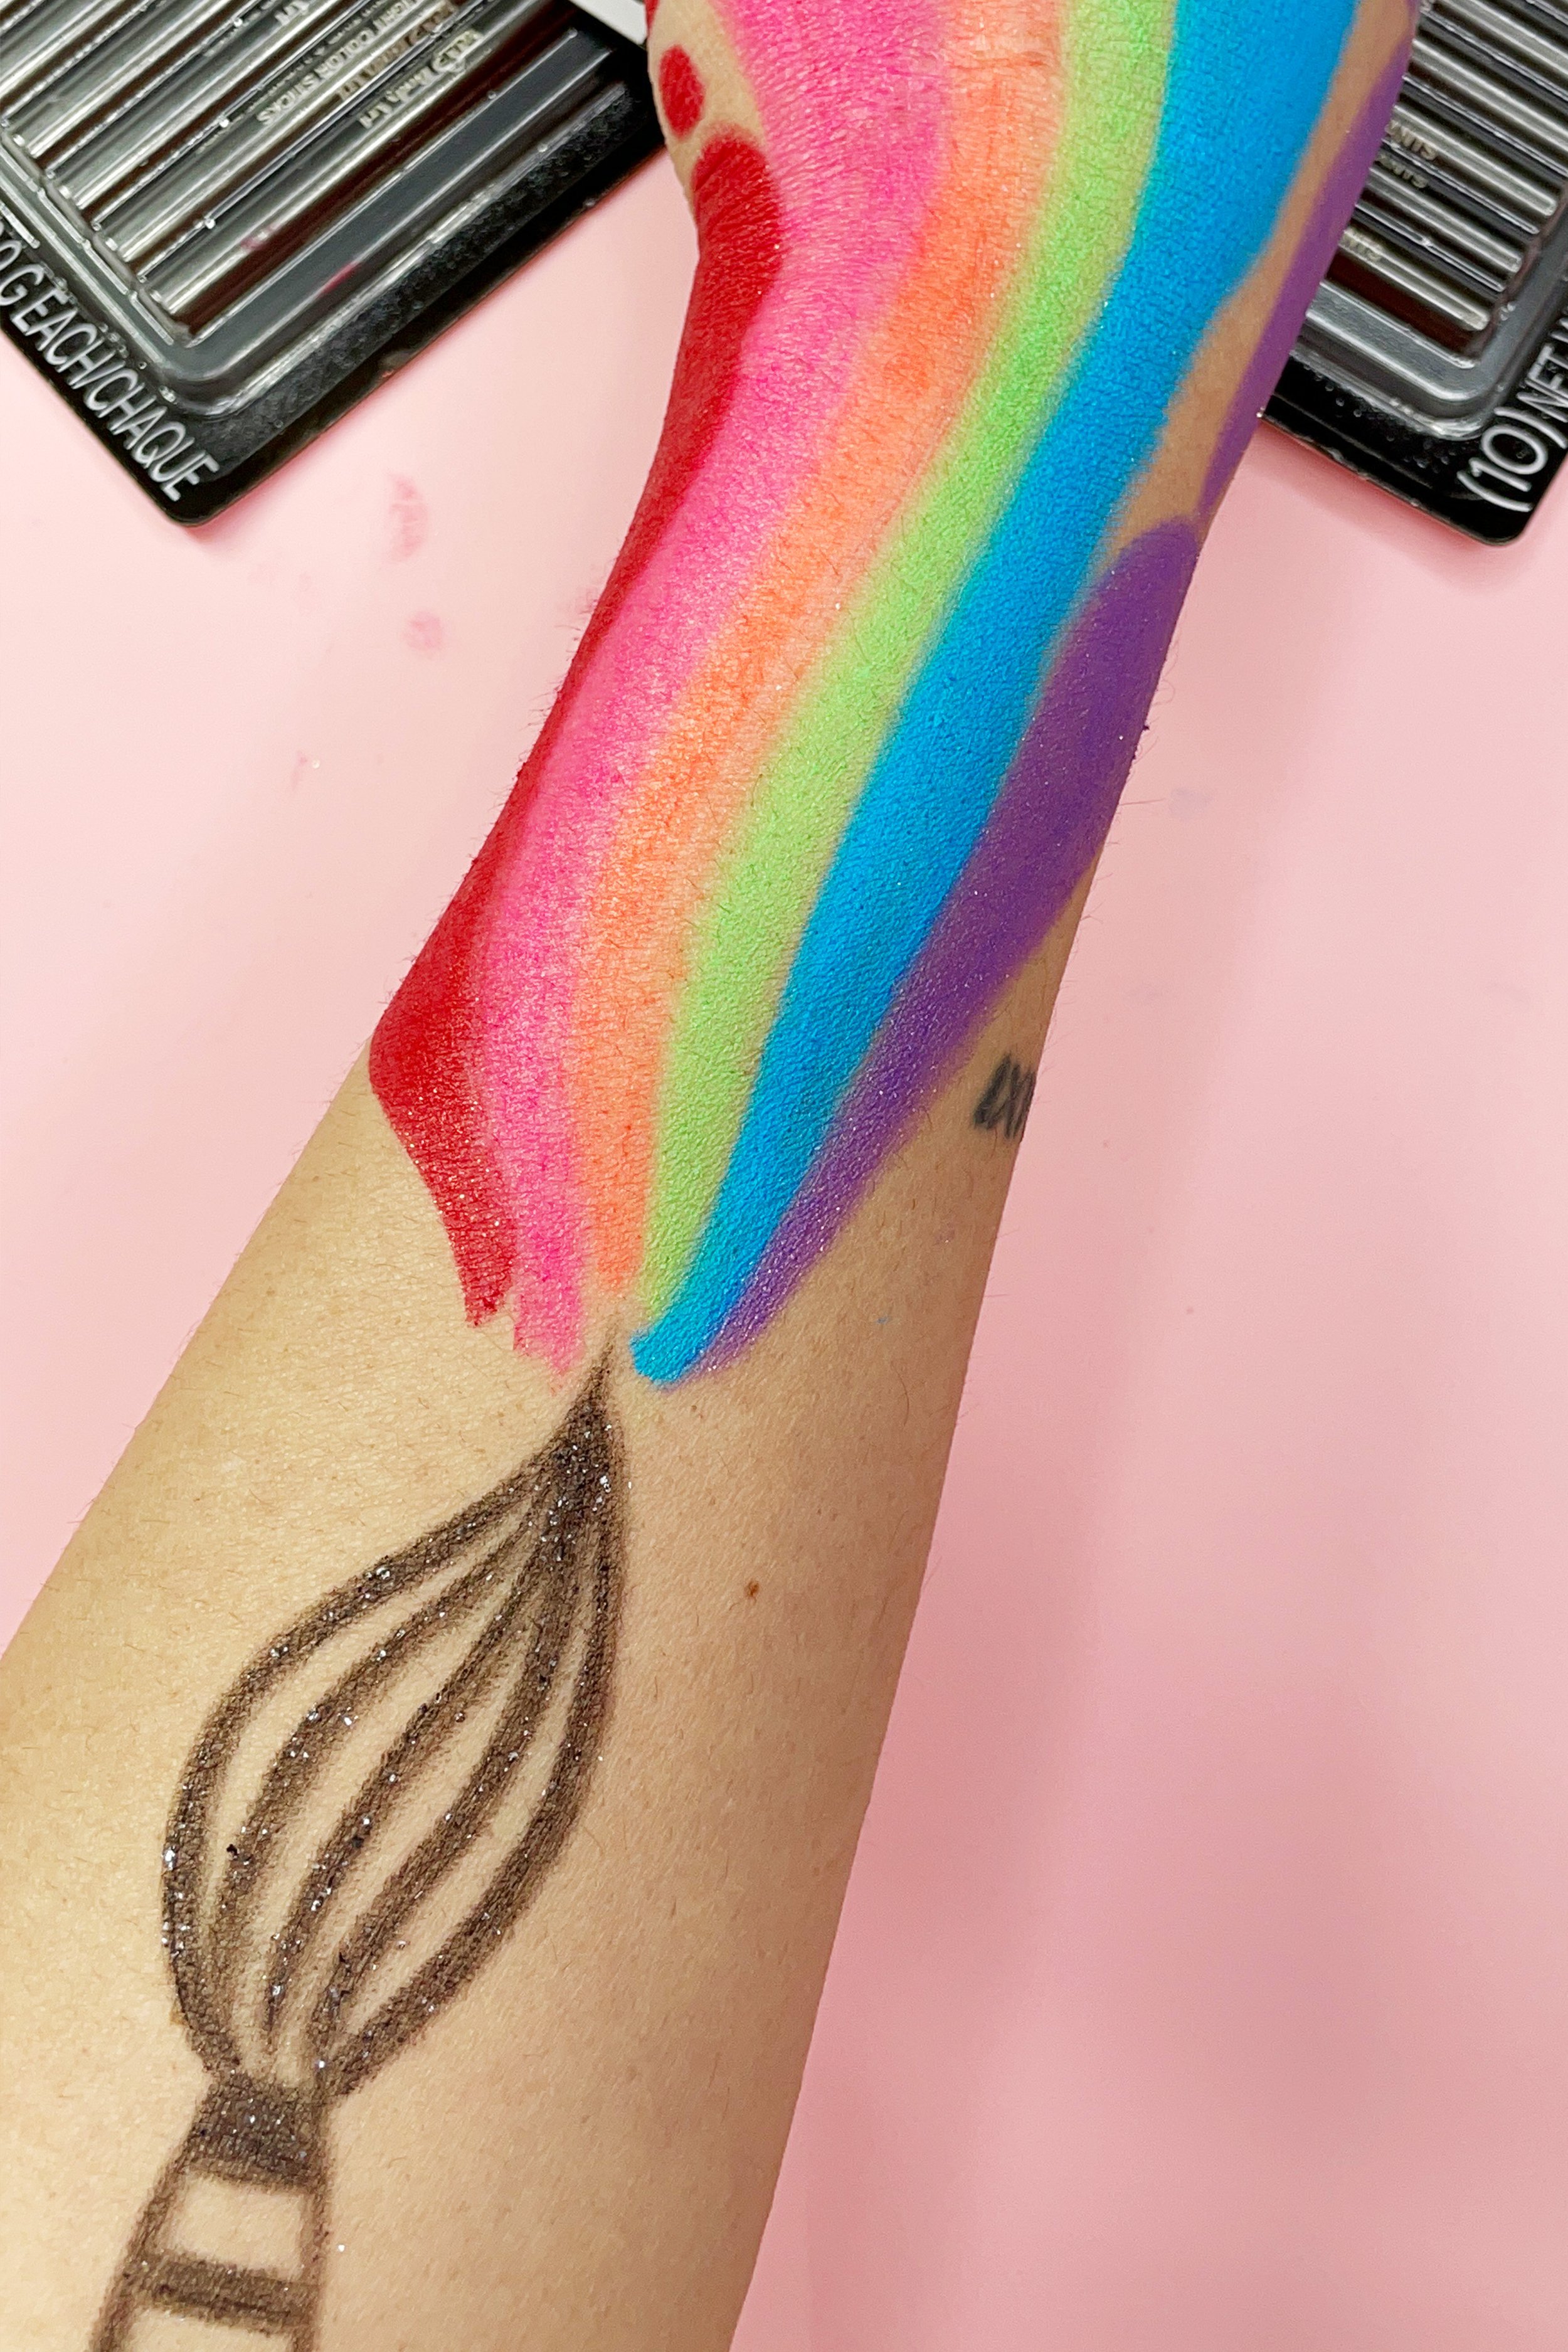
I wanted something simple but will show the quality of these sticks. I started with a doodle of a paint brush, and the idea was to create rainbow colors that will drip from the brush to the tip of my fingers. It represents Joy, and creativity. Something I love to do every day.
The black stick I used is from the shimmer set, and I absolutely love all the shine from the glitters. The bright neon pink, orange & green were all part of the Black Light Set.
I felt like the Shimmer were more opaque but then again, the black light is supposed to glow in the dark and that’s it’s main purpose. But boy there were still very vibrant. I love how these pens glide on your skin. The colors are very opaque and really vibrant. There’s also no foul smell or odor which I love.
It is also recommended that you can wait few minutes for the product to set or use talc as a setting powder to avoid long wait.
So tell me, what to do you think? Have you ever tried these before? I promise you, you’ll have lots of fun! It definitely reminded me so much of my younger years. Nostalgic for sure!
I want to thank TulipColors for sending over for me to try and share with all of you.
Let me know if you have any questions, and I will get back with you as quickly as I can.
Have a fabulous day! And as always, Stay Creative & Happy!!!
Love,
Lhey

This post was sponsored by TulipColors.Com
Free Coloring Page | Mommy Lhey Christmas Girl

Watch My Latest Unboxing | Pentel Watercolors And Markers
Hello Loves, Oh my! I was in heaven the other day. We went to Oklahoma and found “PORCH” Art Supply Store. I looooooove the store! They are like a candy store for any artist. I wish i’m rich and have lots of money I would have bought sooooooo much lol! But anyways, I was still able to purchase some goodies yay! And so I want to share my haul and swatches with you. Hope you enjoy it, if you have any question just let me know.
Stay Creative & Happy!
LHEY :)
Bullet Journaling With Cricut
Hello October!
Can you believe it? Haha! Well, You know I have to say it. But man, time is sooooooo fast.
And lookie here a new YouTube Video? Who’s this? Lol. If you may have notices, I took a long break from YouTube because, well….
It just all became too much for me. But i’m back. I had a good break, I really enjoyed some time off creating contenst and i’m learning to prioritize and working in batch. (A work in Progress)
But anyways, here’s my newest Bullet Journal spread with the help of my Brand New Cricut Explore 3 that I am absolutely obsessed with. Have you tried the brand new smart materials? I used the Smart Cardstock here, Let me know what you think.

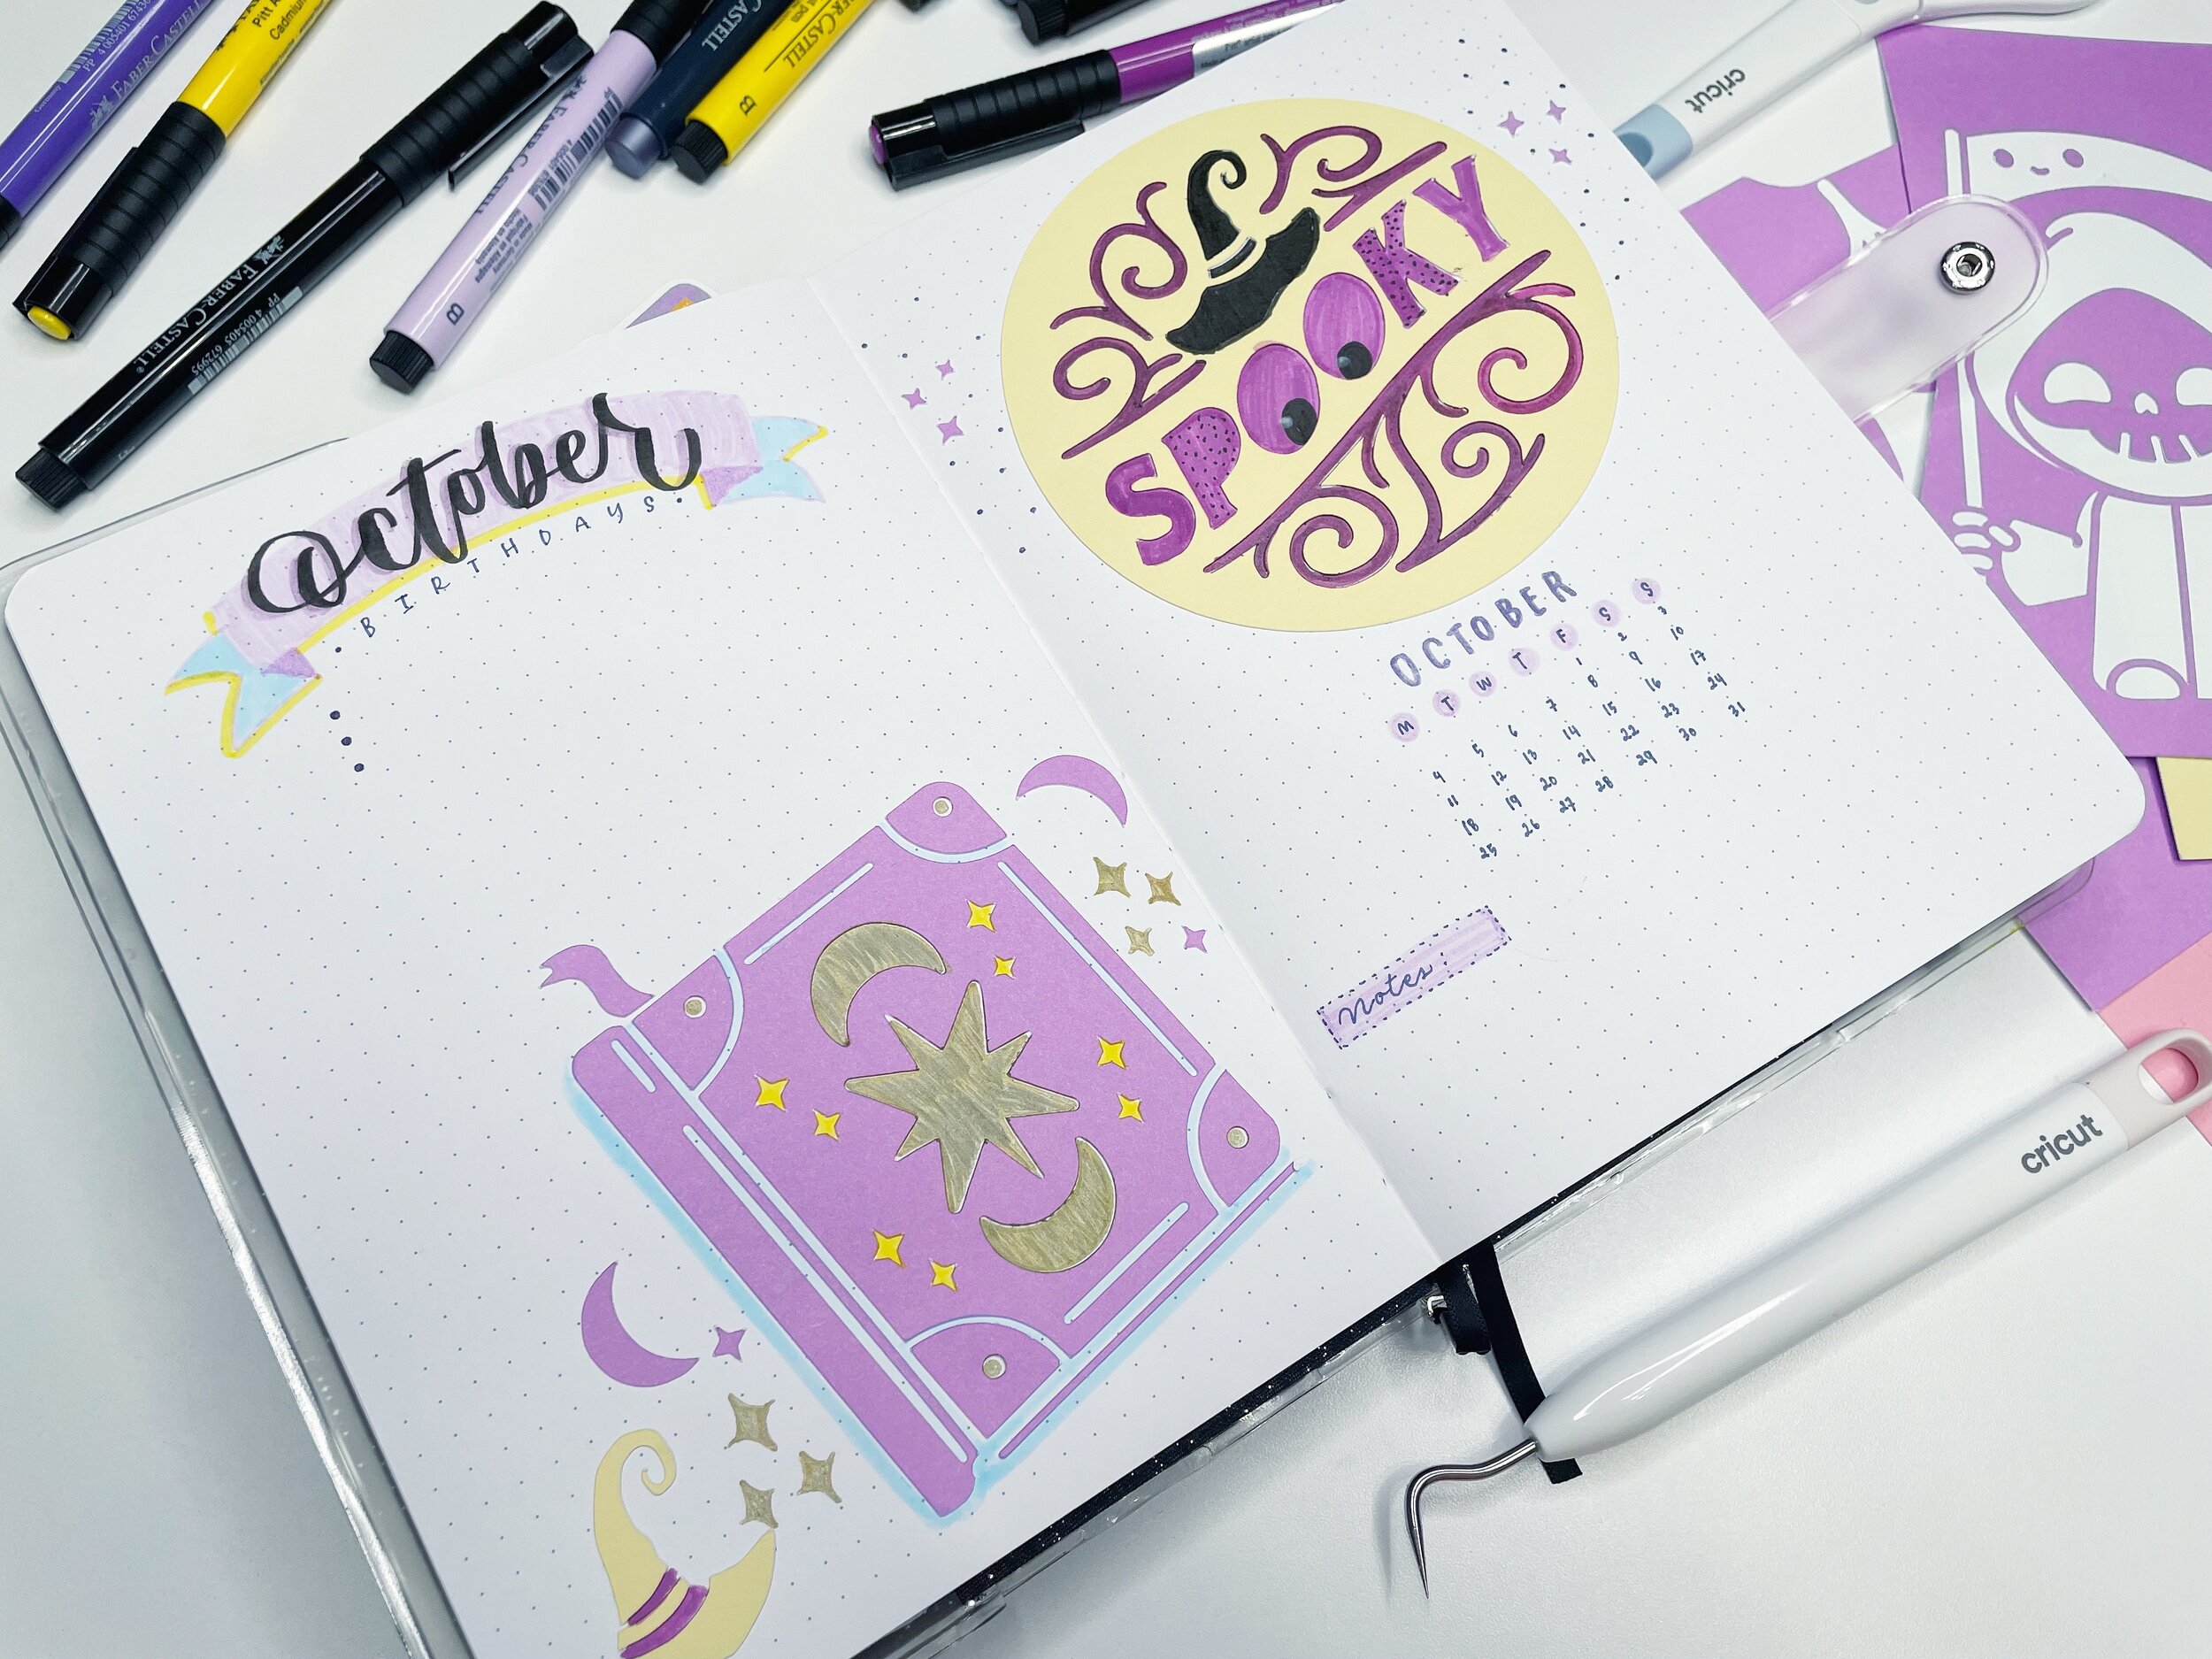
Cricut Explore Air 3


I cannot wait to start playing with the new SMART materials. I’ve had a small taste of how awesome these are when I used them with my Cricut joy! It was such a delight not to worry about mats that are not sticking well. You just load the smart materials, and get on with the cutting. T’was nice!
Here were some of my older projects I created last year! I seriously cannot wait to get started working on Halloween and Holiday projects again! And you bet I will share it with you guys!


If you have any request for future projects let me know in the comments. Or if you need any help with your cricut, ask away. I’ll try to have the answers for you to the best of my knowledge. Hehehe.

Have a wonderful week ahead my friends!
LOVE,
LHEY
This post includes affiliate links where I can earn a small commission from your purchase.
Back To School Freebie Sticker
Free Back To School Labels

Hello Loves,
Here are some Free Labels that you can use and download for your own personal use. I created these to use for my daughter’s Plastic bins that we bought from Michael’s. This Project It turned out so well. Yay!
You can watch the full video here on YouTube.
This Post May Include Affiliate Links that will allow ma to make some commissions from your purchase. Thank you in advanced. Thank you for your continued support.
Free “This Is Us” Wallpaper
Hello Loves, I wanted to share this wallpaper I made to celebrate our Presale of our newest “THIS IS US” Card Crafting kit. I hope you’ll be able to use and enjoy it. Have a blessed weekend.

THIS IS US | CARD CRAFTING KIT
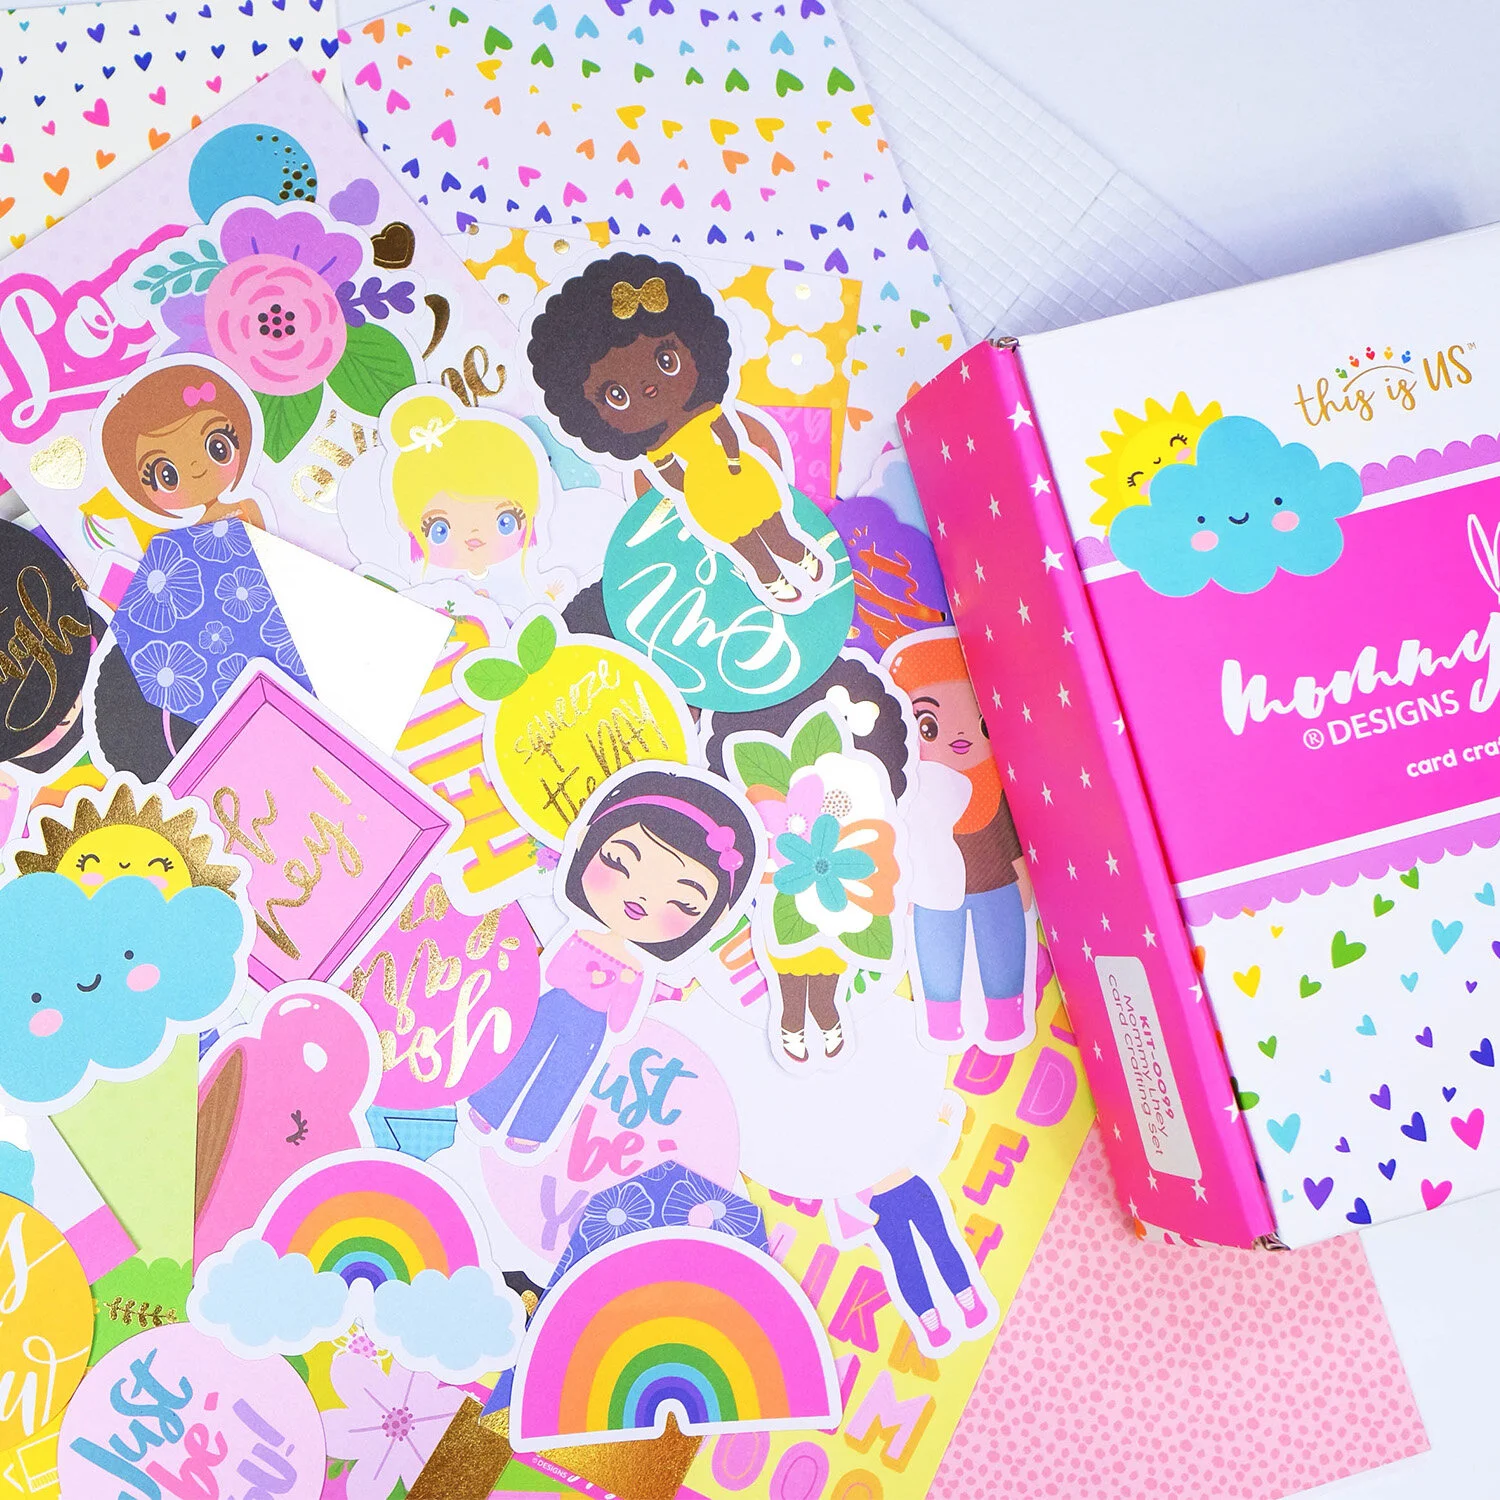
This is Us Paper House Card Crafting Kit
$38.49
Newest Collaboration with Paper House Productions.
This Kit is Full to the Brim. We only have VERY limited Inventory.
Price Kit is $29.99 + 8.50 (Flat Rate Shipping)
The Price Listing Includes US Flat Rate Priority Shipping already. Please use the Code “THISISUS” so you do not have pay more SHIPPING upon check out!
This is available to US Customers Only! We do apologize, but shipping abroad just became a lot harder with taxes and ridiculous shipping fees.
We are still NOT accepting other orders other than this Kit. If you order other items together with this box, Your order will be canceled/refunded and will not SHIP.
If you are an International Order, please know that your order will be refunded and canceled.
4X6 Stamp Set
60 Die Cuts | Ephemera
20 4X6 Post Card (2 of Each Design)
20 5X7 Base Cards (2 of Each Designs)
20 5X7 Envelopes
6 5X7 Stickers
3d Foam Sticky Dots
Mommy Lhey X Paper House Card Crafting Kit Unboxing
You can’t hear me right now but i’m screaming with excitement! Yay!
I am so proud and excited to share this new collection with you. My Brand new collaboration with Paper House; THIS IS US: Card Crafting Kit!


Everything turned out amazing! I am stoked! I hope that you’ll love this as much as I do.
I am just waiting for final details how we can accept preorders for this box. I must say with the price of International Shipping and Taxes, I might not be able to accept orders outside US & Canada.
ENJOY THE VIDEO, and please let me know what you think.
Happy Monday! | Back To School Blibber-Blubbers!
Can you believe it’s almost “Back to school” time? Raine & I are both super excited. Even though she will still be doing virtual this year, that is not going to stop us from the excitement of shopping and creating DIY projects for the next school year. She is going to 6th grade? Like what? mind blown! I still cannot believe it.
Truly time flies. Every day, her “likes & Dislikes” are constantly changing, and we are definitely entering the “tween” stage. Finding projects that will keep her entertained and away from her phone is a MUST. Kids nowadays have very short attention span, and that’s why doing things that she loves and something that she’s interested about is very important to me.
We both enjoy crafting & creating together. It’s our “bonding” moment, and I cherish it every single time.
How about you? Do you have children? What are your favorite activities and projects to do? I am on a hunt of new things to create with Raine. So any suggestion is welcome.

Tie-Dye is something we both enjoy. We create the base for our shirts or any fabric with tie dye, and then we use our cricut to add more embellishments and cuteness. This keeps us busy. We also like to make our own jewelries. I have a bunch posted in my Amazon Store for some of our favorites. Which reminds me, I really have to fix my category listing for that. (Putting it out there ya know?)
We want to try Polymer Clay and Resins next. However it is my daughter Jazzle that is so good at making cute things with clay. So we’ll have to do that with her very soon when she comes home and visit.

I also want to invite you to another fun class this week with Faber-Castell and Michael’s. Kawaii Back To School doodling class is a free Zoom event. You just have to register and you will receive the invite link from Michael’s
This is happening on August 6, 2021 @ 2pm C.S.T. Please register and let’s have a fun hour of learning and creating together. I shall see you in the classroom!!! :)
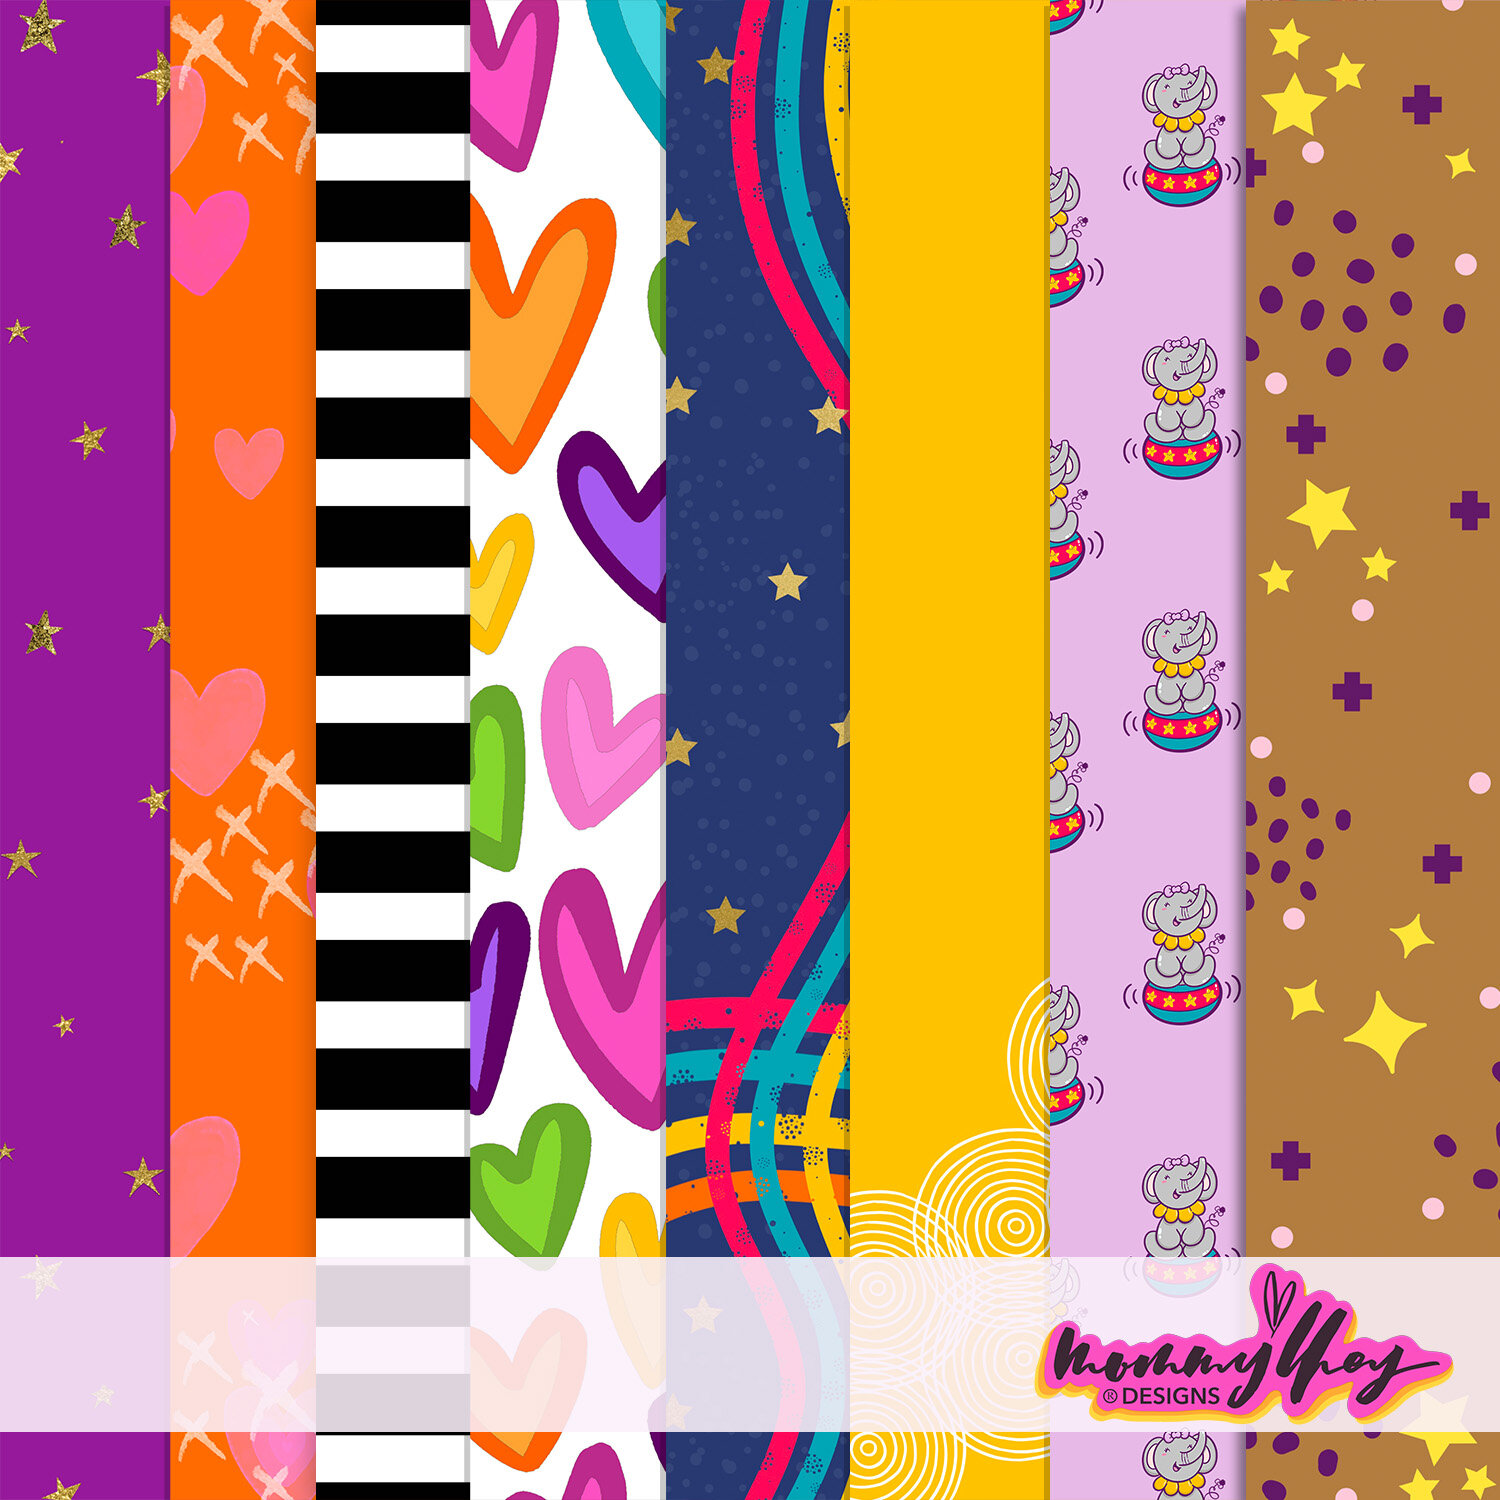
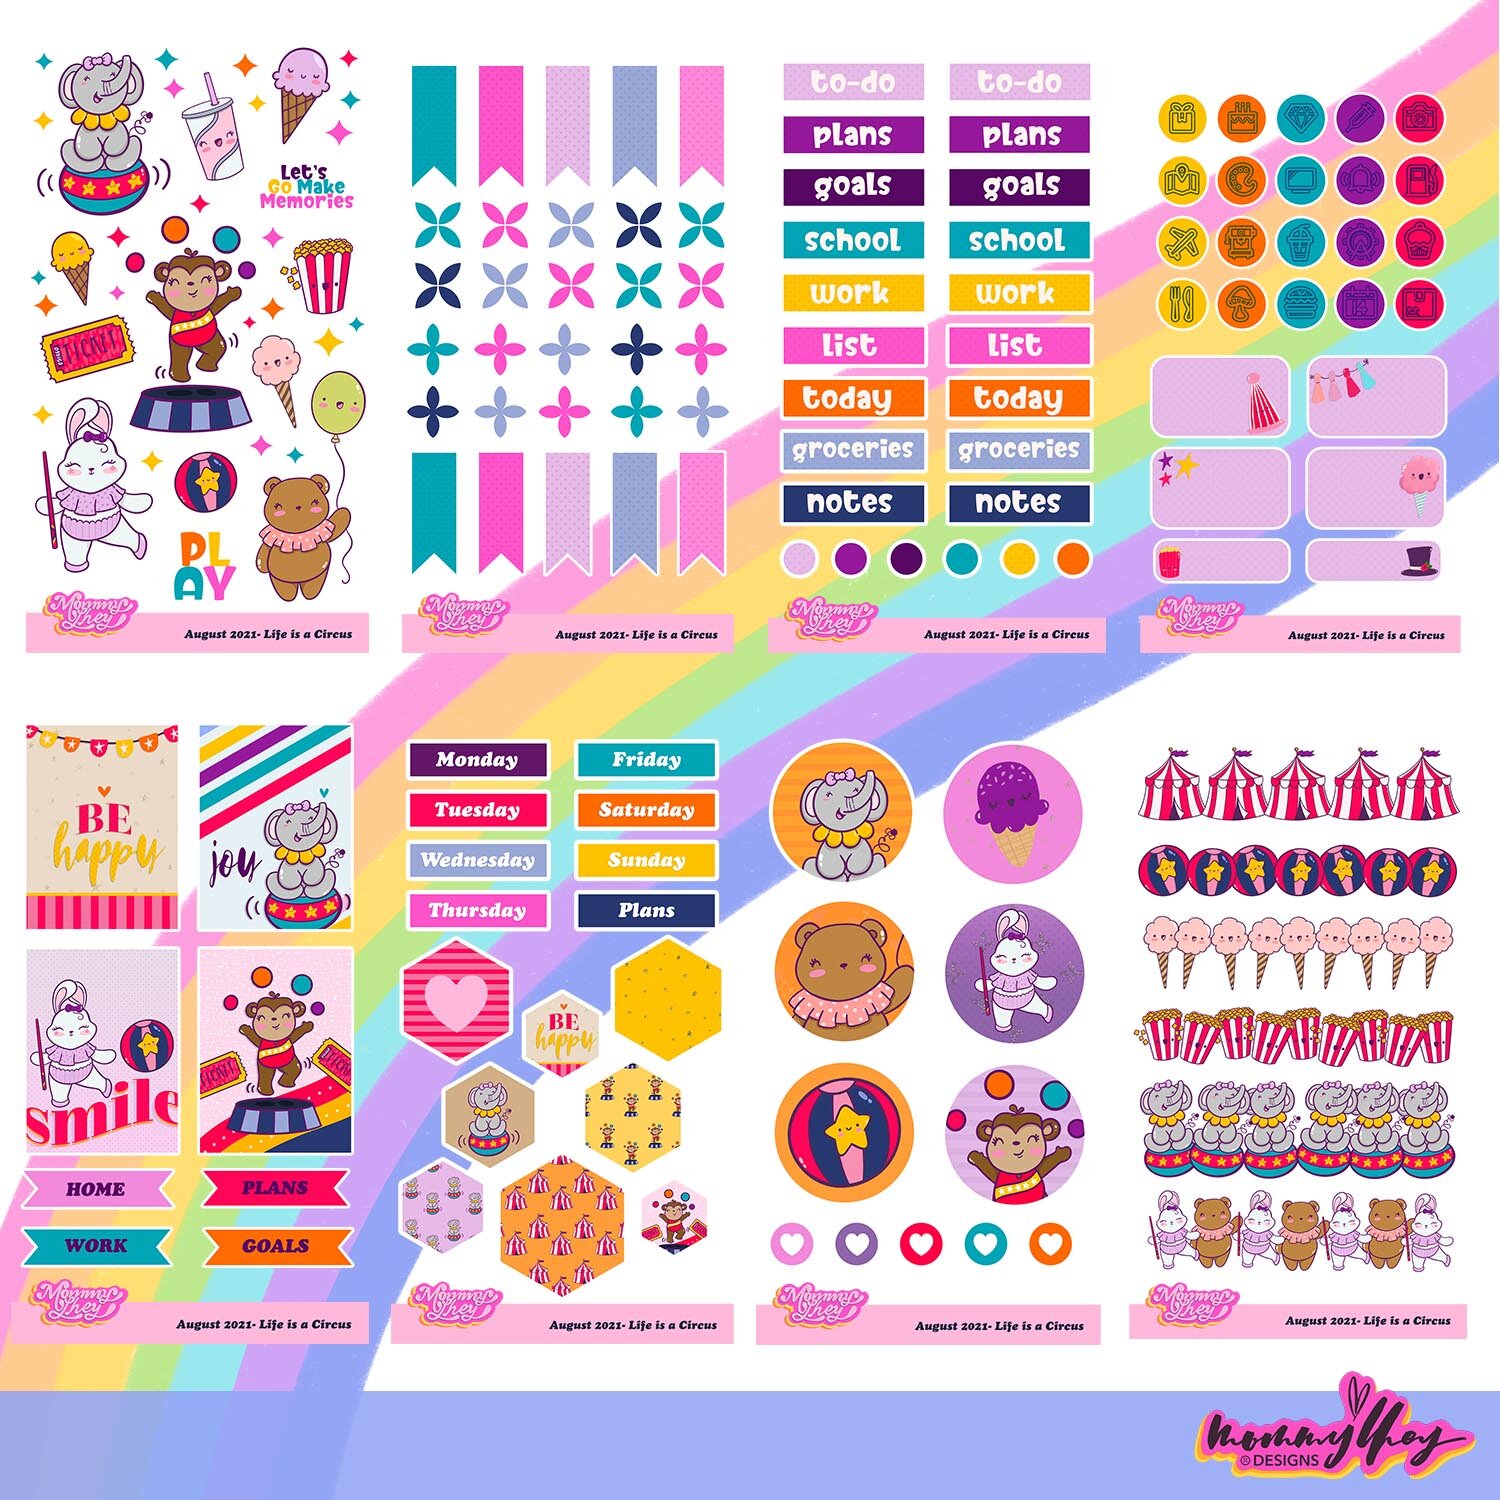
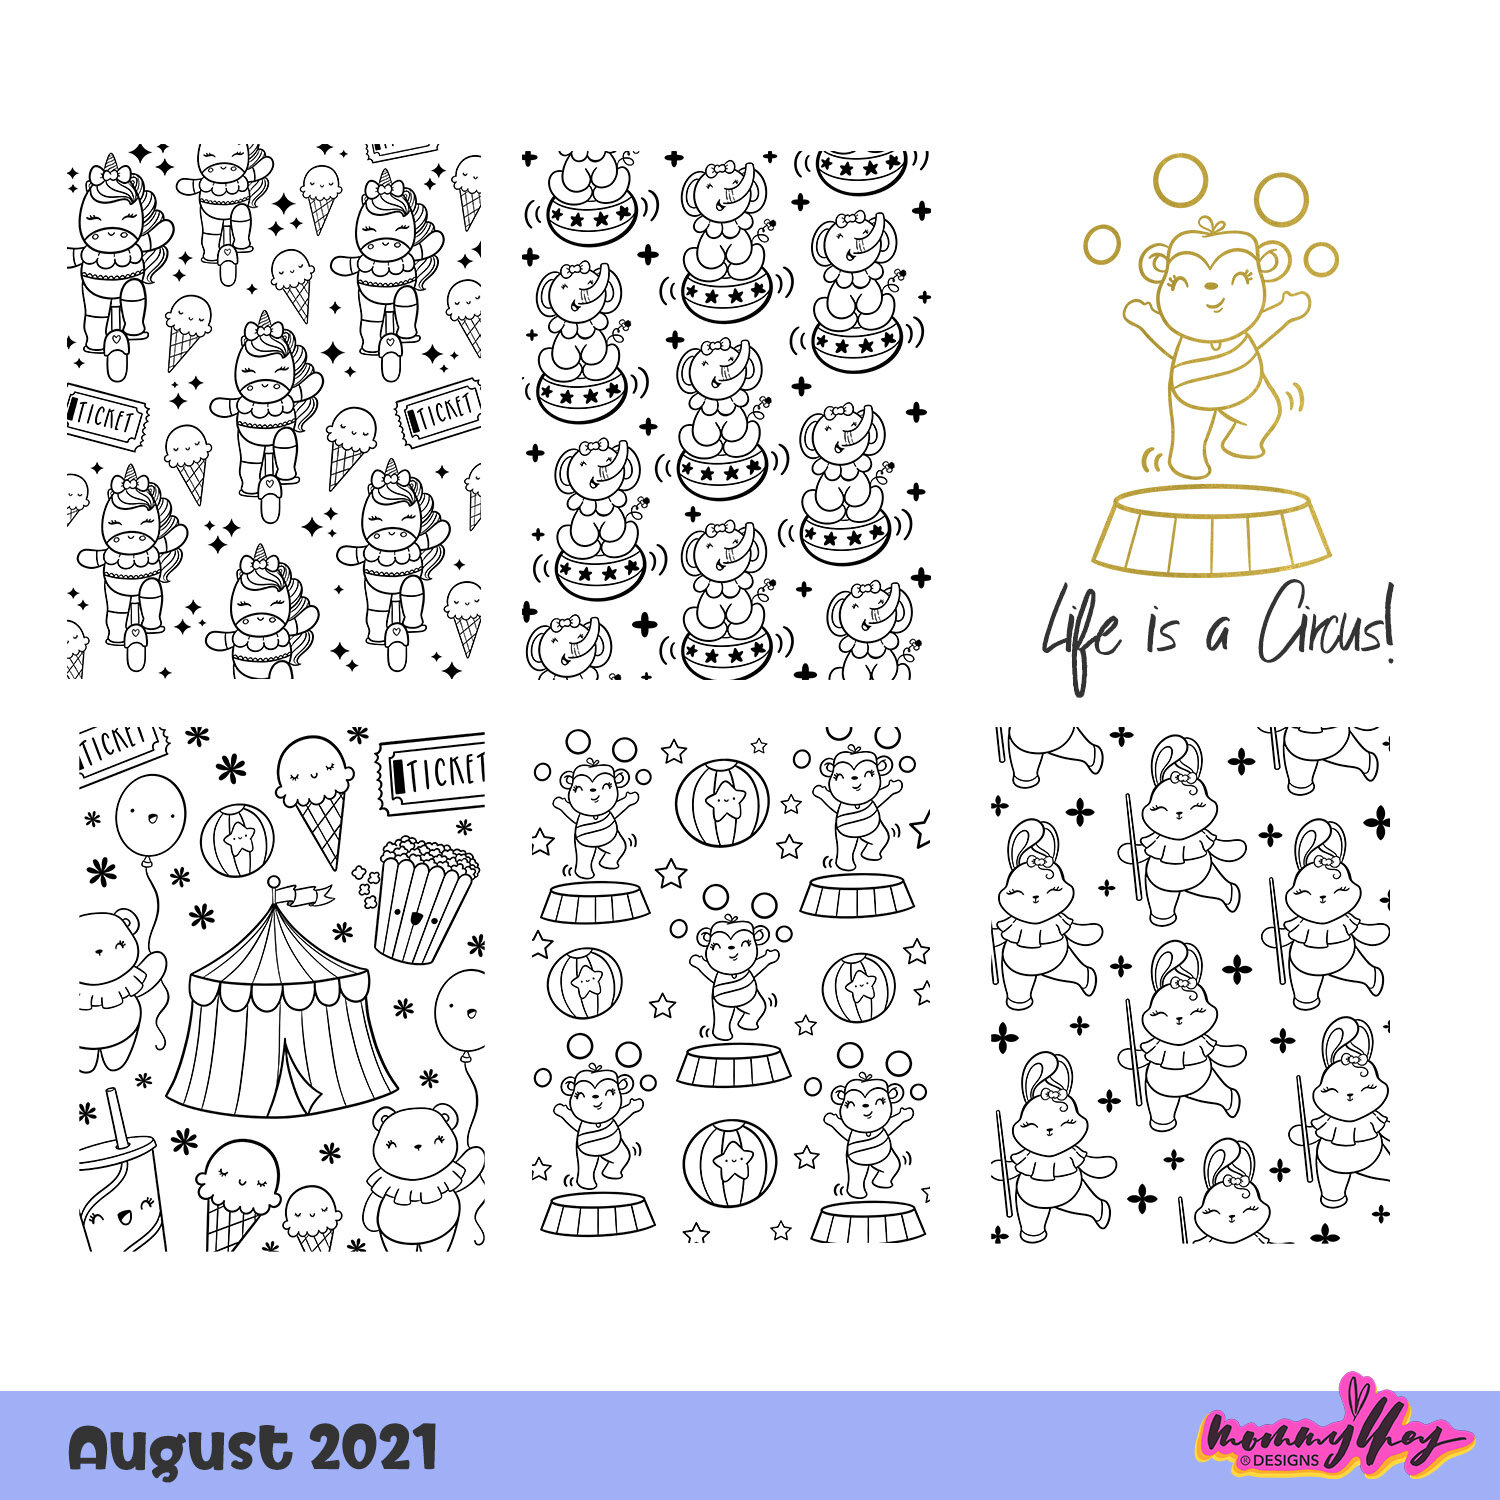
Lastly, our brand new AUGUST Print & Play is Now Available! This collection is seriously super adorable!!!! You are not gonna want to miss this! I’ve included the silhouette files, so all you gotta do is load in the Silhouette Studio and Print & Cut your stickers. If you still need help with your CRICUT or SILHOUETTE please do watch my tutorial videos. And now, that I finally have the office all set up’; I am ready to create more YouTube videos for all of you. Send me a project request so I can add it to my line up, okay?
Have a blessed week everyone!!! Please be well, stay well & take care of yourselves!
LOVE,
LHEY
Disclaimer: This post includes Affiliate links: I will receive a small incentive from your purchase. Thank you.
Tombow Free Doodling Workshop with Mommy Lhey

Guys! I am super excited to share this amazing news with all of you. Couple of months ago, I worked on a very thorough doodling workshop for Tombow USA. And it’s now available to watch today!!!! Yay!
Please be aware that this is going to be a long class, because I really worked on every details that you’ll need to get started with doodling. Get your favorite drink and let me walk you through the basic shapes from simple exercises to get your brain and hand coordination and will do a step by step final piece of illustration.


Tombow is also having a sale for today only! Save 20% off the class materials. Use the code: “doodle” and stock up on your fudenosuke pens and ABT Pro’s.

I am super excited for you to take this class. My hope is to inspire you to create and have fun with creating art daily. Please let me know if you have any questions. You can email me at hello@iammommylhey.com or Follow me and connect with me on Instagram. Please tag us @tombowusa and @mommylhey with your class practice sheets and progress. We’d love to see what you created!

Crafty Storage Solution
Free Animal Crossing Fruits Sticker
Hello Loves,
This one goes to all my animal crossing lovers. I was playing the other day and practicing adding shadows and highlights with my digital paintings. And I just wanna share all these cute images I created. Even if you don’t play the Animal Crossing game you can still use these free stickers and it will still look so cute in your planners and Journals. I created this as a transparent file you may use it for both cricut, silhouette, or brother machines. I hope you’ll like this. Share it, PIN it, so that a lot of people can download and enjoy!
Please do take care! Stay Creative & Stay Happy!

FOR PERSONAL USE ONLY!
